How to connect your domain to Blogger
Want to connect your Porkbun domain to your Blogger account? No problem! Our Quick DNS Config tool makes it easy.
The first thing you'll need to do is add your domain in Blogger. Check out Google's guide for more information on how to connect your domain and find the "Security CNAME" record that you'll need. After adding the domain to Blogger, read on!
1
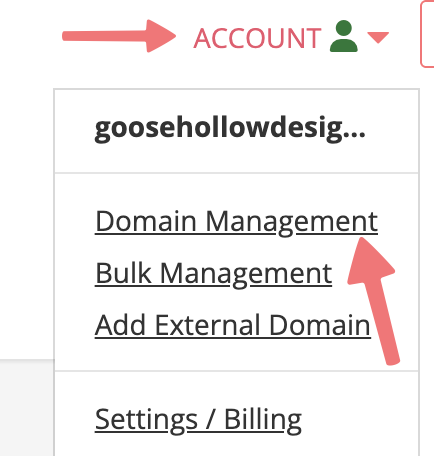
Log in. You should arrive at the Domain Management screen. If you already logged in, click on ACCOUNT in the top-right corner, then select Domain Management.
2
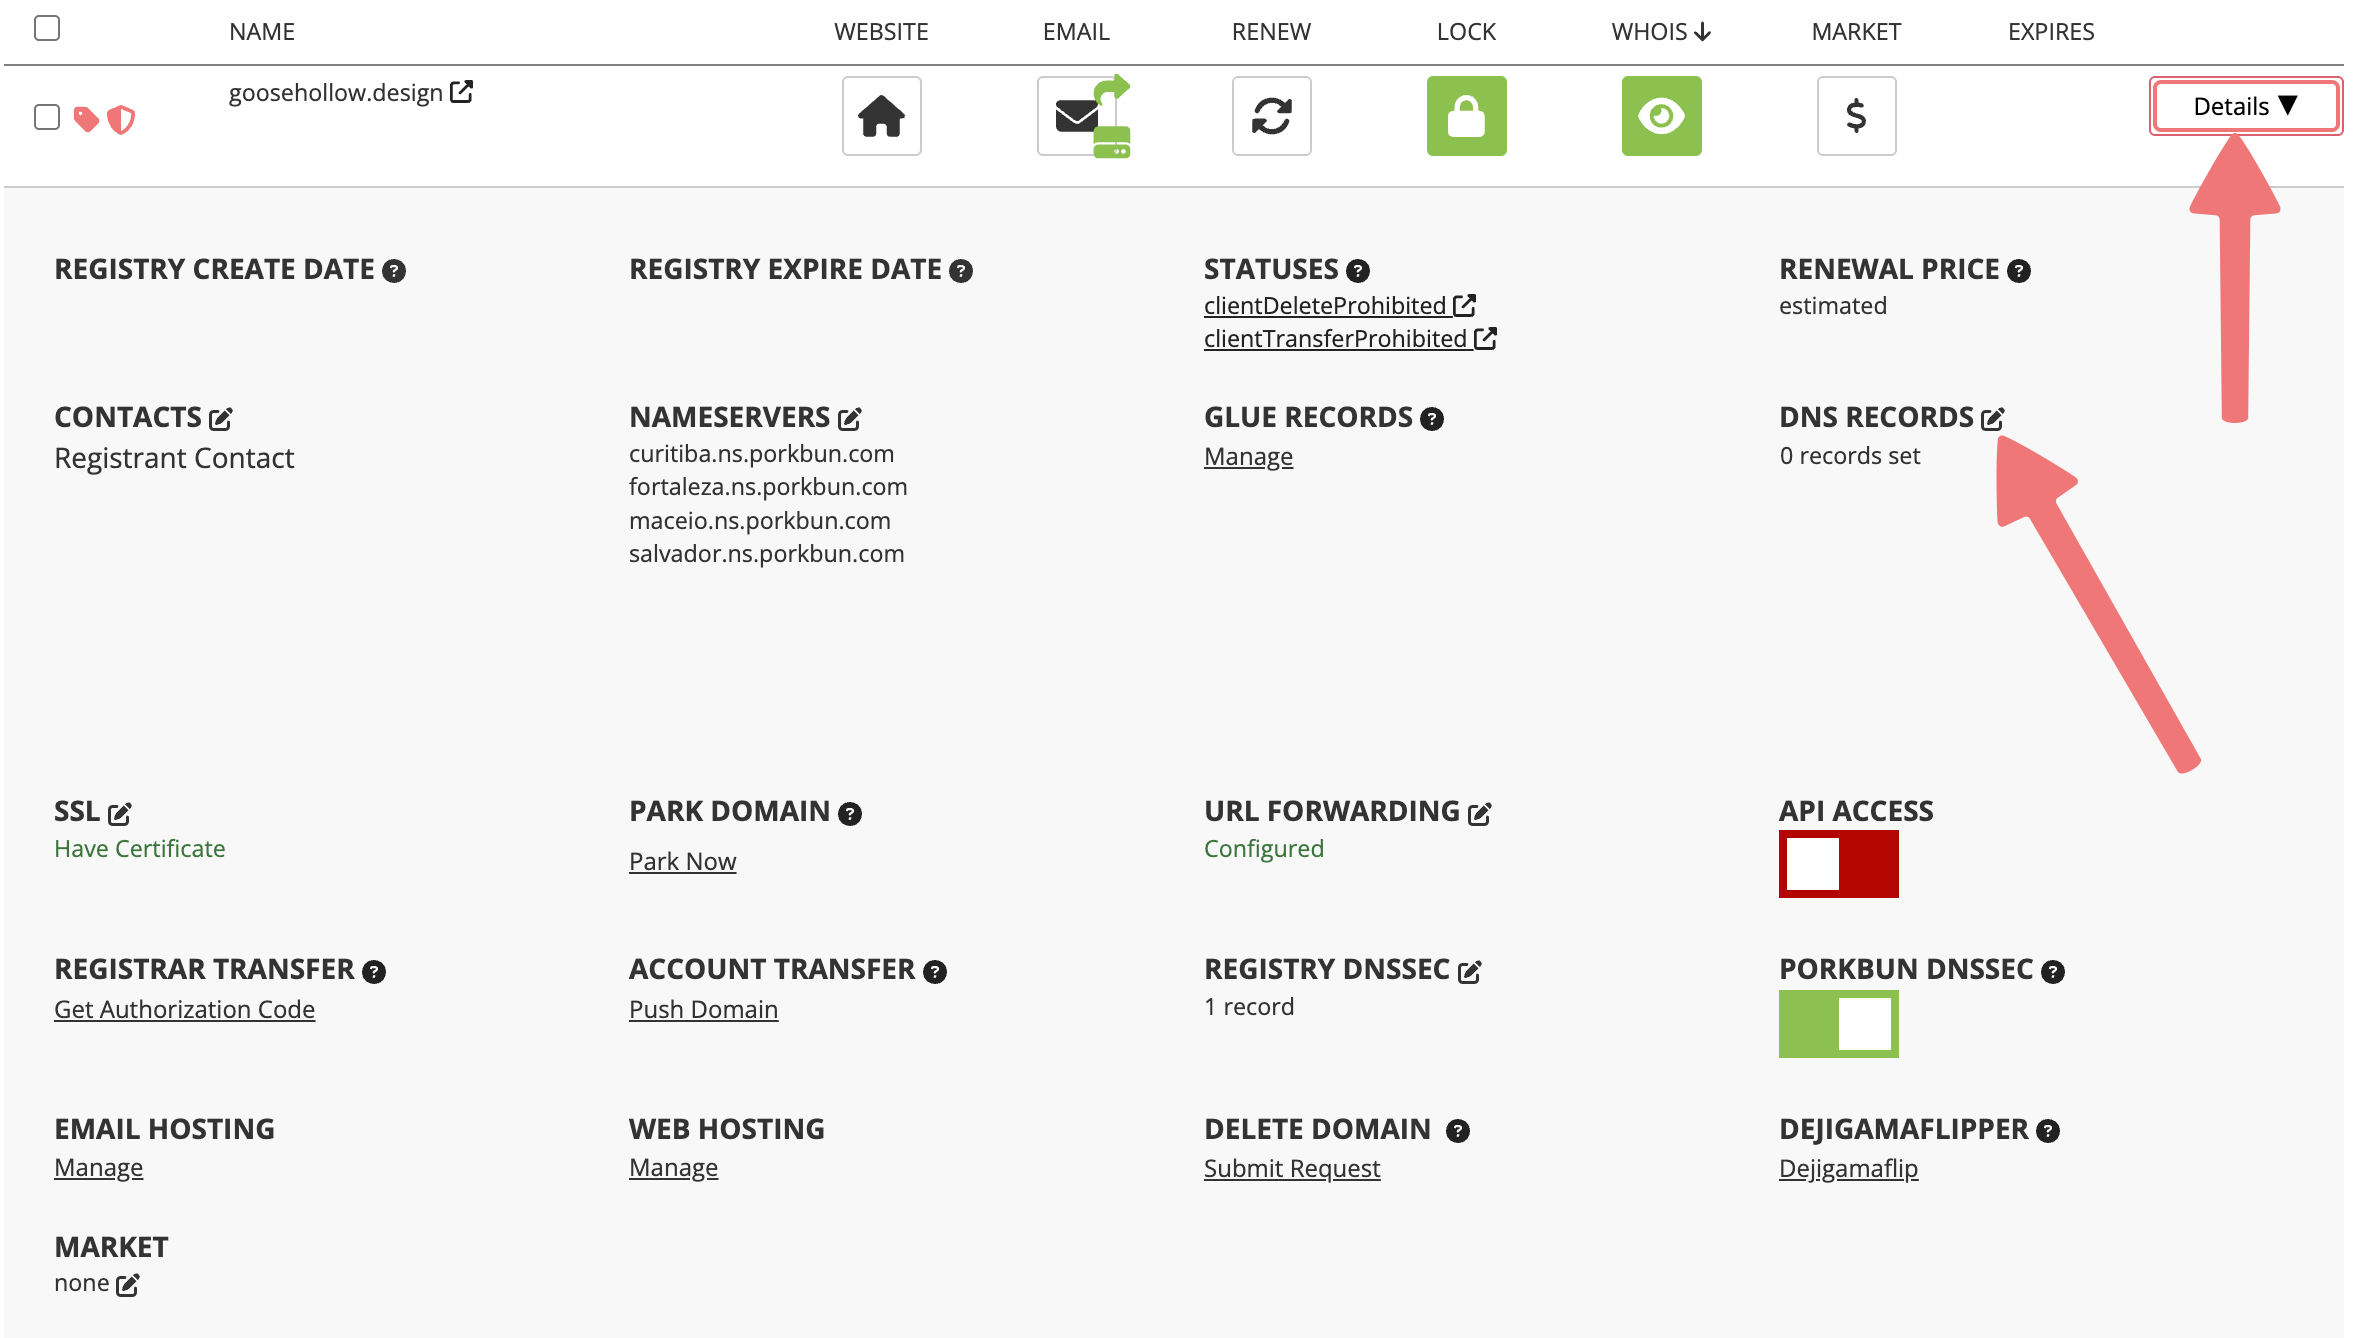
Locate the domain you're connecting to Blogger. All the way to the right of the domain name, click on the "Details" button. In the details menu that opens up, find the "DNS Records" option and click on the edit icon.
3
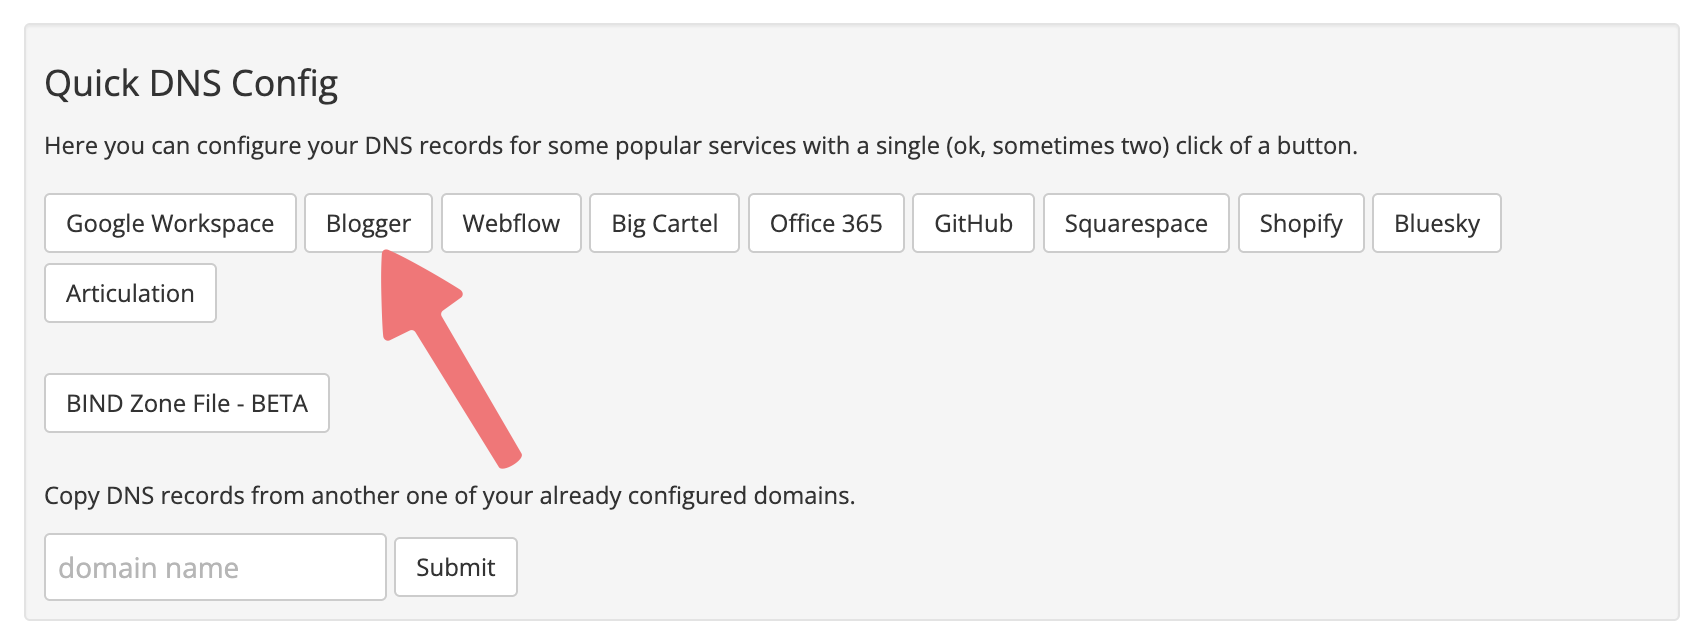
The "Manage DNS Records" menu will appear. Scroll down until you see the "Quick DNS Config" section. Click on the "Blogger" button.
4
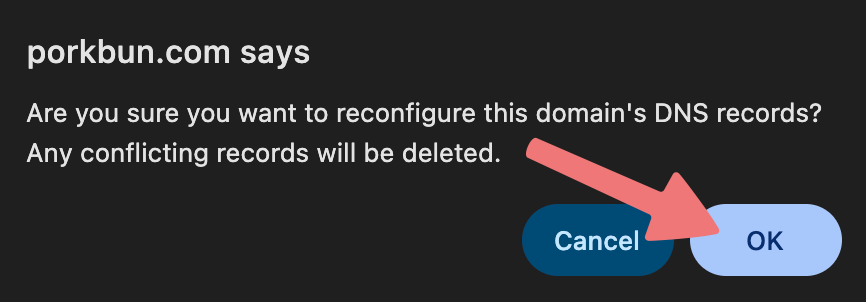
A browser pop-up will appear asking if you're sure you want to reconfigure your domain's DNS records. Click the "OK" button to continue.
5
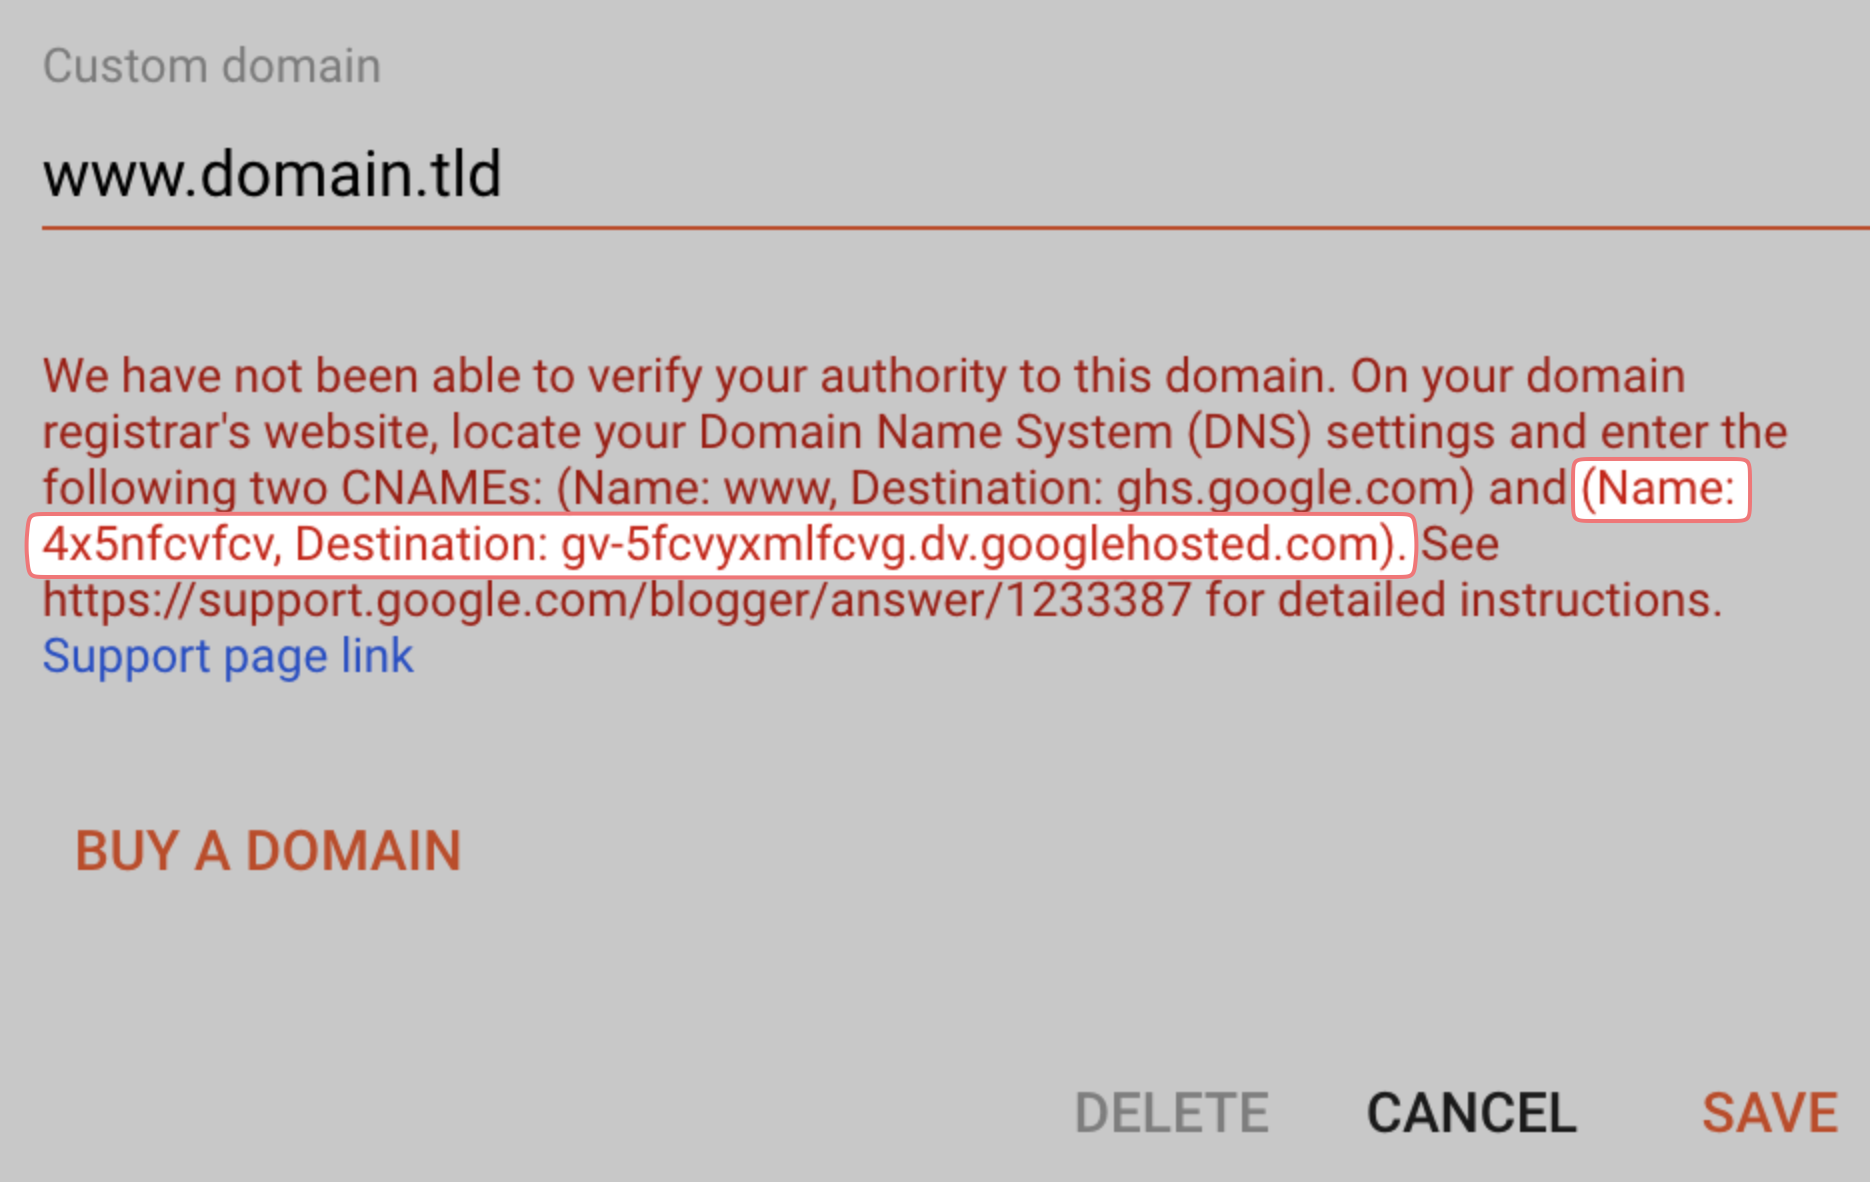
You'll be redirected to another menu labeled "Additional DNS Requirements". Here you will input the Security CNAME record that you were given when you added your domain to Blogger. The record will look something like this:
In the "Host" field on Porkbun, enter the value that Blogger shows as the "Name". In the "Answer" field, enter the value that Blogger shows as the "Destination". Your values won't be exactly the same, but the formatting should look similar to this:
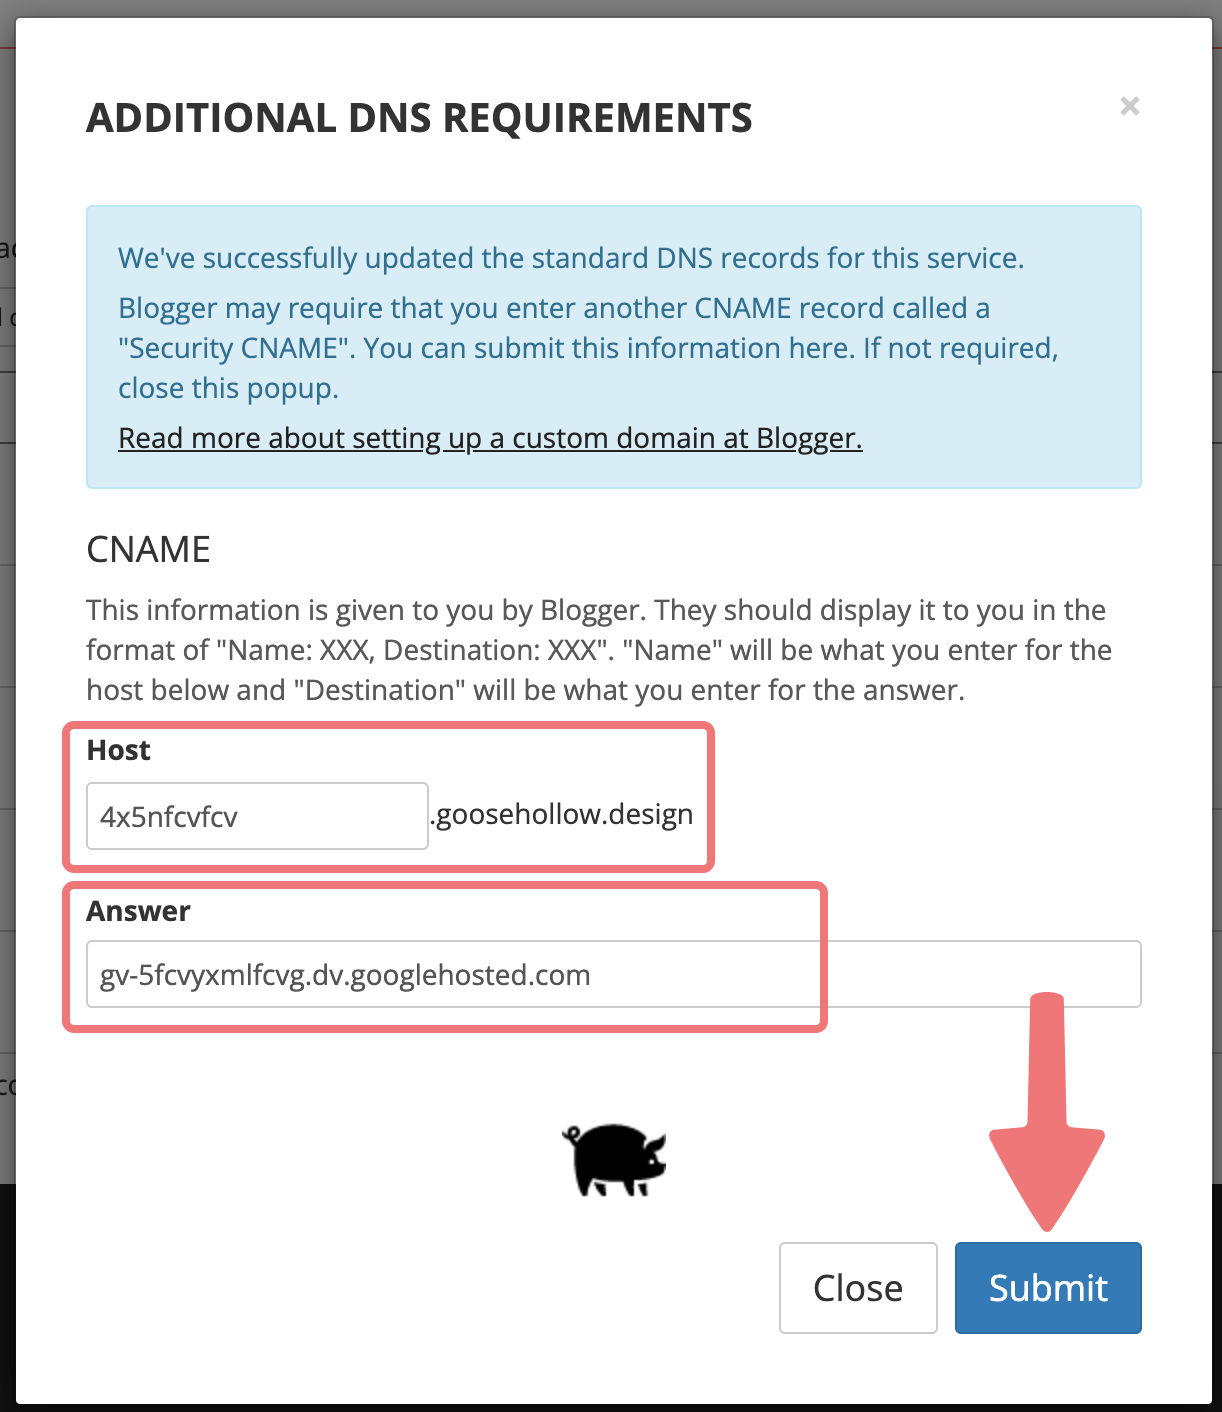
Click on "Submit" to finish adding the record. Another browser pop-up will appear, letting you know the DNS records have been updated successfully.
6
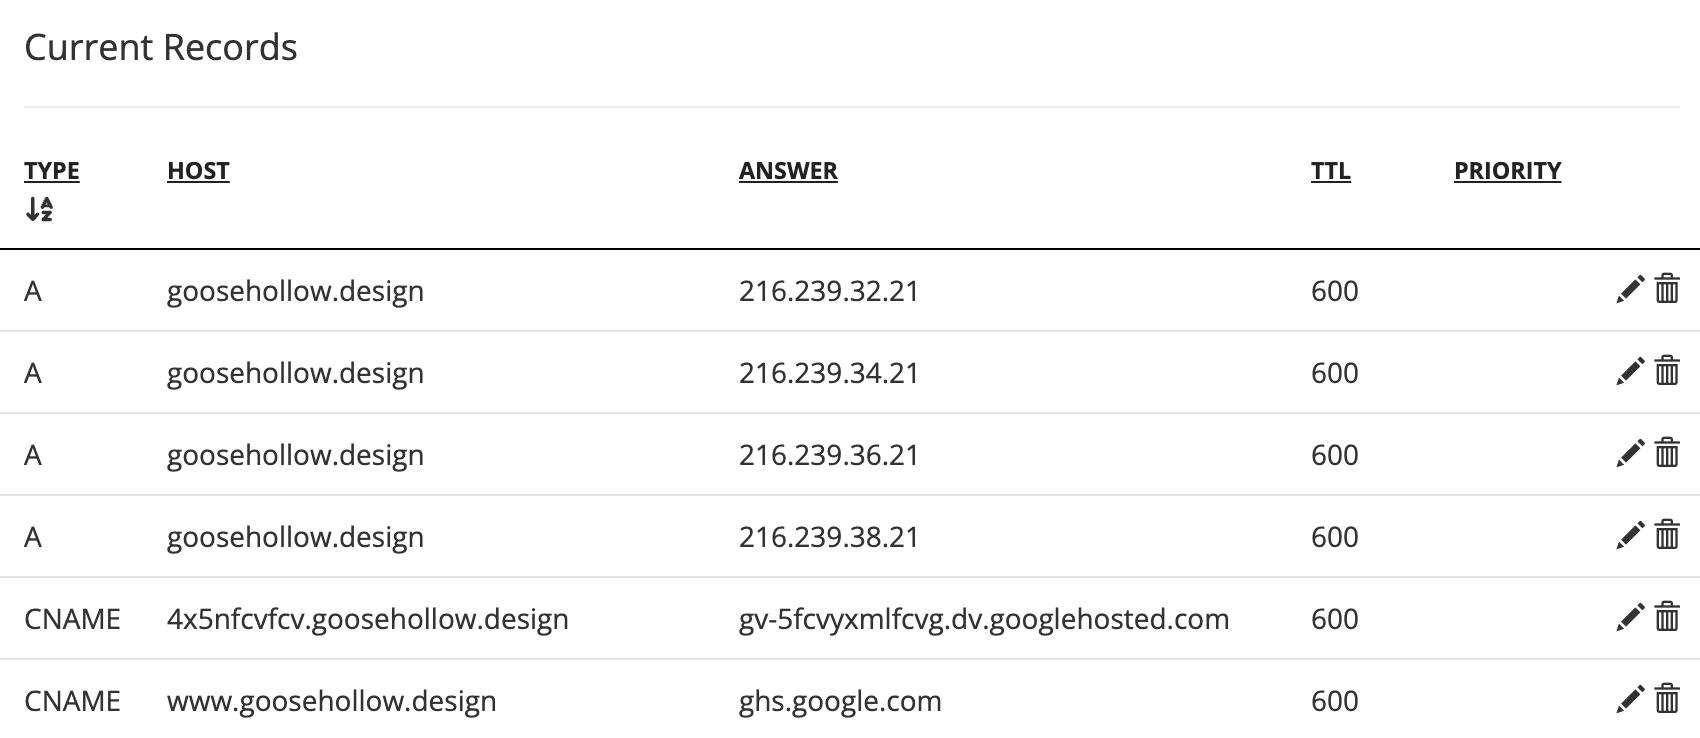
You'll be redirected back to the "Manage DNS Records" menu. Scroll down to the bottom section labeled "Current Records". You will see a group of DNS records that have been added to your domain, including the Security CNAME record.
That's it! You should now be connected to Blogger, and within the next 24 hours (typically much quicker) you'll be able to access your Blogger site via your domain name. Feel free to reach out to our support team if you run into any issues with this process.


