How to connect your domain to Google Sites
Want to connect your Porkbun domain to your Google Sites page? No problem!
According to this article from Google, you will need to verify ownership of your domain and connect to it with a CNAME record. Google Sites have to be placed on a subdomain such as "www" since Google Sites won't allow you to map your site to your root domain. You'll need to decide ahead of time if you want to use www as your subdomain, or something else (for instance blog.mysite.tld).
Let's get started!
Verify the Domain in Google Search Console
1
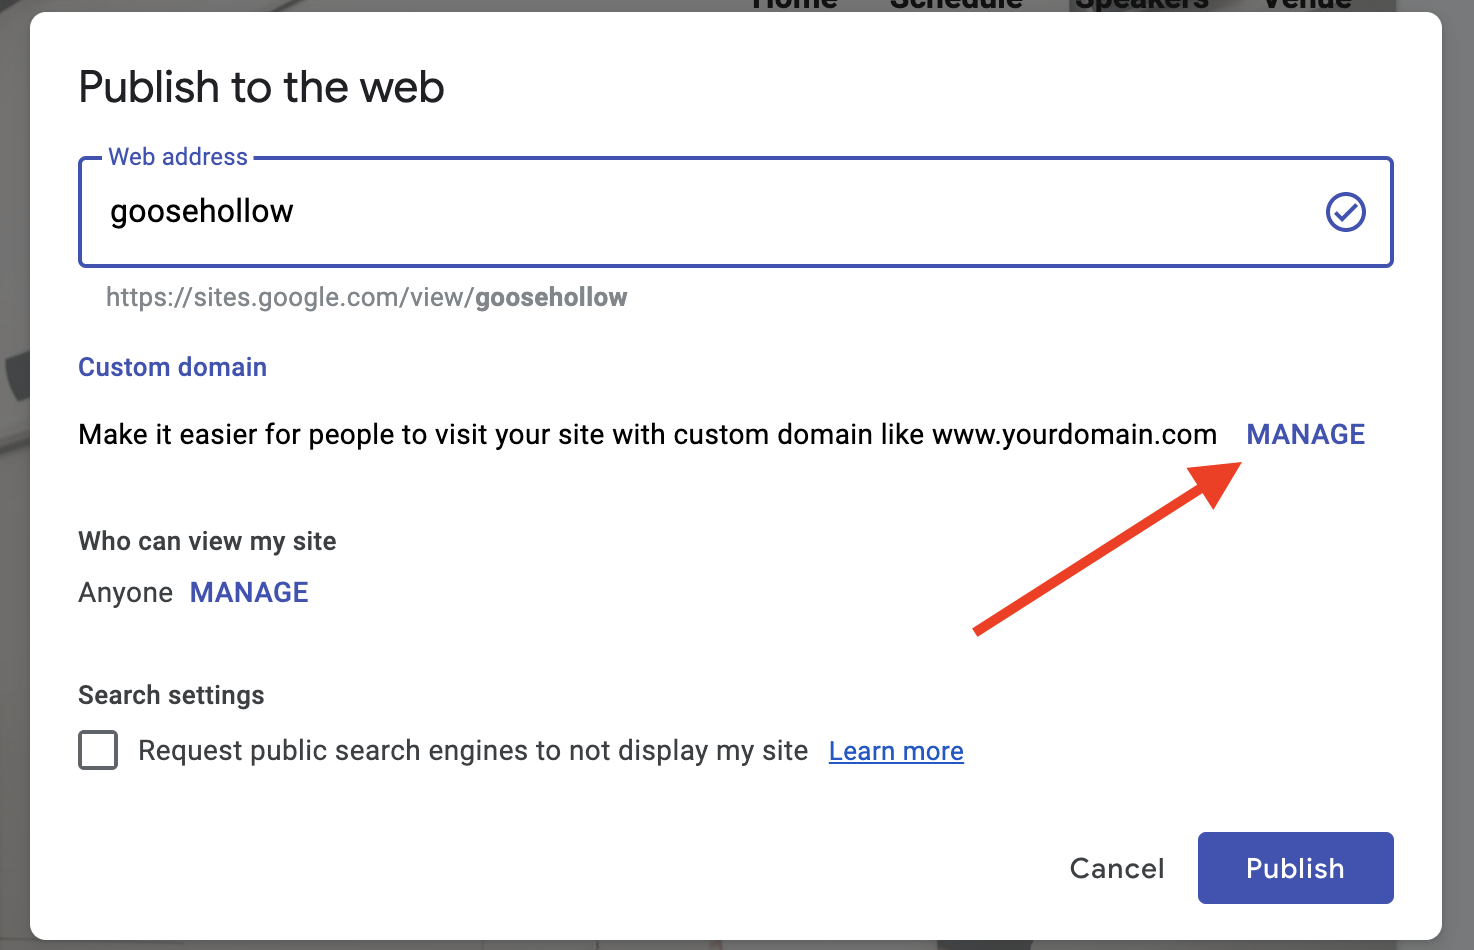
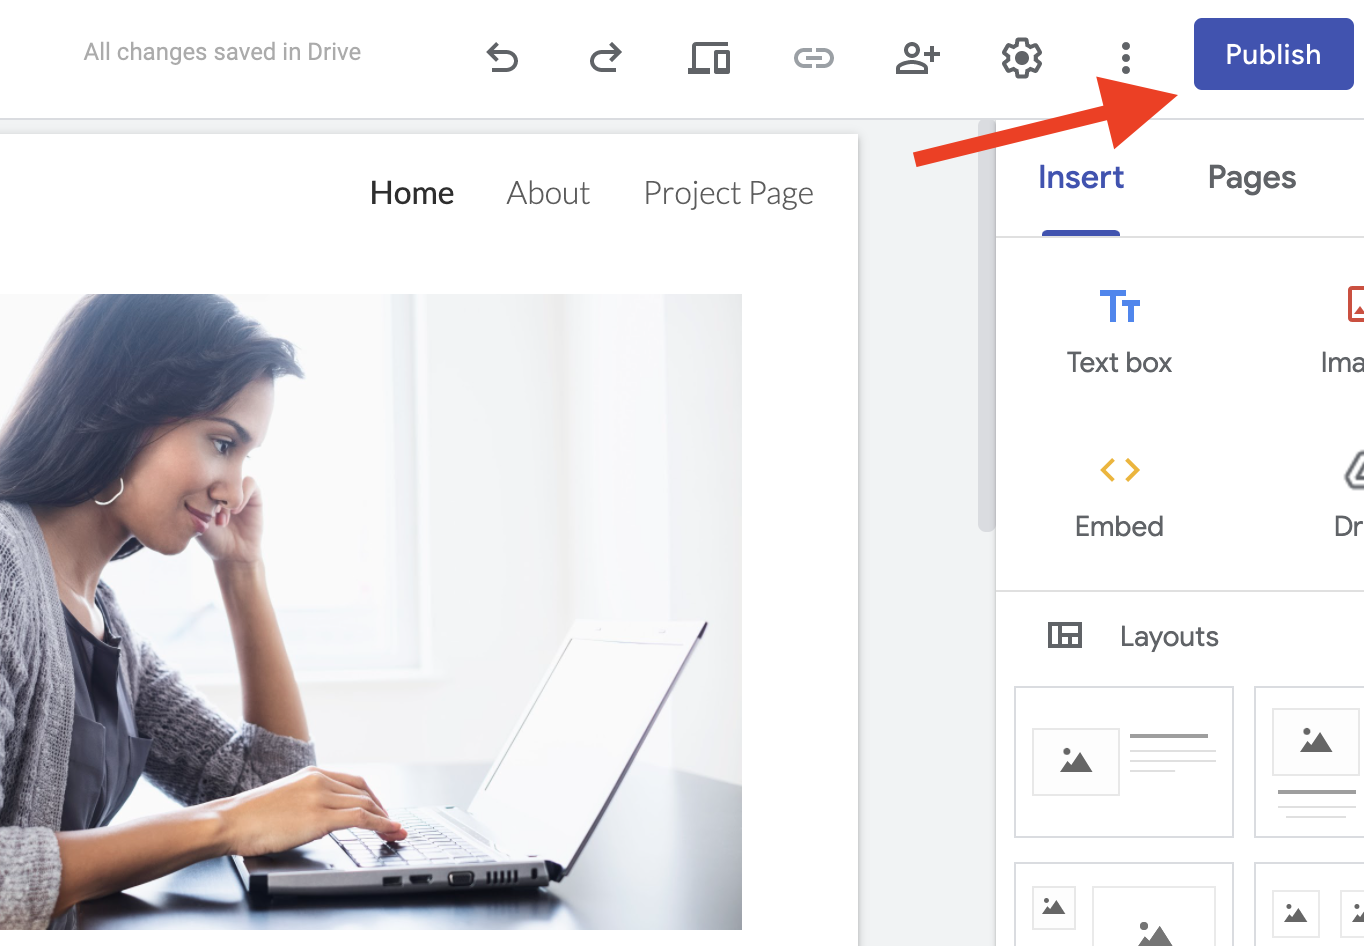
Log in to your Google Site and click the "Publish" button in the upper-right corner. If you have already published the site, click the arrow button next to "Publish" and click "Publish Settings..." in the drop-down menu.
Click MANAGE in the Custom Domain settings section to add a Custom URL.
2
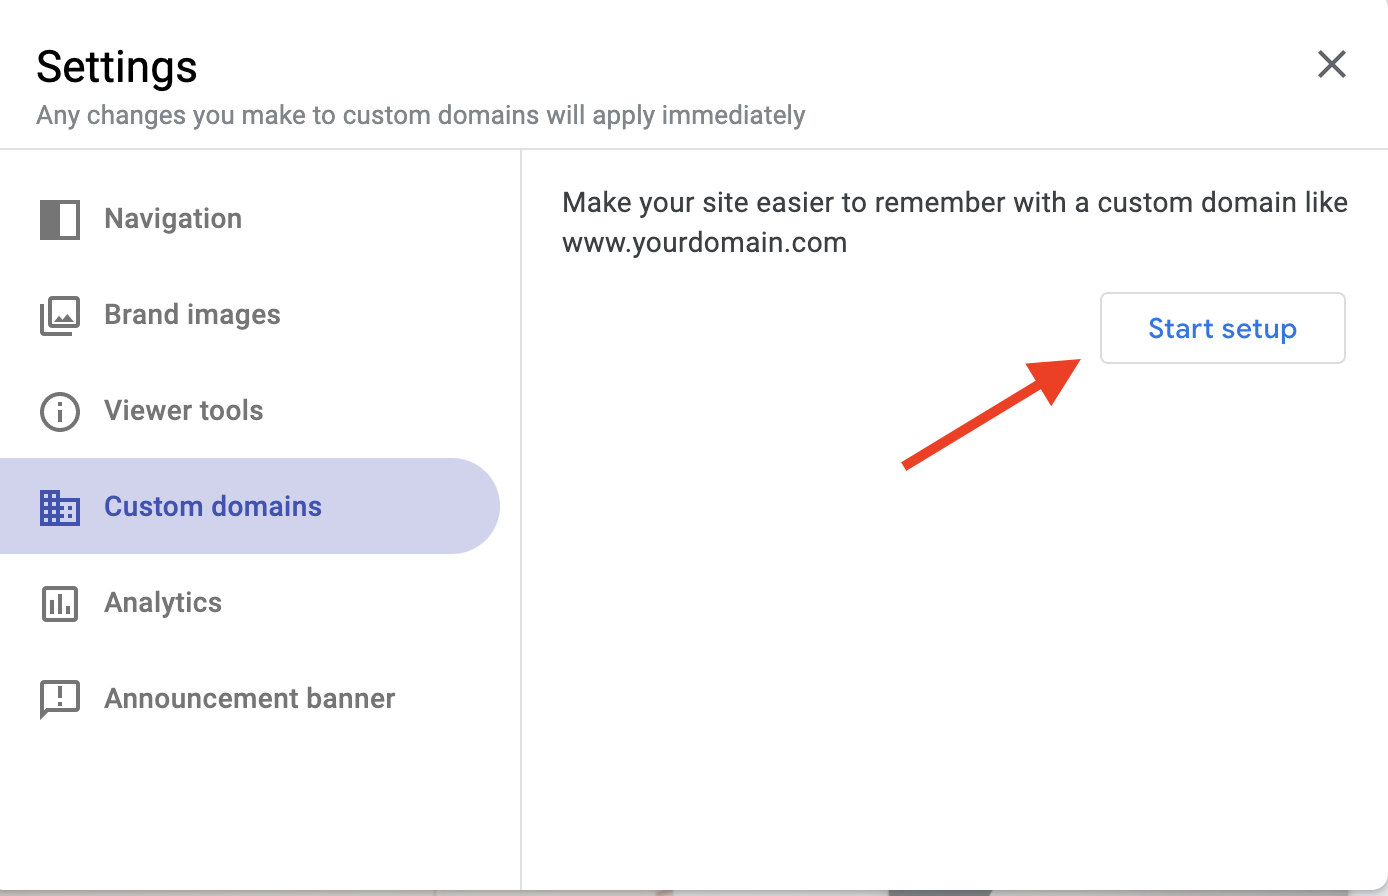
On the Google Sites Settings page, select the "Start Setup" button to begin connecting your domain:
3
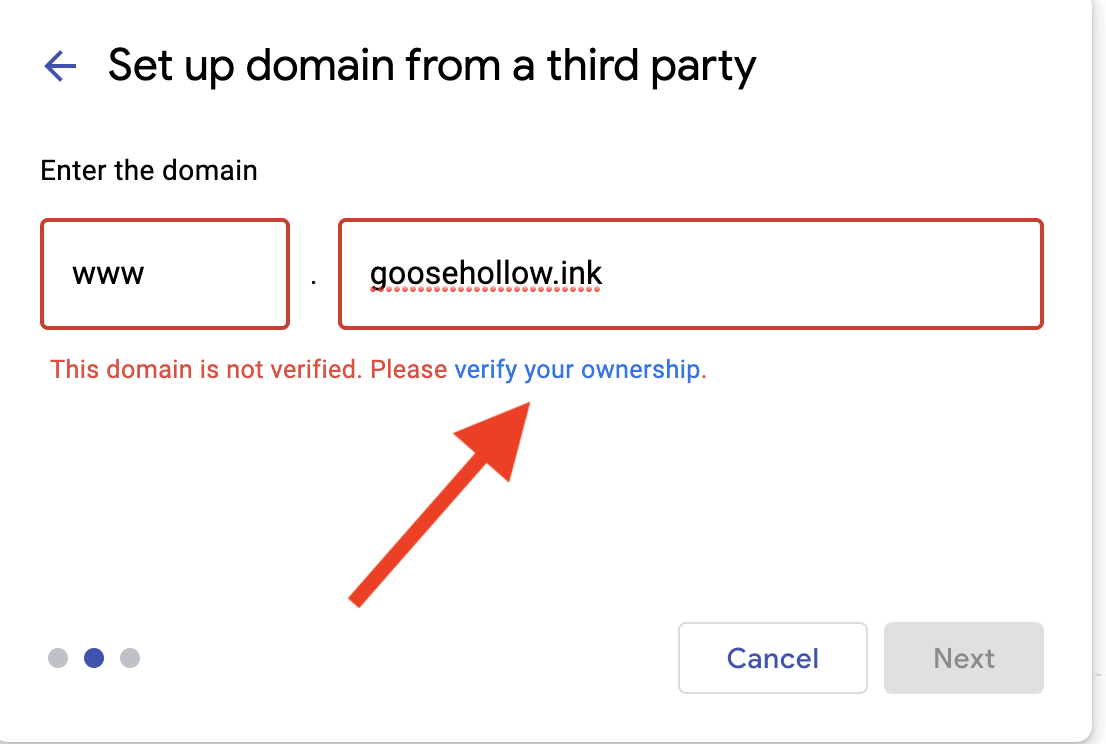
Enter the domain name using the subdomain you would like to use (generally www). As we mentioned in the intro, Google Sites does not support the use of the root domain. You will be prompted to verify your ownership of the domin. Click the "verify your ownership" link to proceed. This will open up the verification page in a new tab:
4
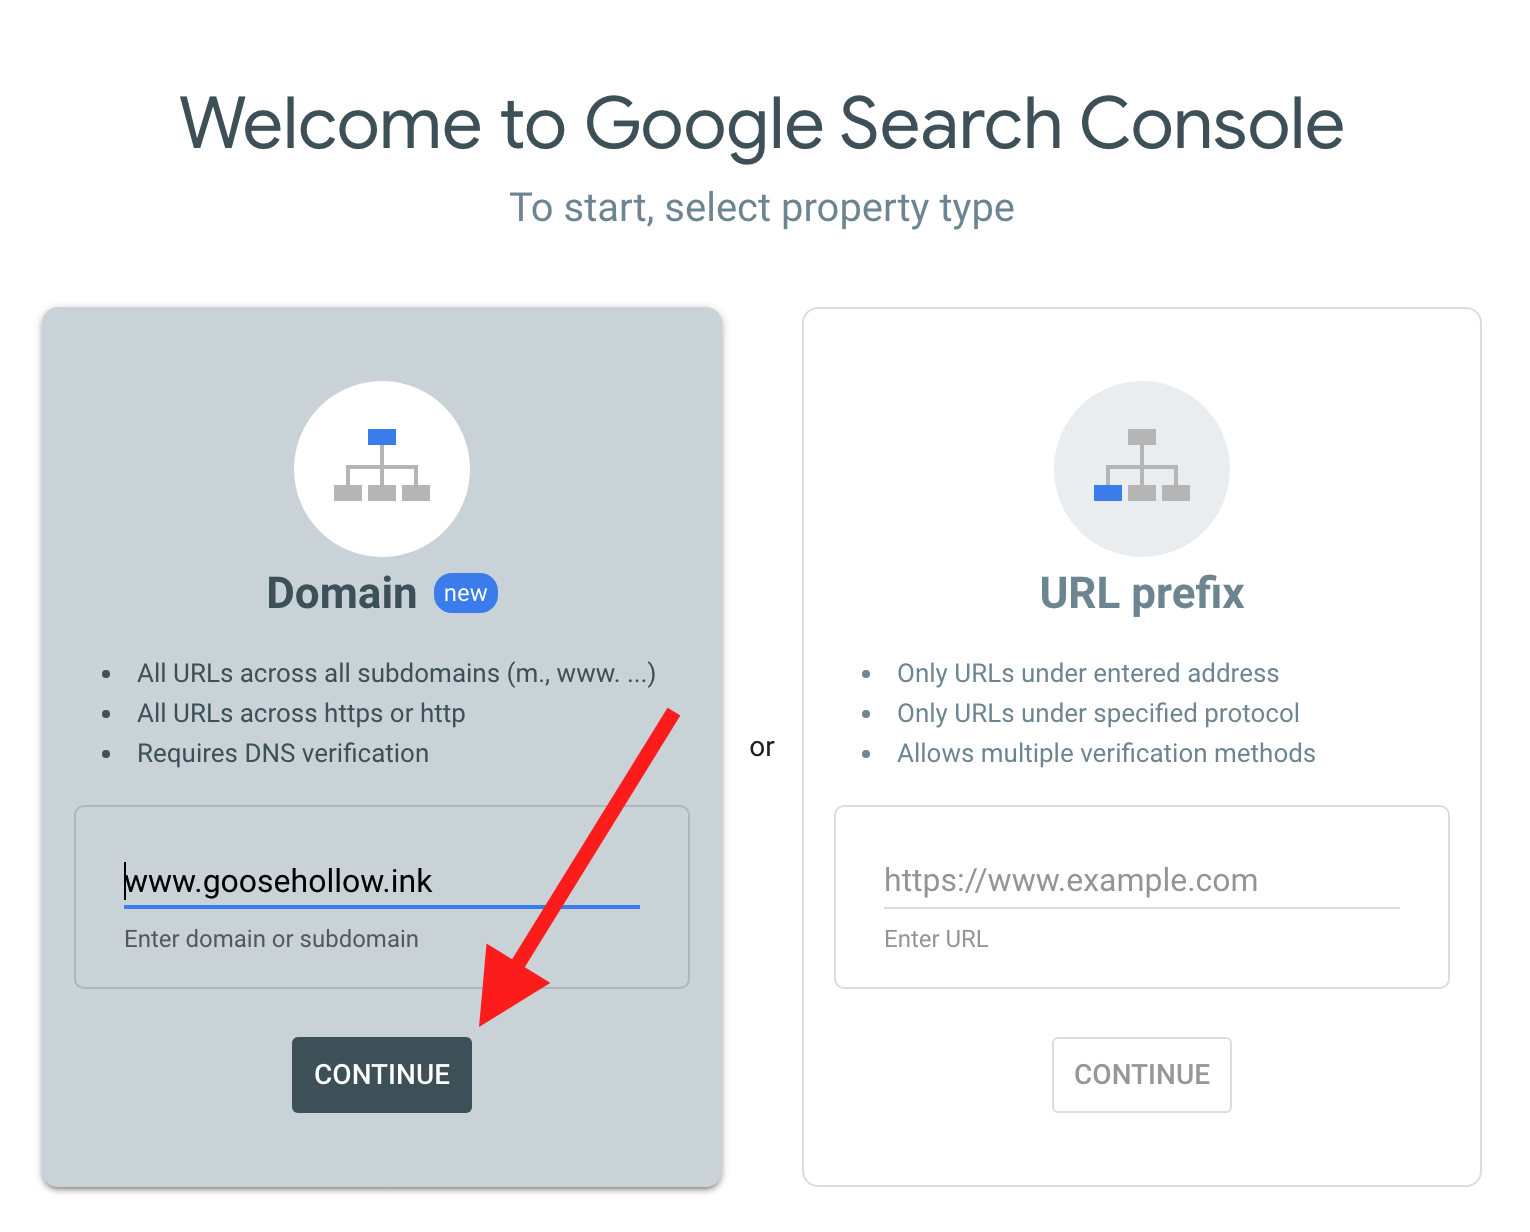
You will be prompted to choose a property type from within the Google Search Console. Under "Domain" select CONTINUE.
5
Once you select "Continue" from the selection page, you will be presented with a pop-up that shows instructions to create a TXT record. Select the "Copy" button:
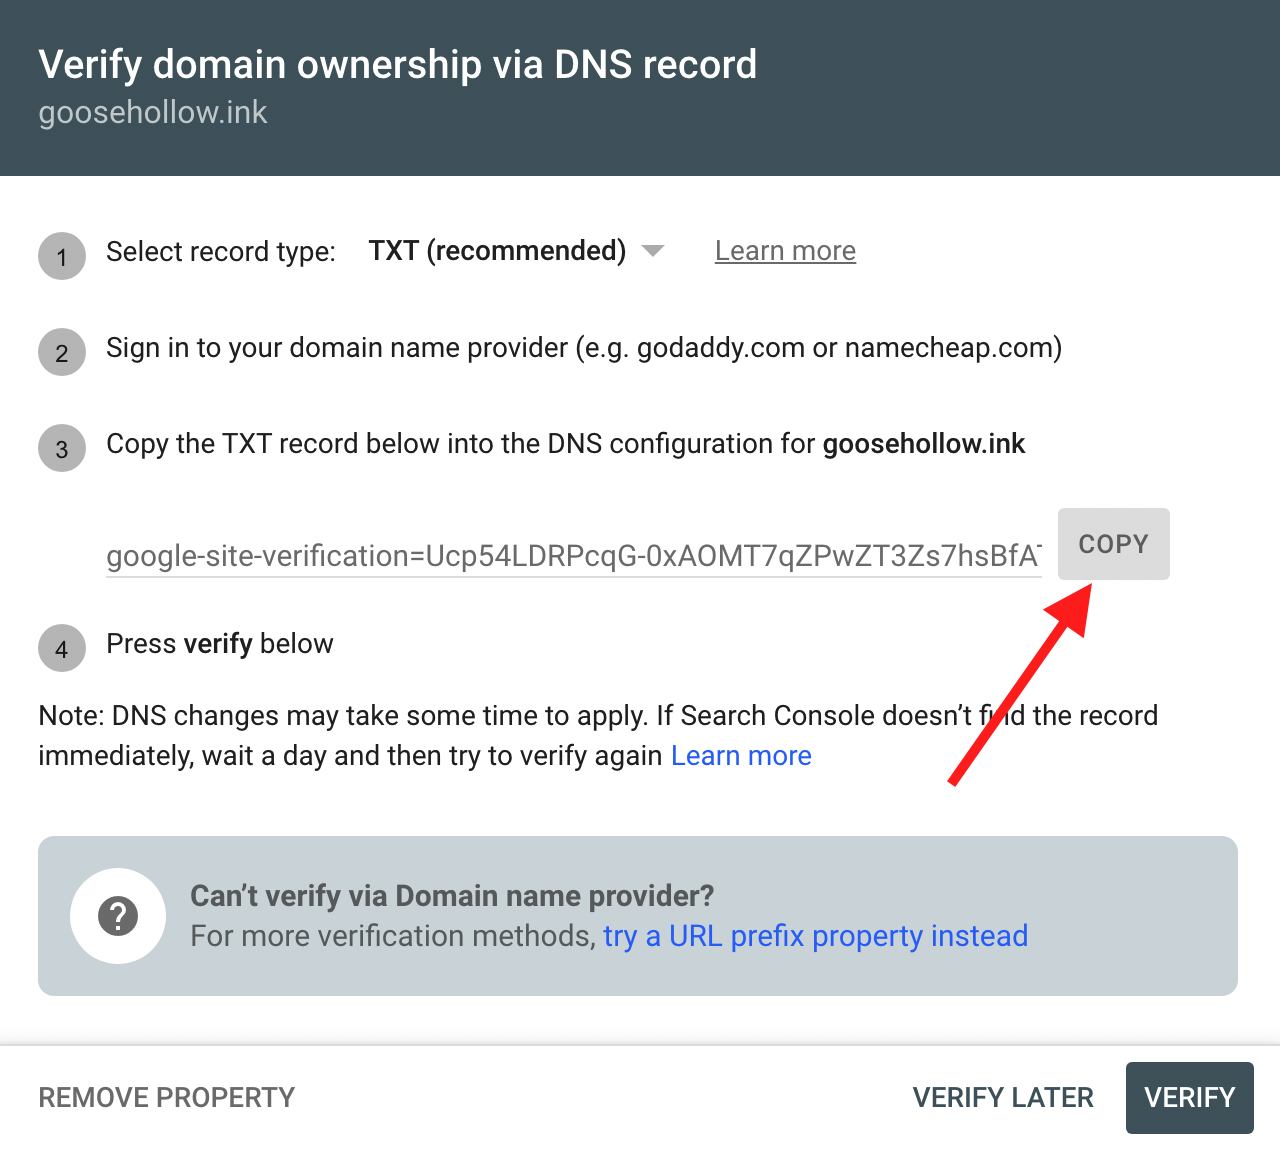
6
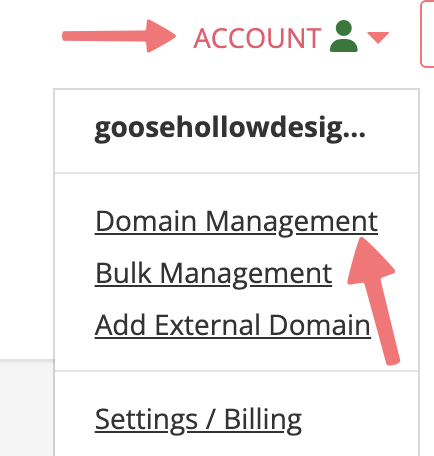
Login to your Porkbun account. You should end up on your Domain Management page. If you are already logged in, click on ACCOUNT in the top right corner and select "Domain Management."
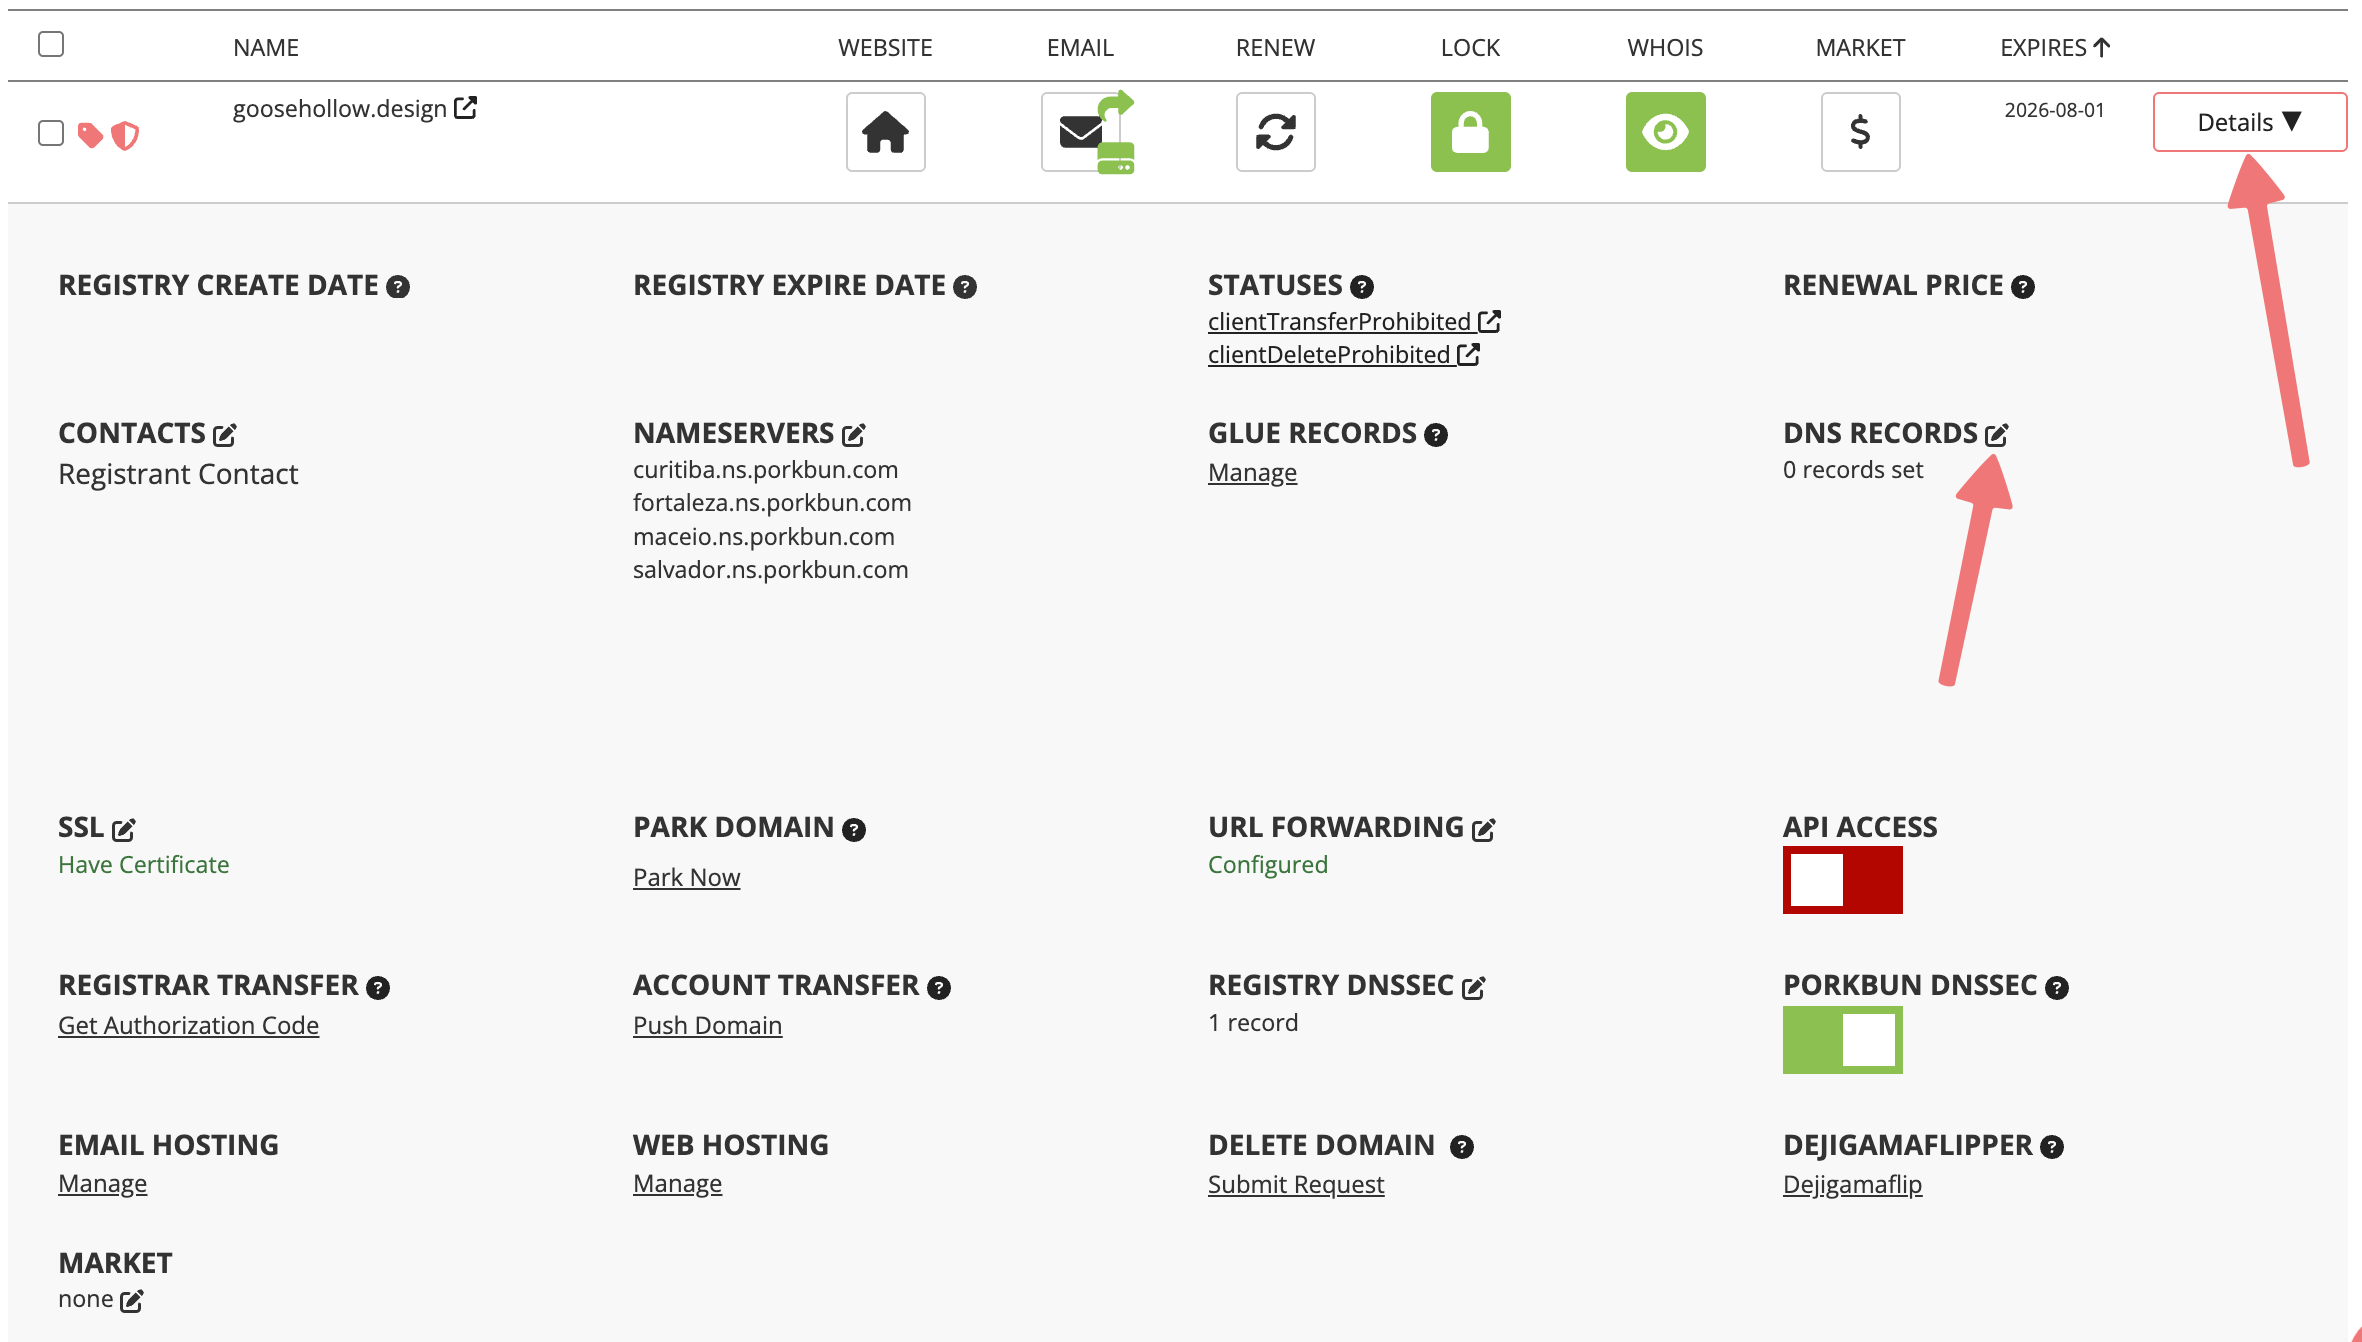
Then click on the Details button to the right of your domain and click on the edit icon next to "DNS Records".
7
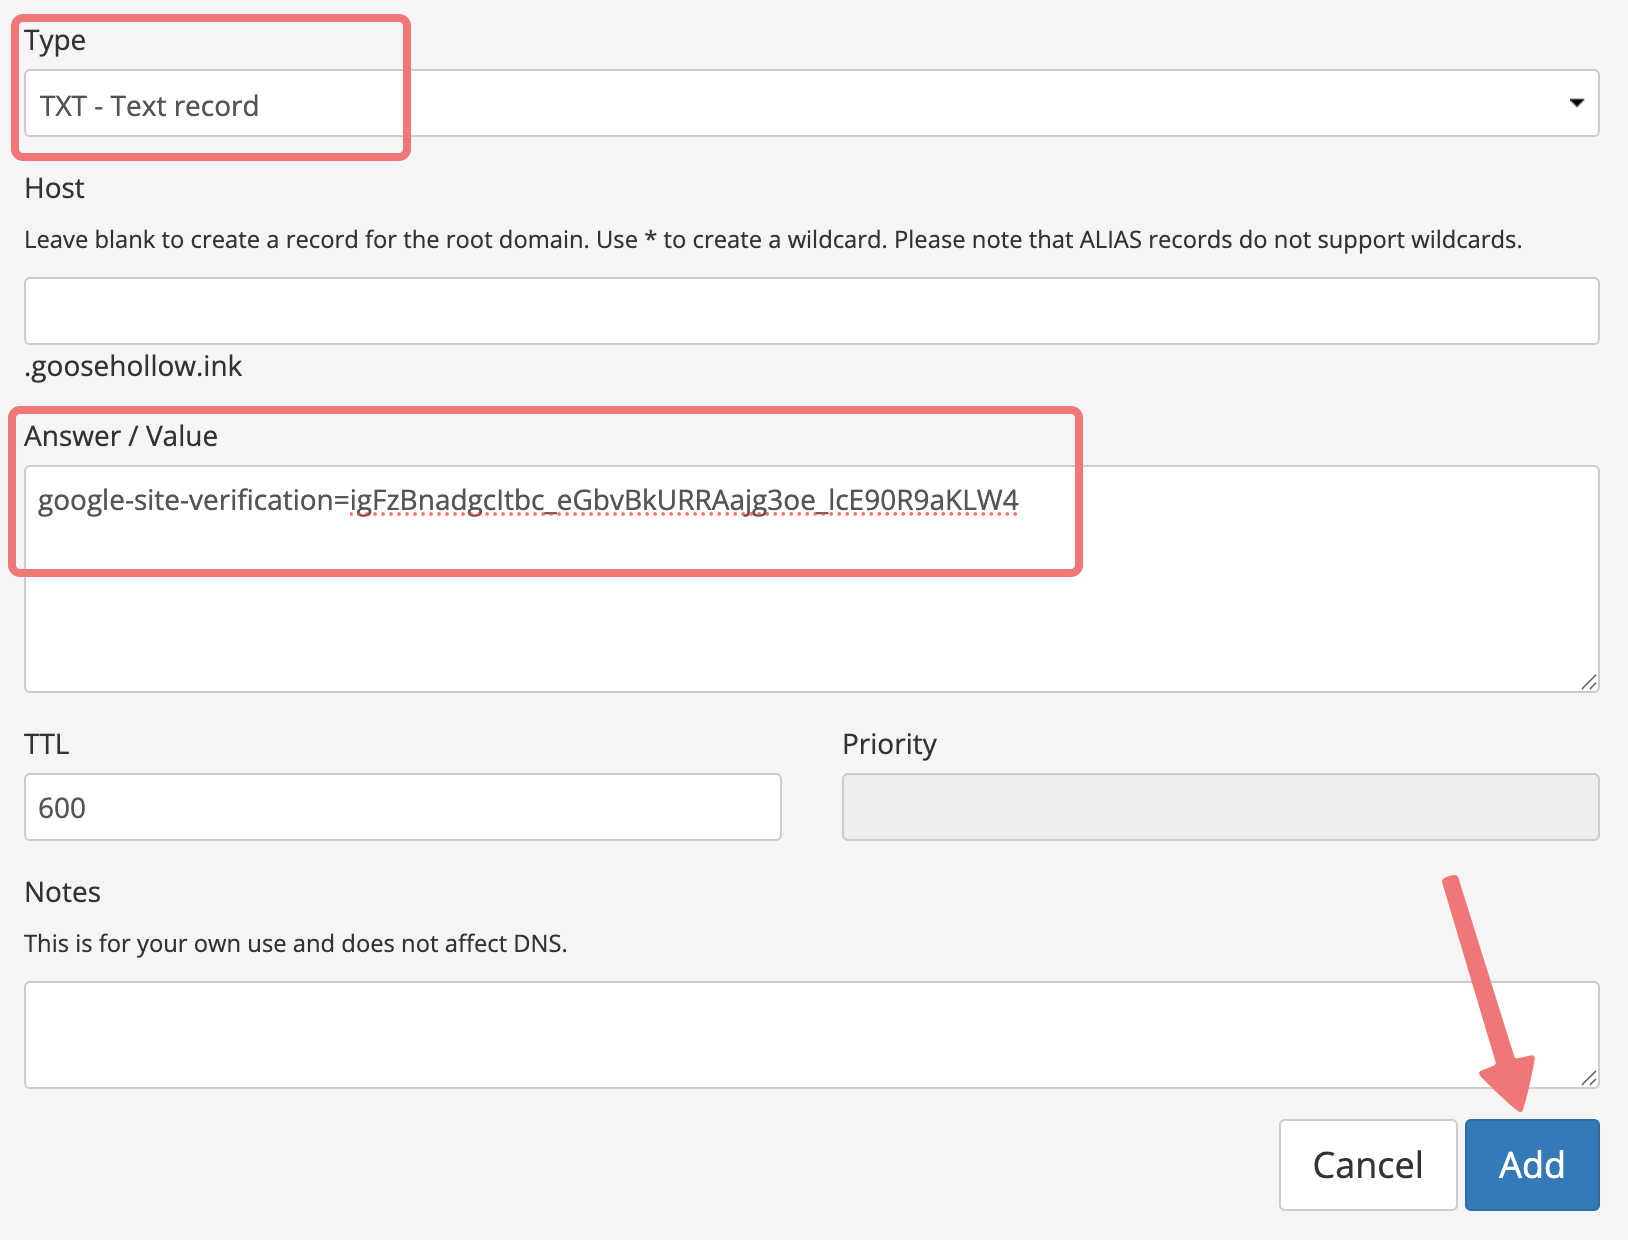
If you chose the TXT record method, select "TXT - Text record" from the Type dropdown menu. Leave the Host field blank and paste the record from earlier into the Answer/Value field, then select the "Add" button.
8
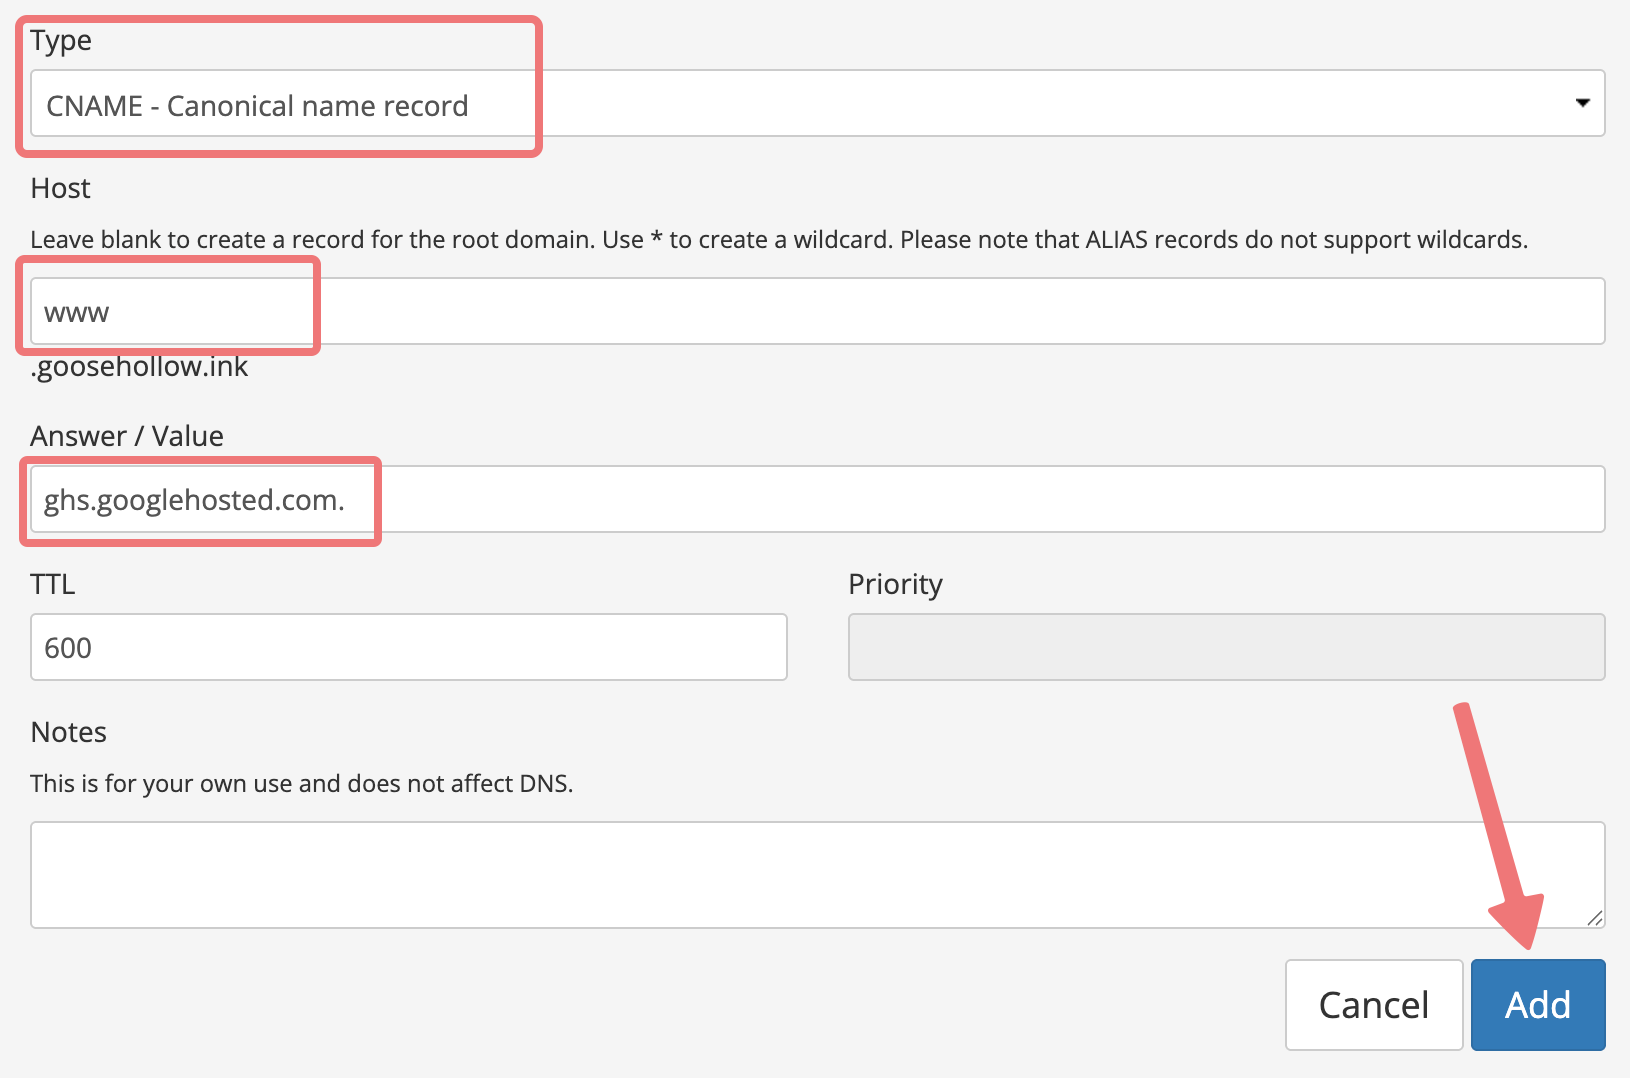
Add a second record, selecting "CNAME" as the type. Under Host, list the subdomain you chose earlier (such as www) and set the Answer/Value to "ghs.googlehosted.com." (be sure to include the period), then select the "Add" button.
9
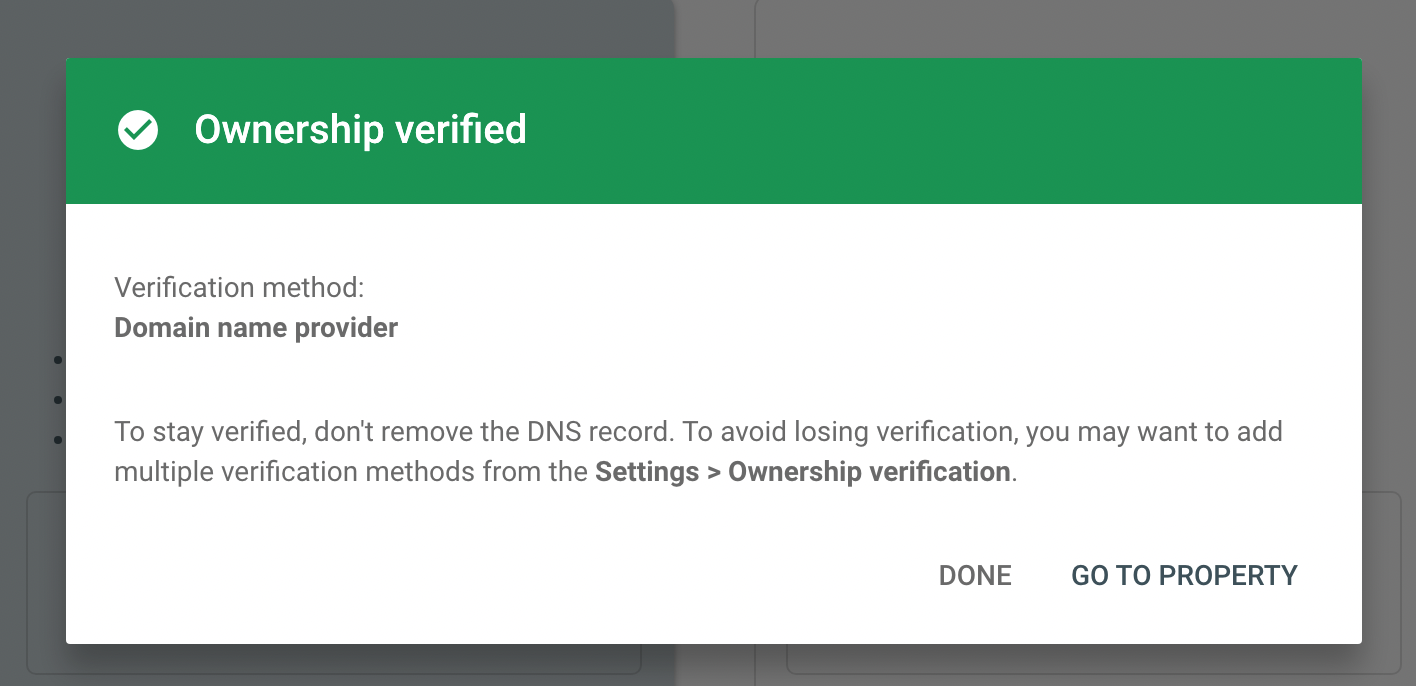
Return to the Google Search Console tab and select the "Verify" button. If the verification succeeds, you will see the message "Ownership Verified"
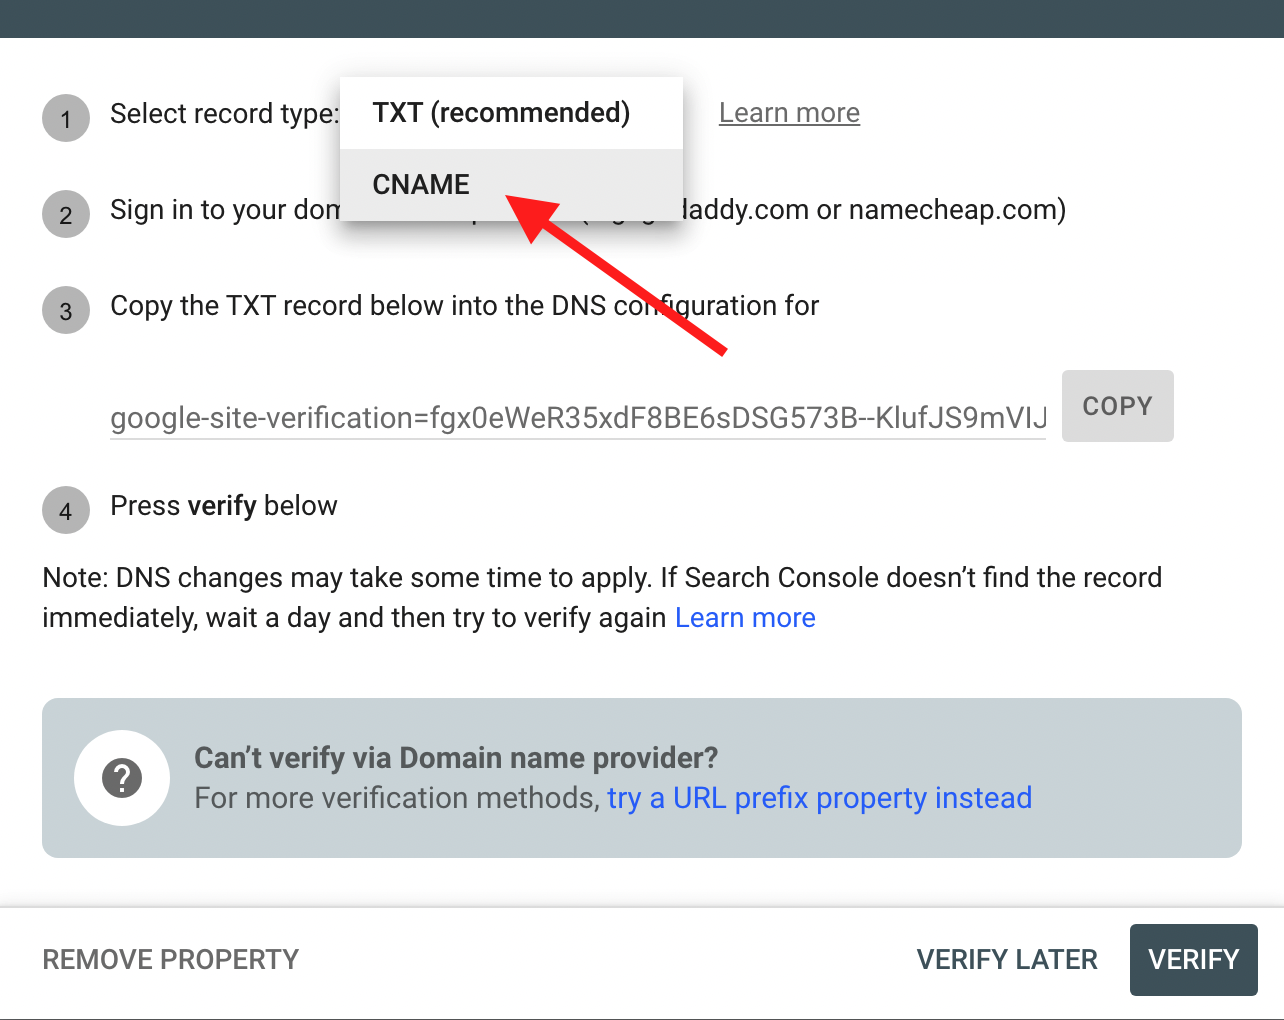
If your domain does not verify, you'll be presented with a verification failed message. Clicking "Ok" from there will take you back to the DNS instruction page where you can select to verify with CNAME instead:
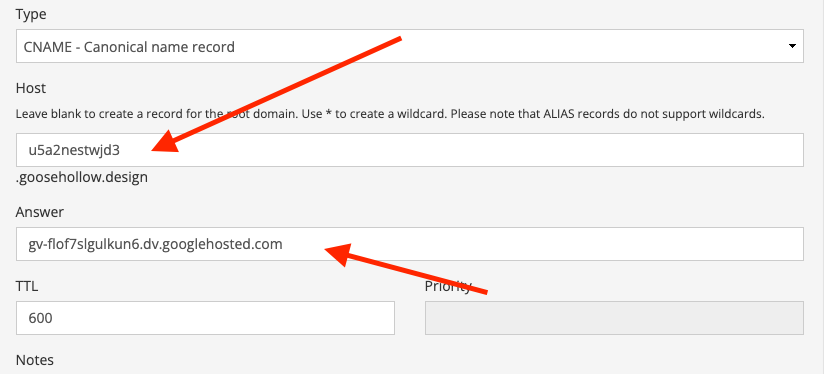
Then grab a copy of both the Label/Host and Destination/Target Fields:

If you chose the CNAME record method, copy the CNAME Label/Host field and paste it into the Host field in Porkbun. Then copy and paste the CNAME Destination/Target into the Answer/Value field.
Publish the Site to the Domain
1
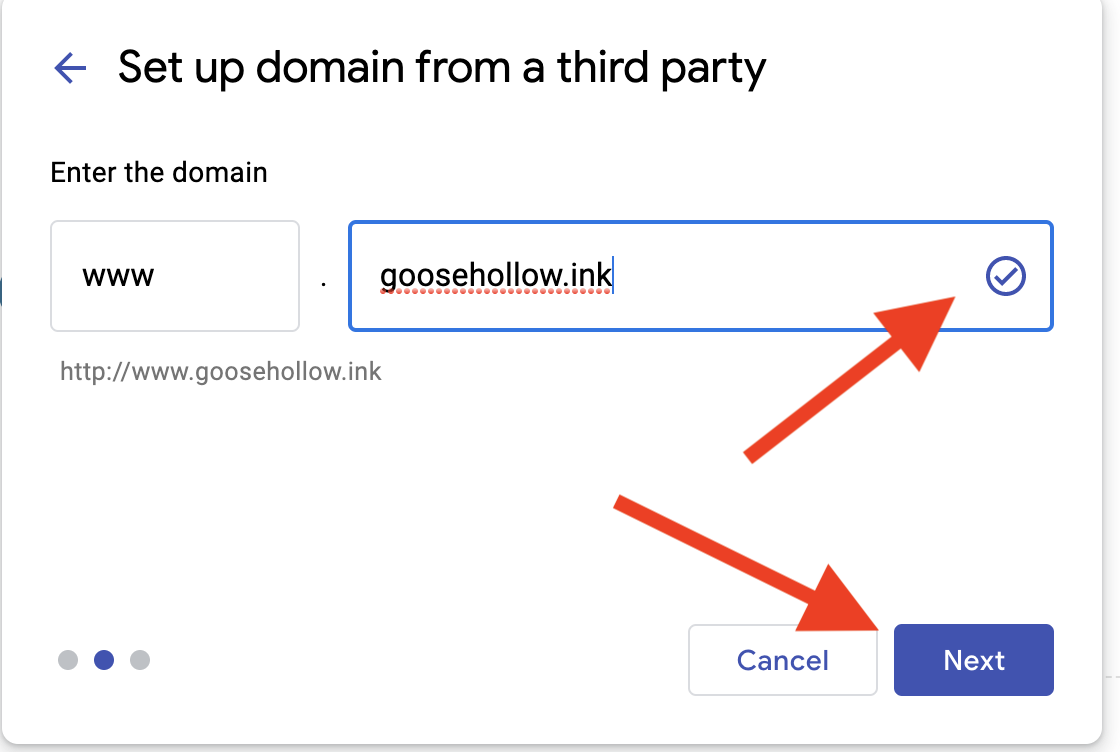
Go back to the Google Sites page to the "Set up custom domain" pop-up and retype in your domain. Look for a checkmark next to the domain. If you see it, select the "Next" button:
2
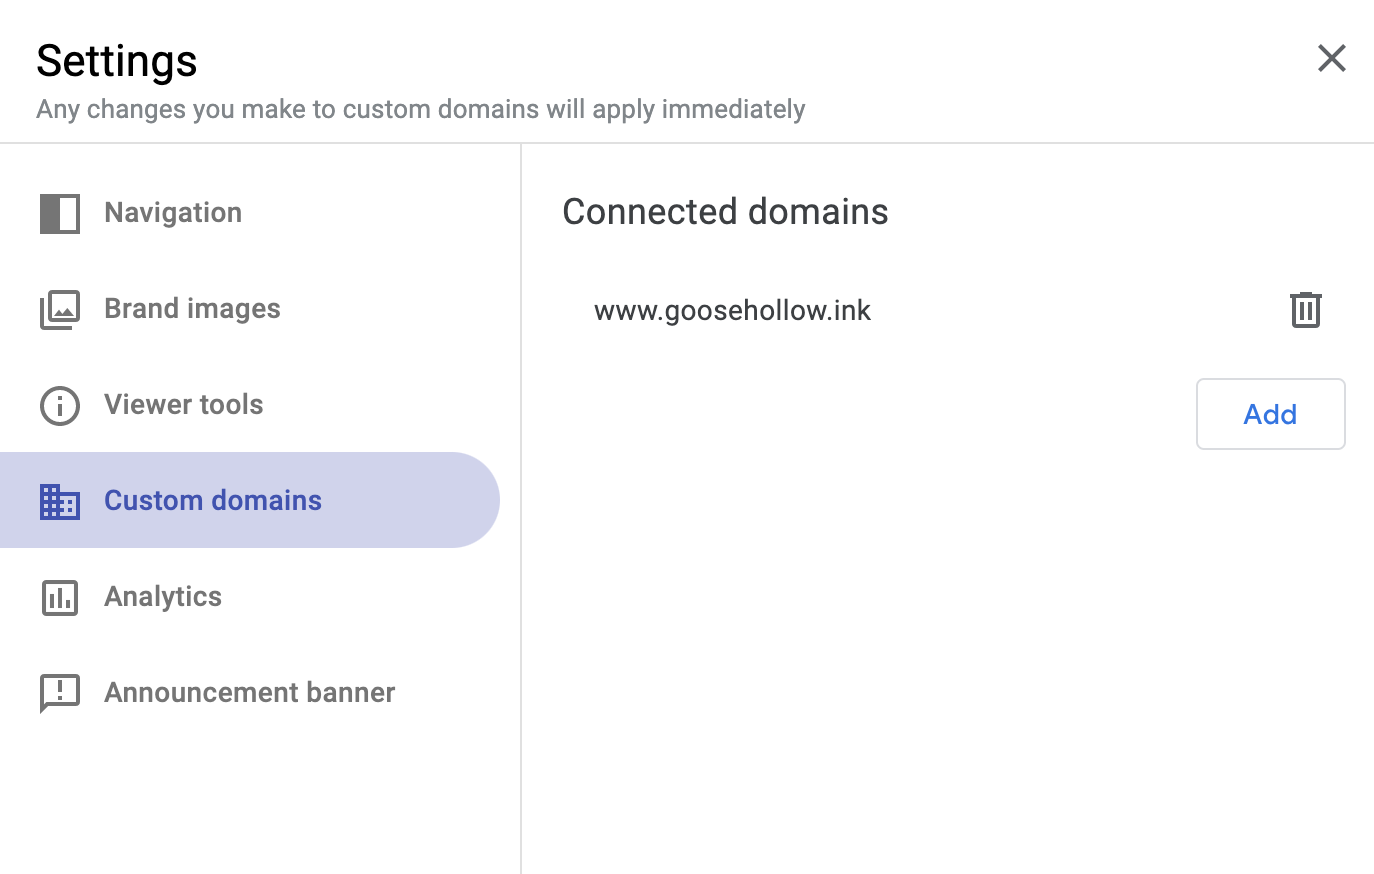
On the next page, select the "Done" button, as you have already added the CNAME record request on step 8 of this guide. You should see your domain assigned in Custom Domains:
3
Finally, if you haven't already, click the "Publish" button to publish your site one more time.
That's it! If you did everything correctly, your subdomain should begin resolving to your Google Sites page.
Please Note:
It can take up to 48 hours for the Google Sites page to fully resolve to your Porkbun domain.
Enable Forwarding from the Root Domain to Your Subdomain
If this Google Site is going to be the primary website for your domain, you'll need to set up URL forwarding so that people who don't type the "www" can still get to your site.
1
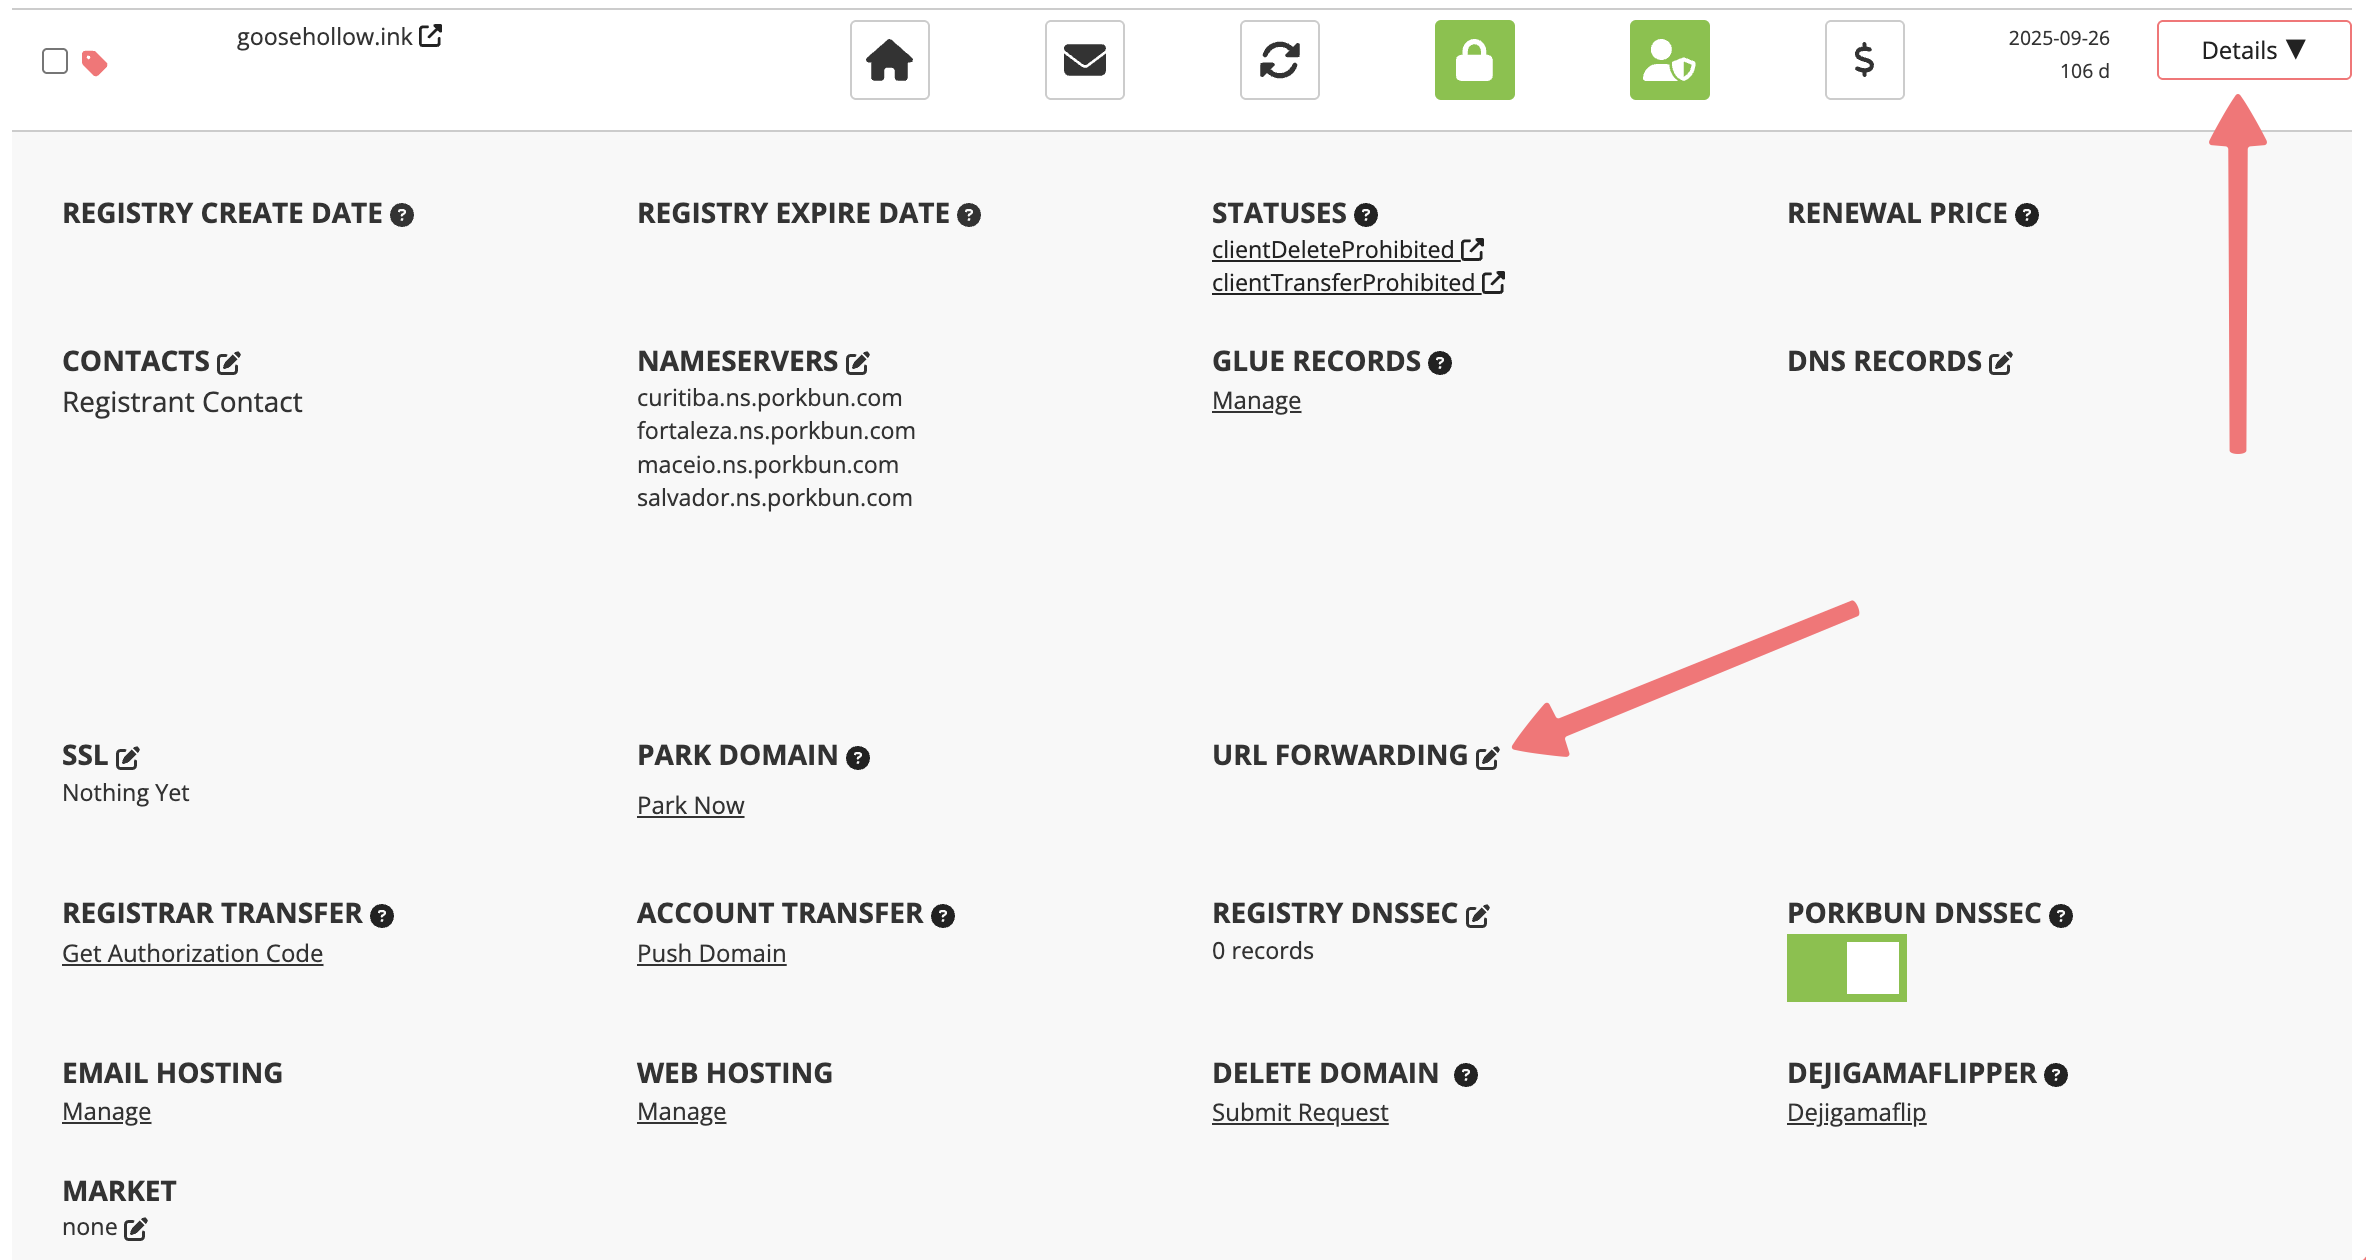
To enable forwarding from the root domain, sign in to Porkbun and go to the Domain Management page. Click the "Details" button for your domain and then click the edit icon next to URL Forwarding.
2
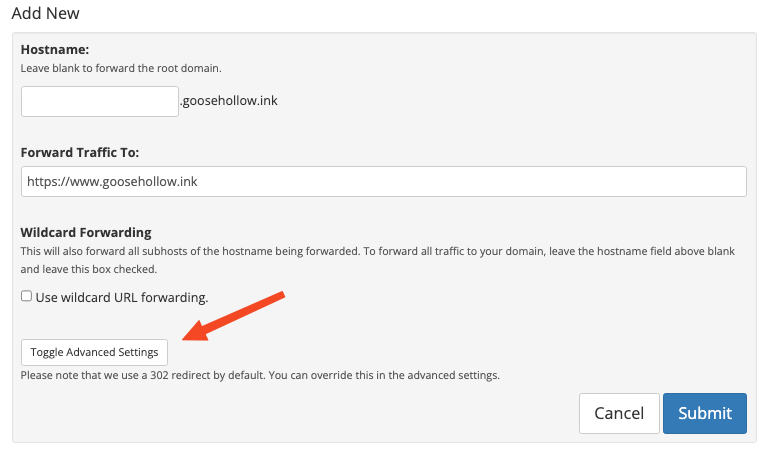
Leave the "Hostname" field blank. In the "Forward Traffic To" field, enter the URL of your chosen subdomain, including https. For example:
https://www.goosehollow.ink
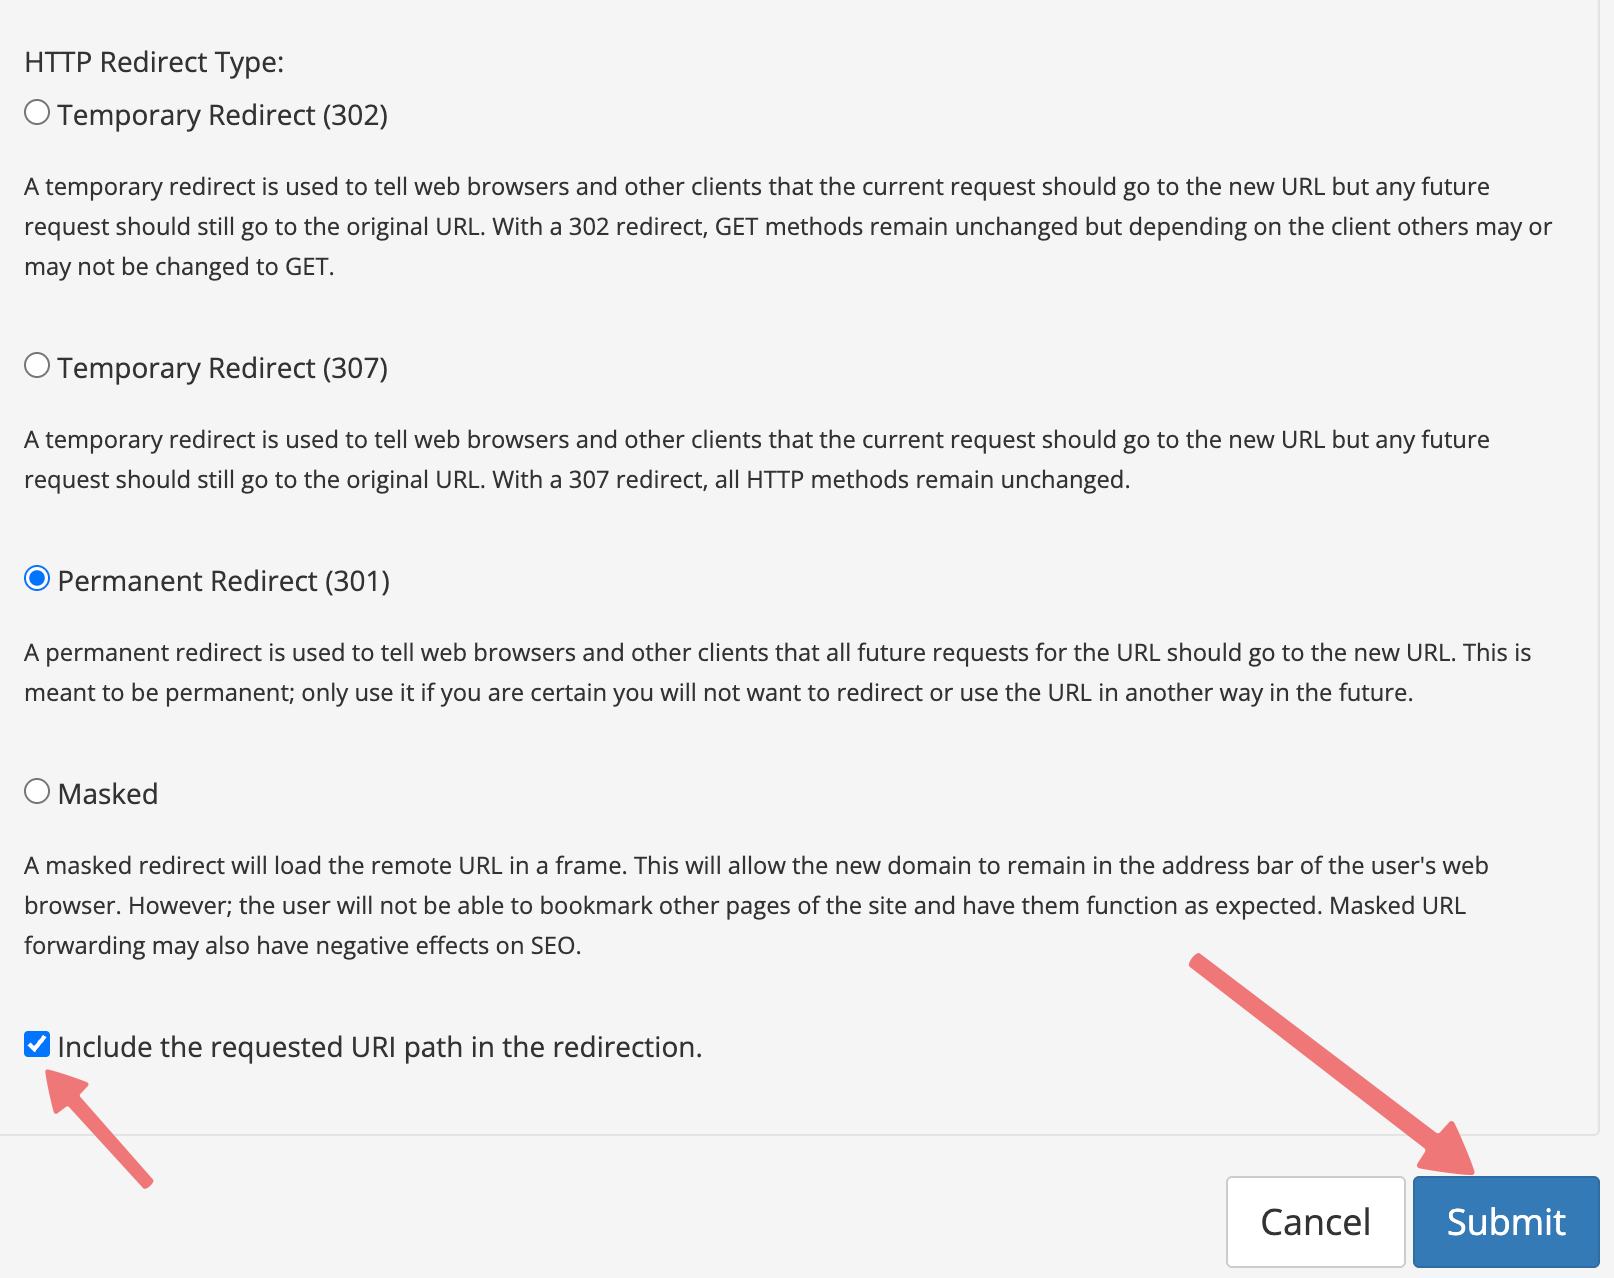
In the same window, uncheck the box for Wildcard Forwarding. Then, select the "Toggle advanced settings" link and check the box at the bottom to "Include the requested URI path in the redirection". Select the "Submit" button to finish setting up the URL redirect.
After a bit of time has passed for everything to propagate, you should find that your site shows up properly even if you don't type "www" in front of the URL first!


