How to switch your Cloud for WordPress plan
Ready to take your managed hosting for WordPress to the next level? The following steps will walk you through how to upgrade your Cloud Hosting for WordPress plan, or switch back if you no longer need a higher tier of hosting.
- 1
-
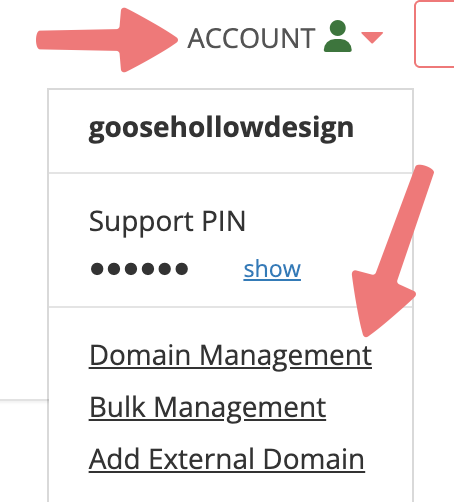
Log in. This should take you to the Domain Management screen. If you're already logged in, click on ACCOUNT in the top right, and select Domain Management.
- 2
-
Locate the domain with the hosting plan you're looking to change. To the right of the domain is a block of icons. Click the WordPress icon that is the first option in that list.

- 3
-
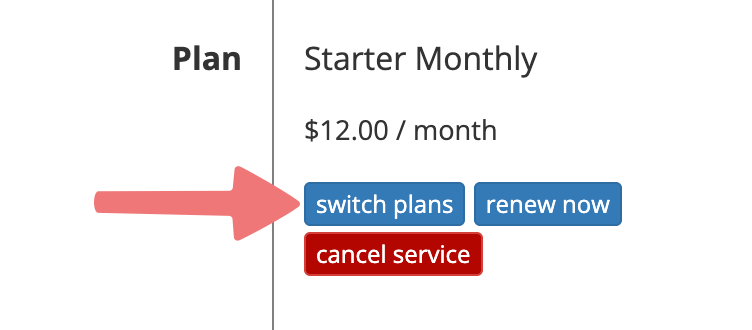
On the Cloud for WordPress page, scroll down to the Plan section and select the "switch plans" button.
- 4
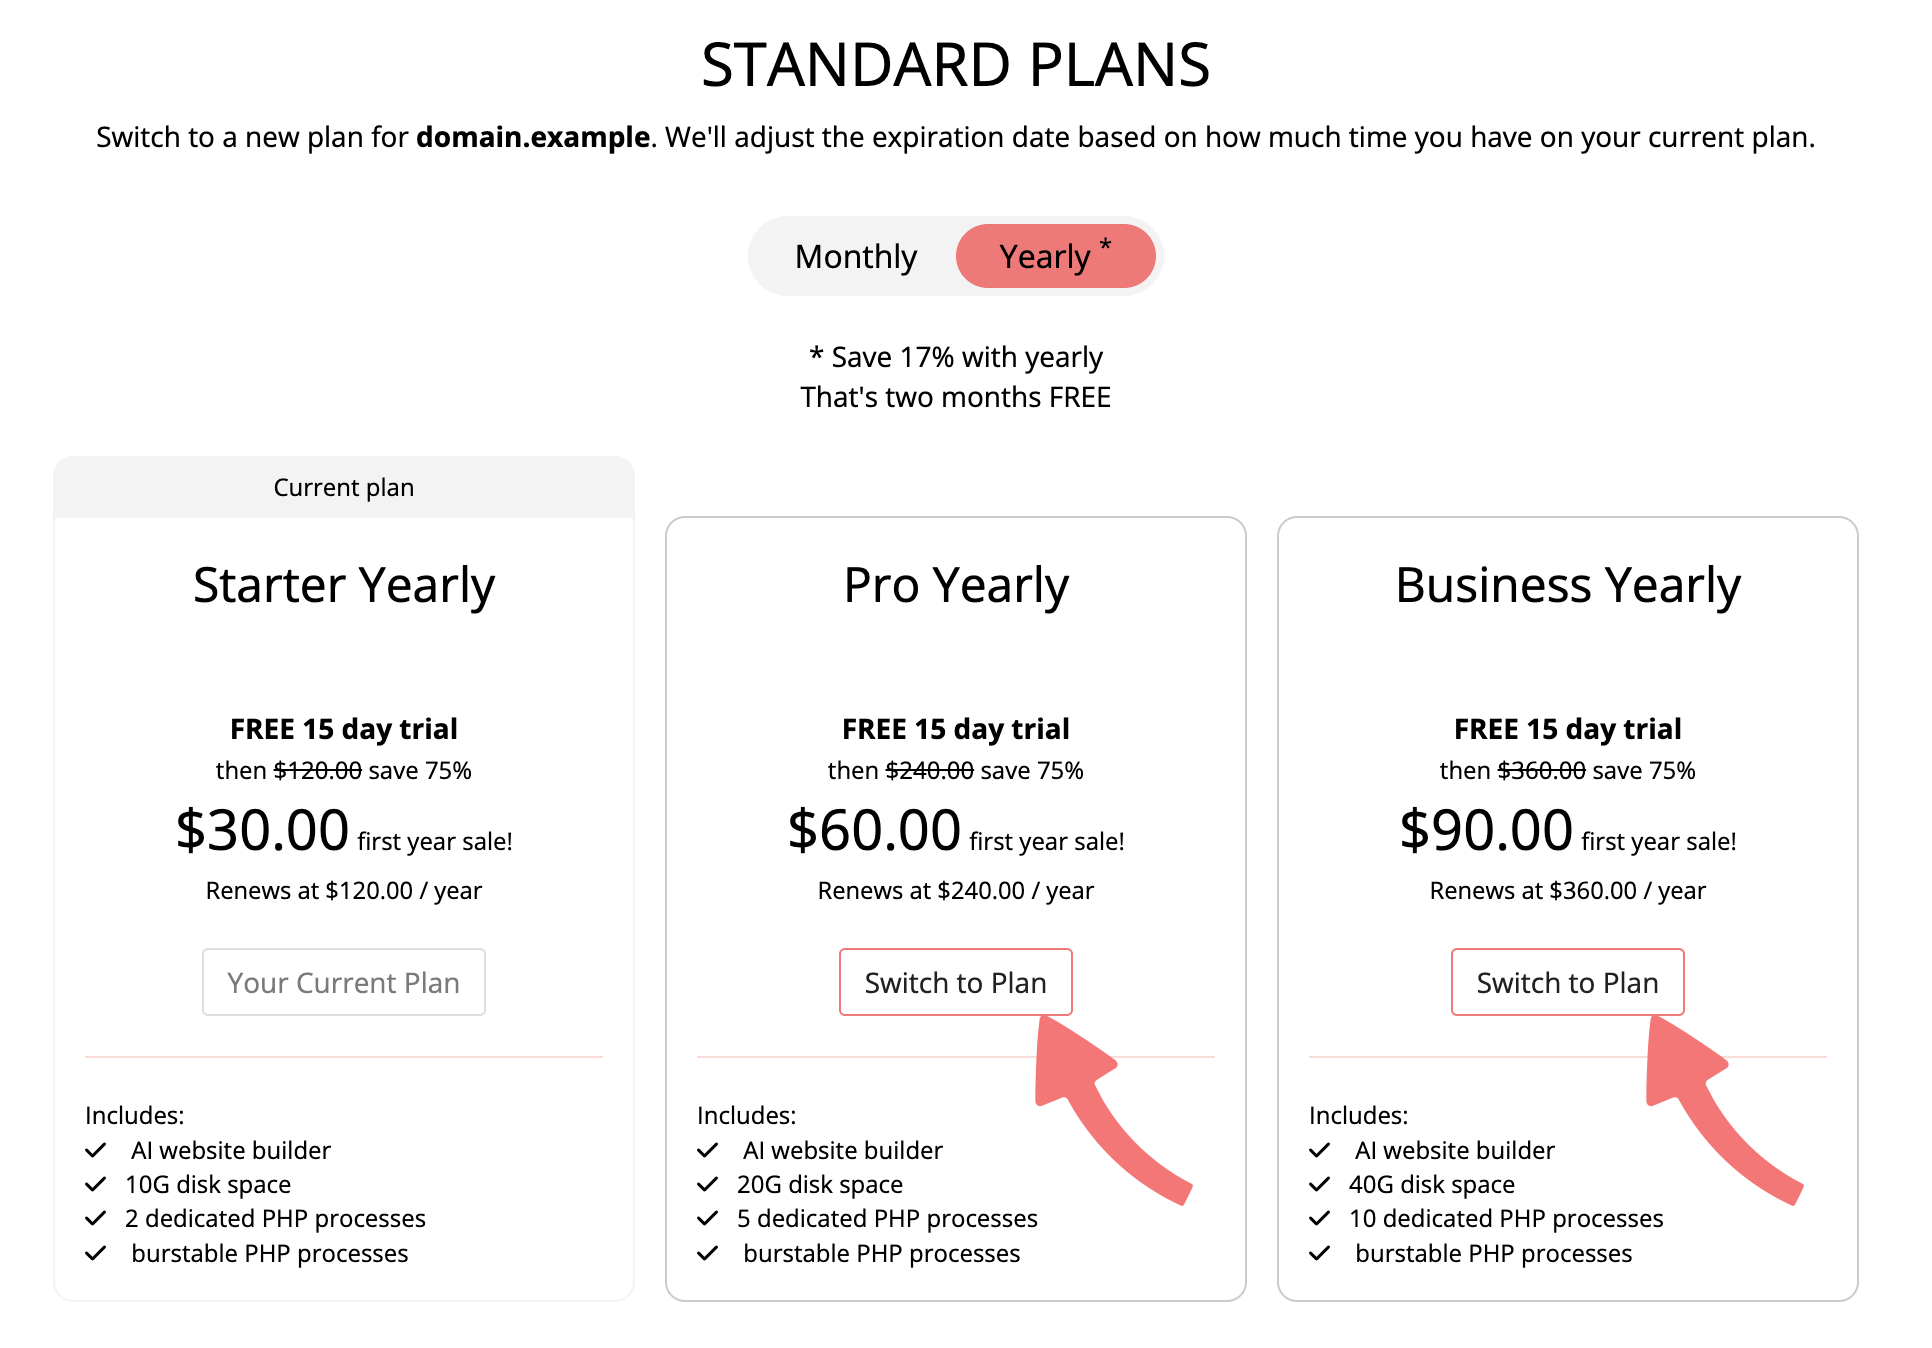
- This will automatically redirect you to our Cloud for WordPress page, where you can review the available monthly and yearly plans. Locate the plan you want to switch to and then select the "Switch to Plan" button.
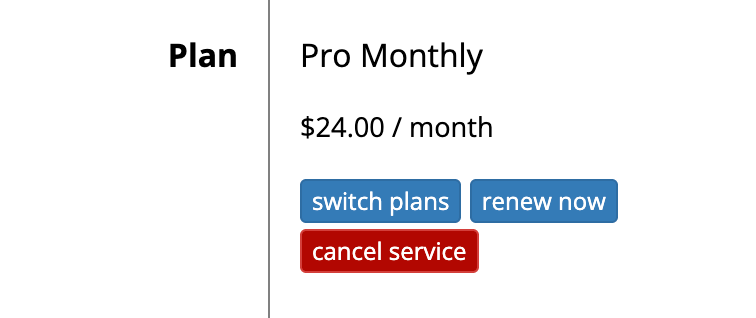
That's it! You will be redirected back to your Cloud for WordPress page, where you can see the new subscription reflected in the "Plan" section. If you also need to renew your plan, you can do so manually in that same "Plan" section. This guide goes into more detail on renewing your Cloud hosting for WordPress.
Feel free to reach out to our support team if you have any questions or concerns.