How to configure your domain for iCloud hosted email
If you wish to use Apple iCloud as the email hosting provider for your domain, that's no problem at Porkbun. First, you'll need to set up your Porkbun domain in iCloud, then update your domain's DNS records to route mail to iCloud's mail servers. Let's get started!
Setting up your Porkbun domain in iCloud
1
According to this guide from Apple, you will need an Apple ID with two-factor authentication turned on. You will also need to set up iCloud Mail on one of your Apple devices, as explained in this article.
2
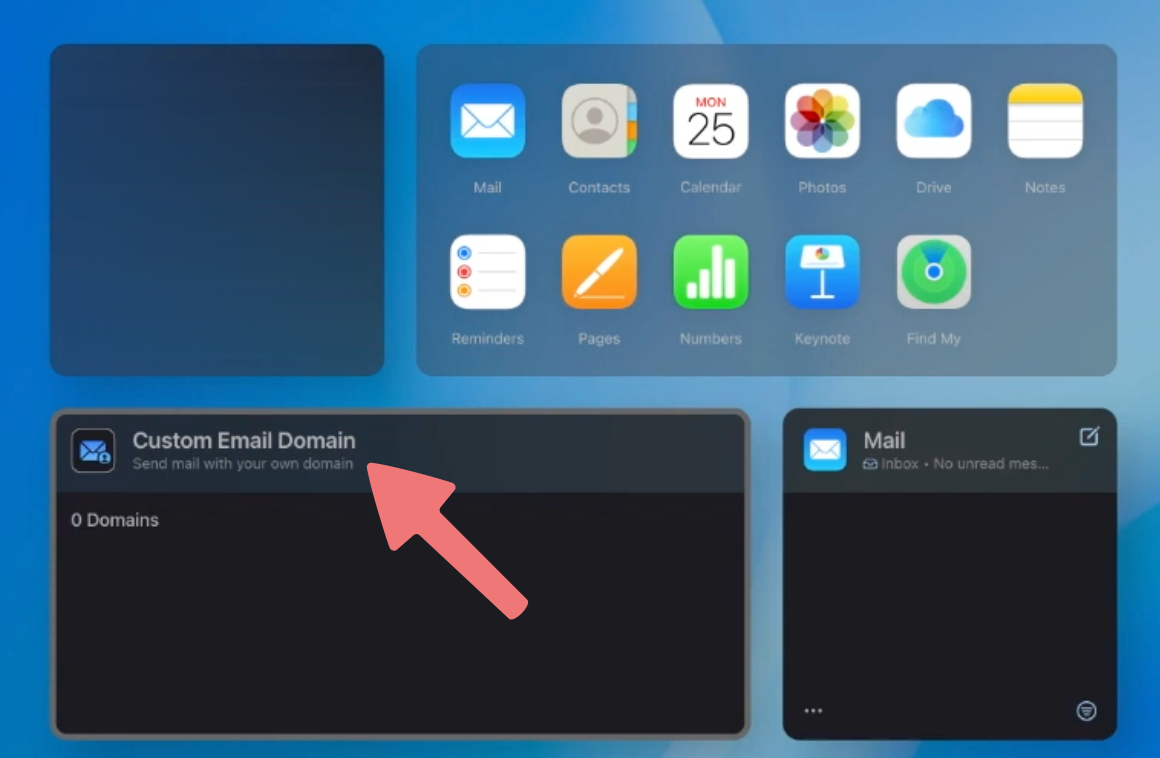
Once you're ready, open a new browser tab and log in to your iCloud.com account. On the main iCloud+ page, locate the "Custom Domain Email" option and click it.
This option should also be available on the general settings page for iCloud, regardless of the device you're using.
3
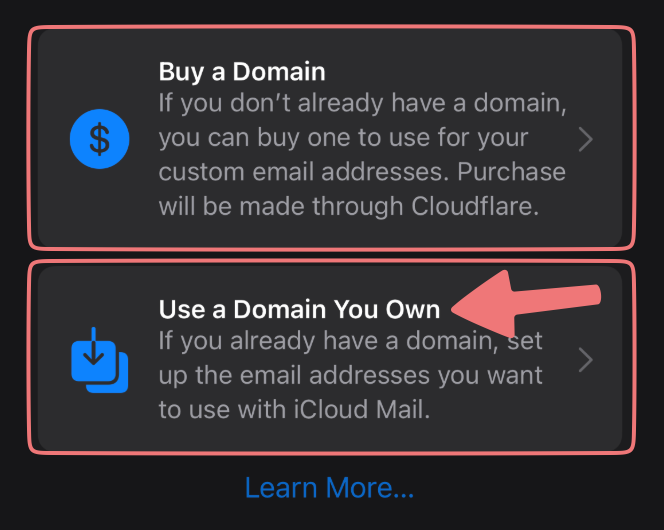
On the next menu that appears, click the "Use a Domain You Own" option, since you've already registered your domain with Porkbun.
4
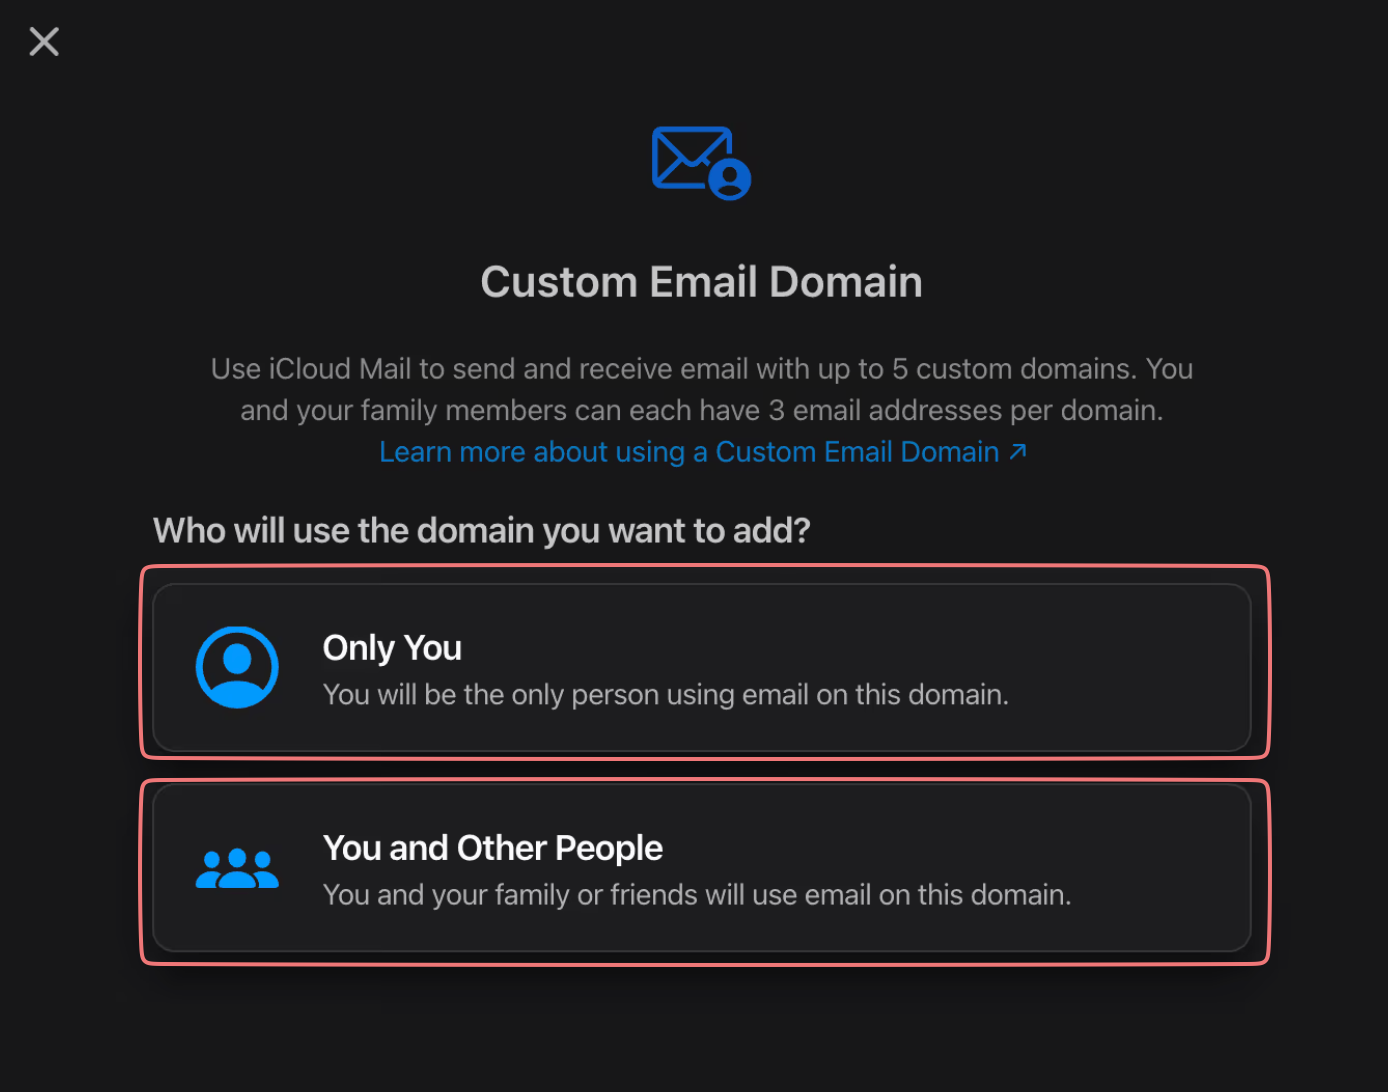
Next, you'll choose who can use the domain to set up custom email addresses. You can select whichever option is best for you, but we'll assume you're choosing "Only You" in this guide.
5
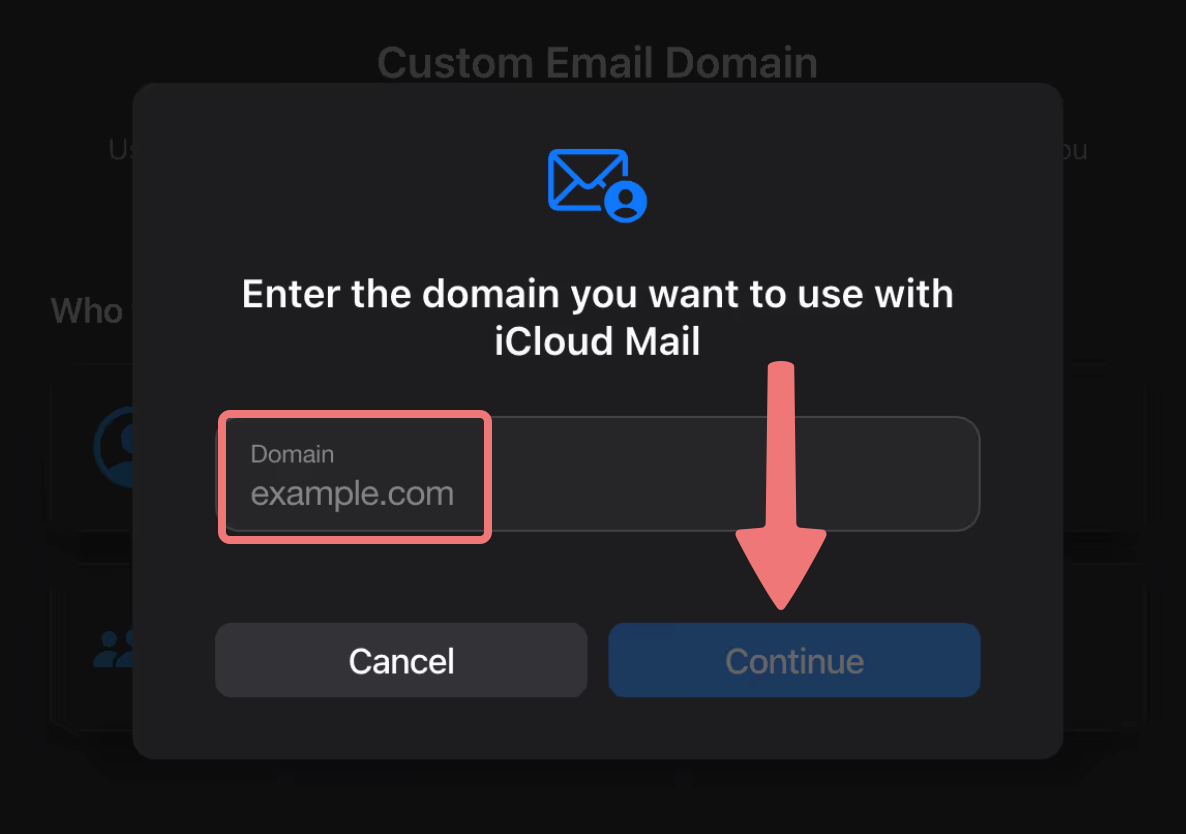
Enter the domain name you are connecting to iCloud, without "www" in front of it. After typing it in, click on "Continue".
6
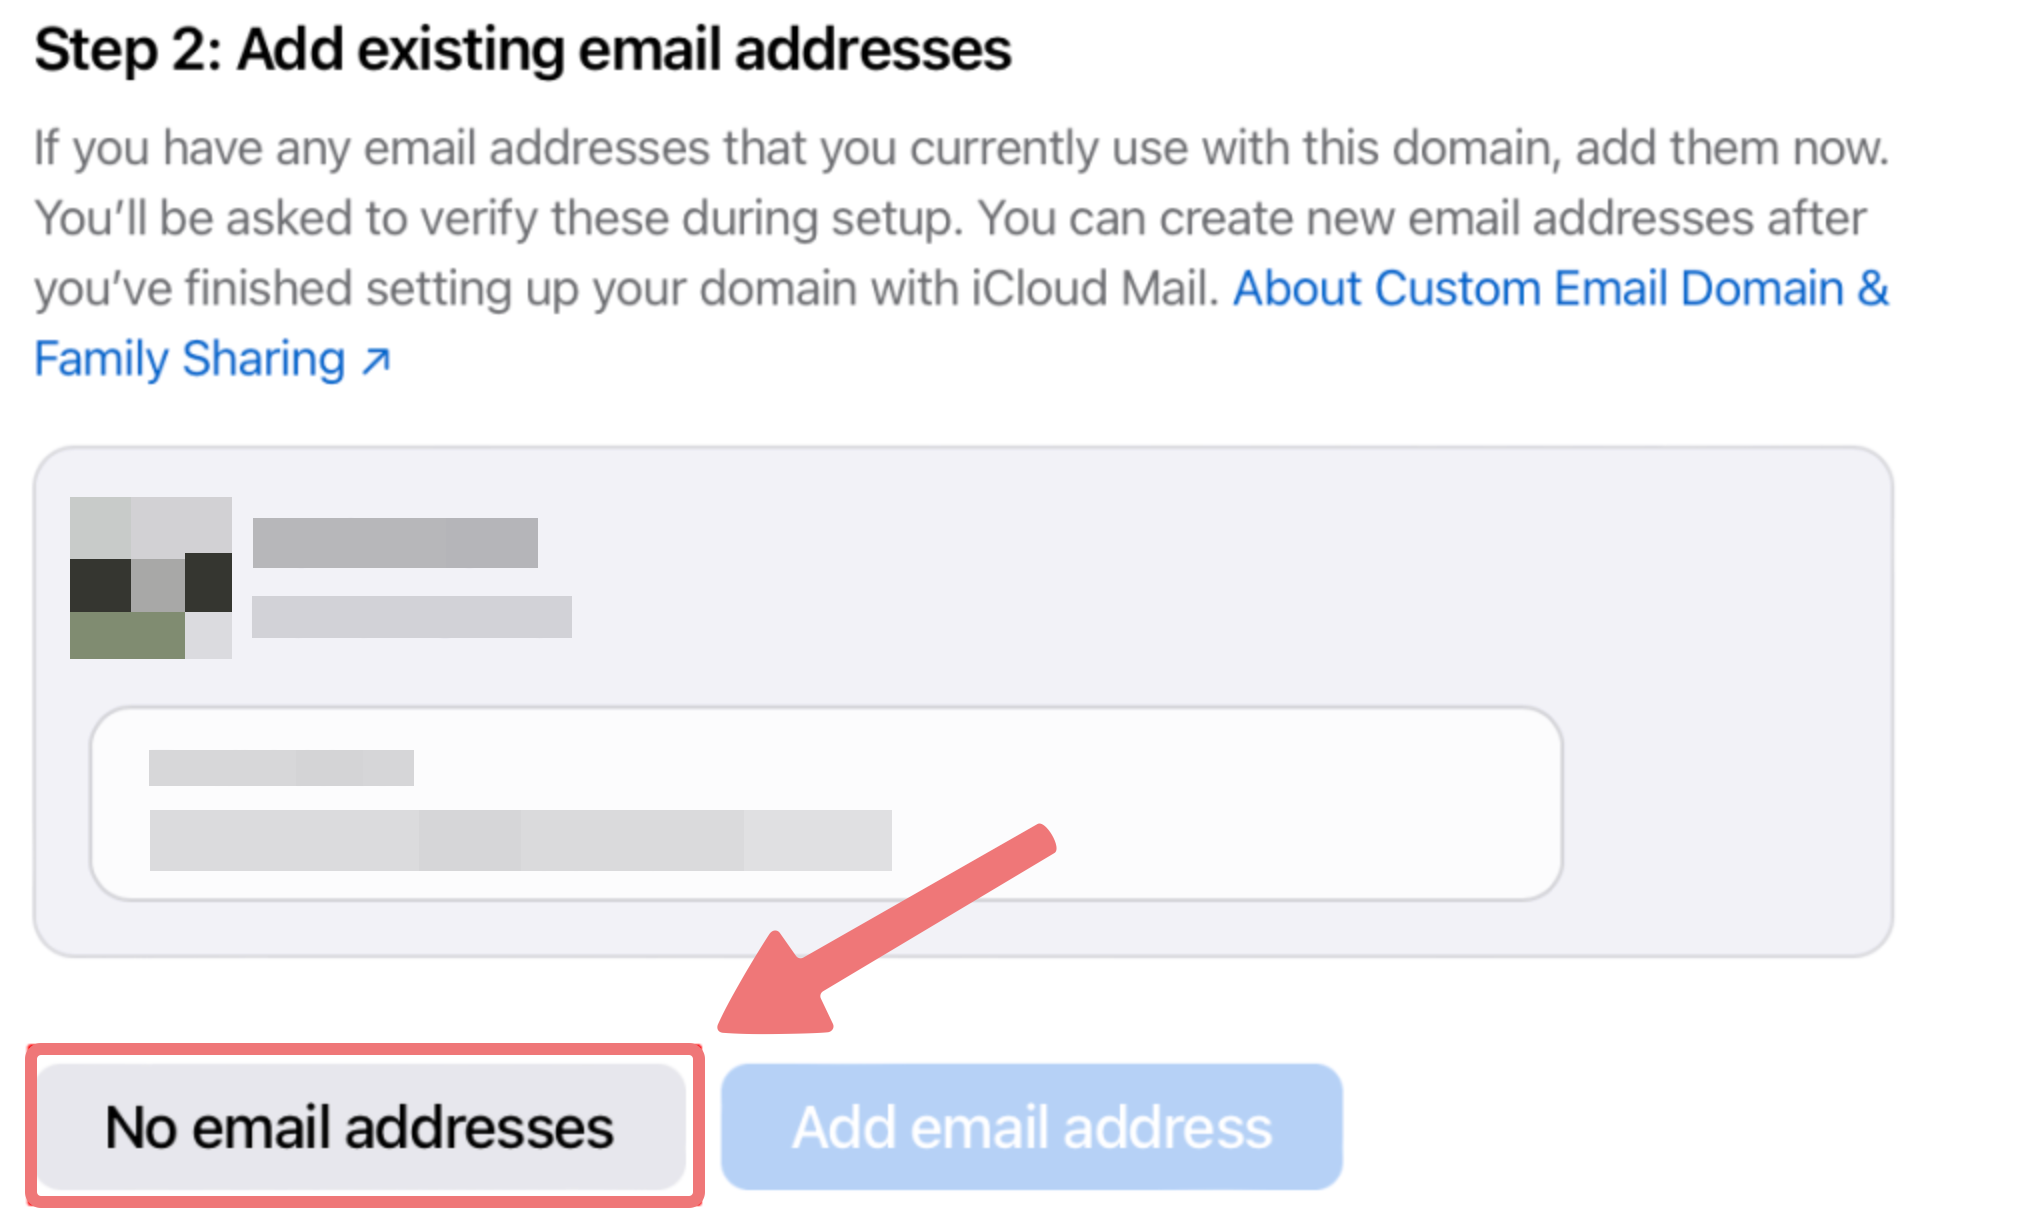
On the next screen, you'll see that step 1 has been completed, and step 2 prompts you to add existing email addresses. You will be creating the actual email addresses at the end, so for now click on the button labeled "No email addresses".
7
Next we will view the DNS records that will need to be added to your domain. Under step 3, click on "View".
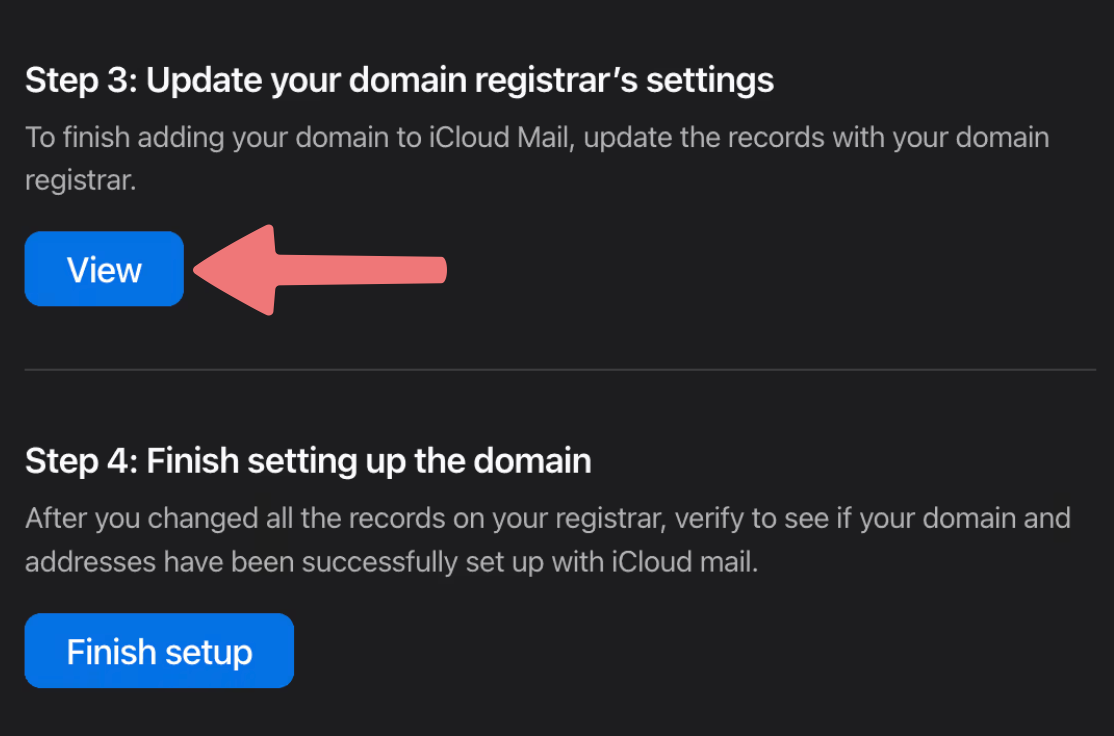
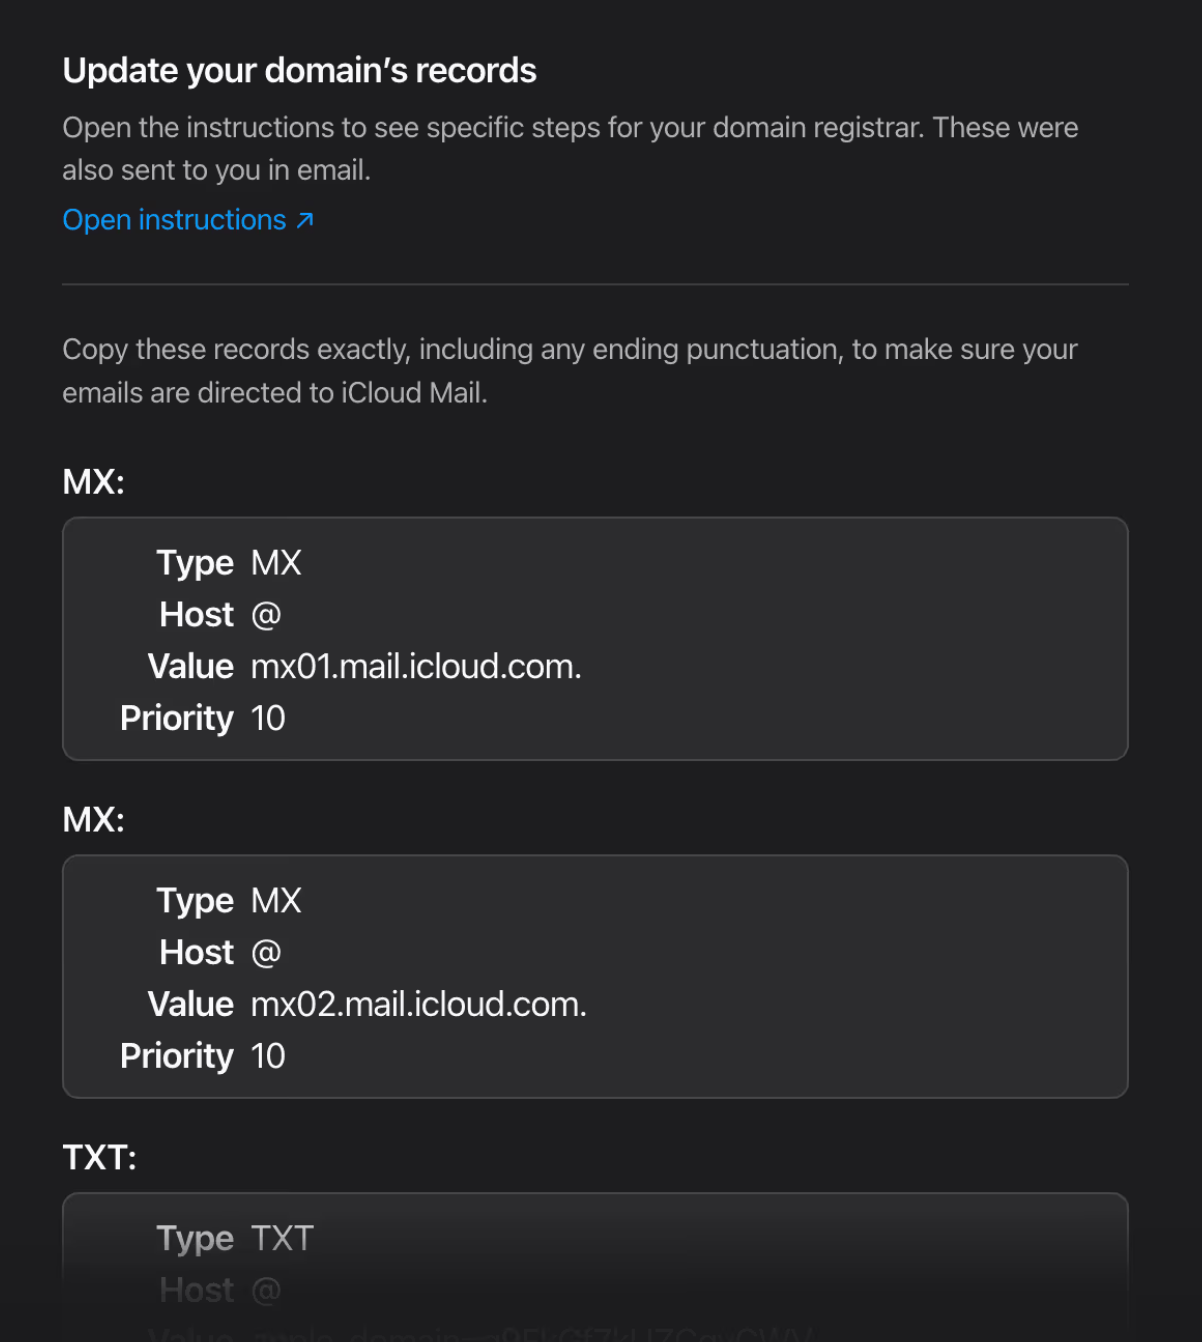
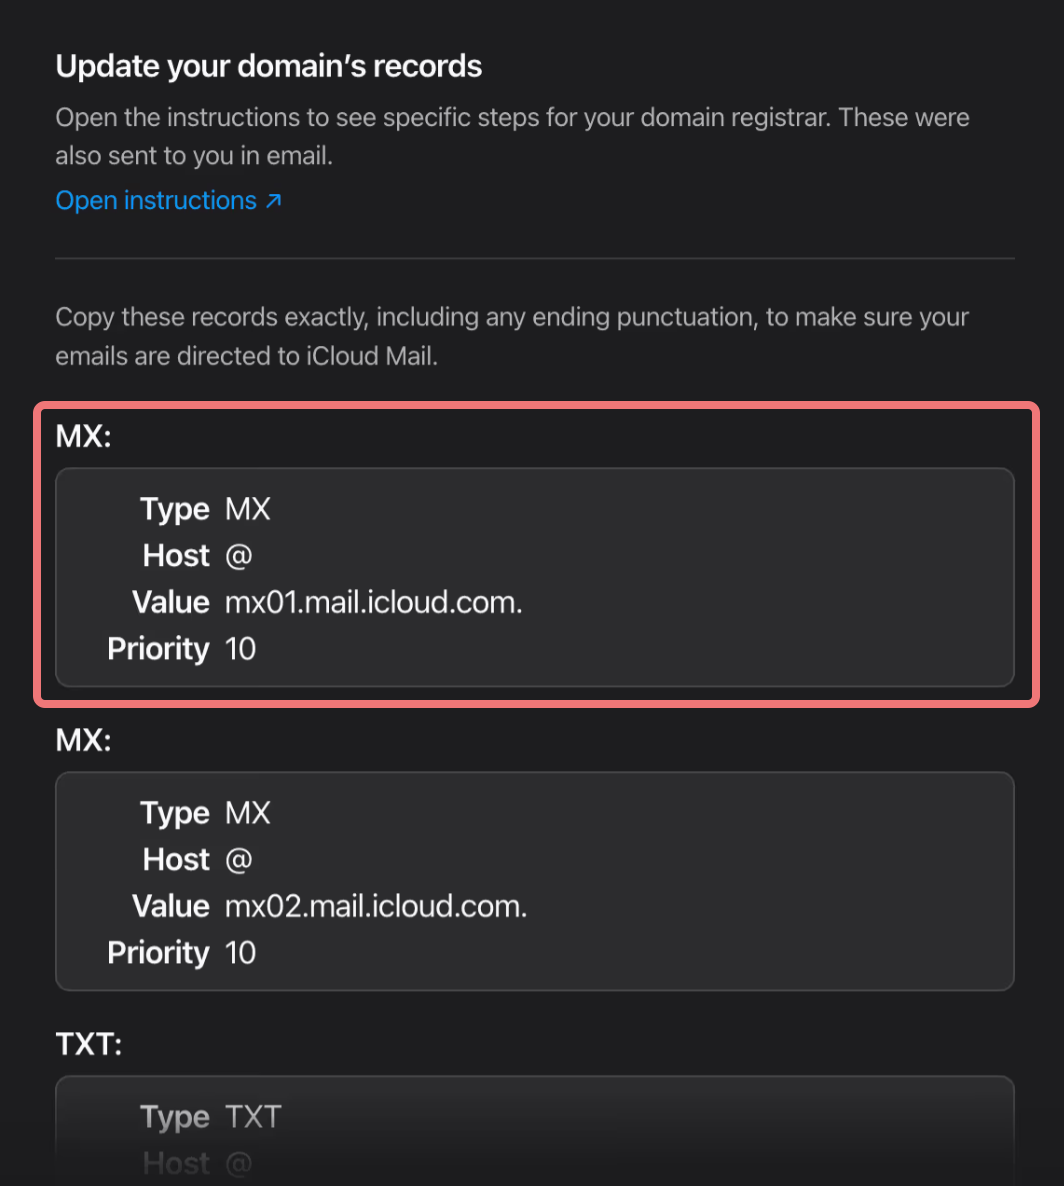
You will then be provided with a list of DNS records. The next step is to add these records to your domain on Porkbun. Leave this iCloud page open for now.
1
Open up a new tab or window in your browser. Navigate to porkbun.com/account/login and log in to your account.
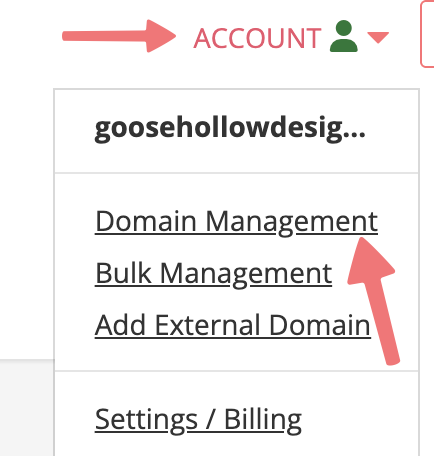
You should be directed to the Domain Management page. If you're already logged in on Porkbun, click ACCOUNT in the top-right corner and select "Domain Management" from the list.
2
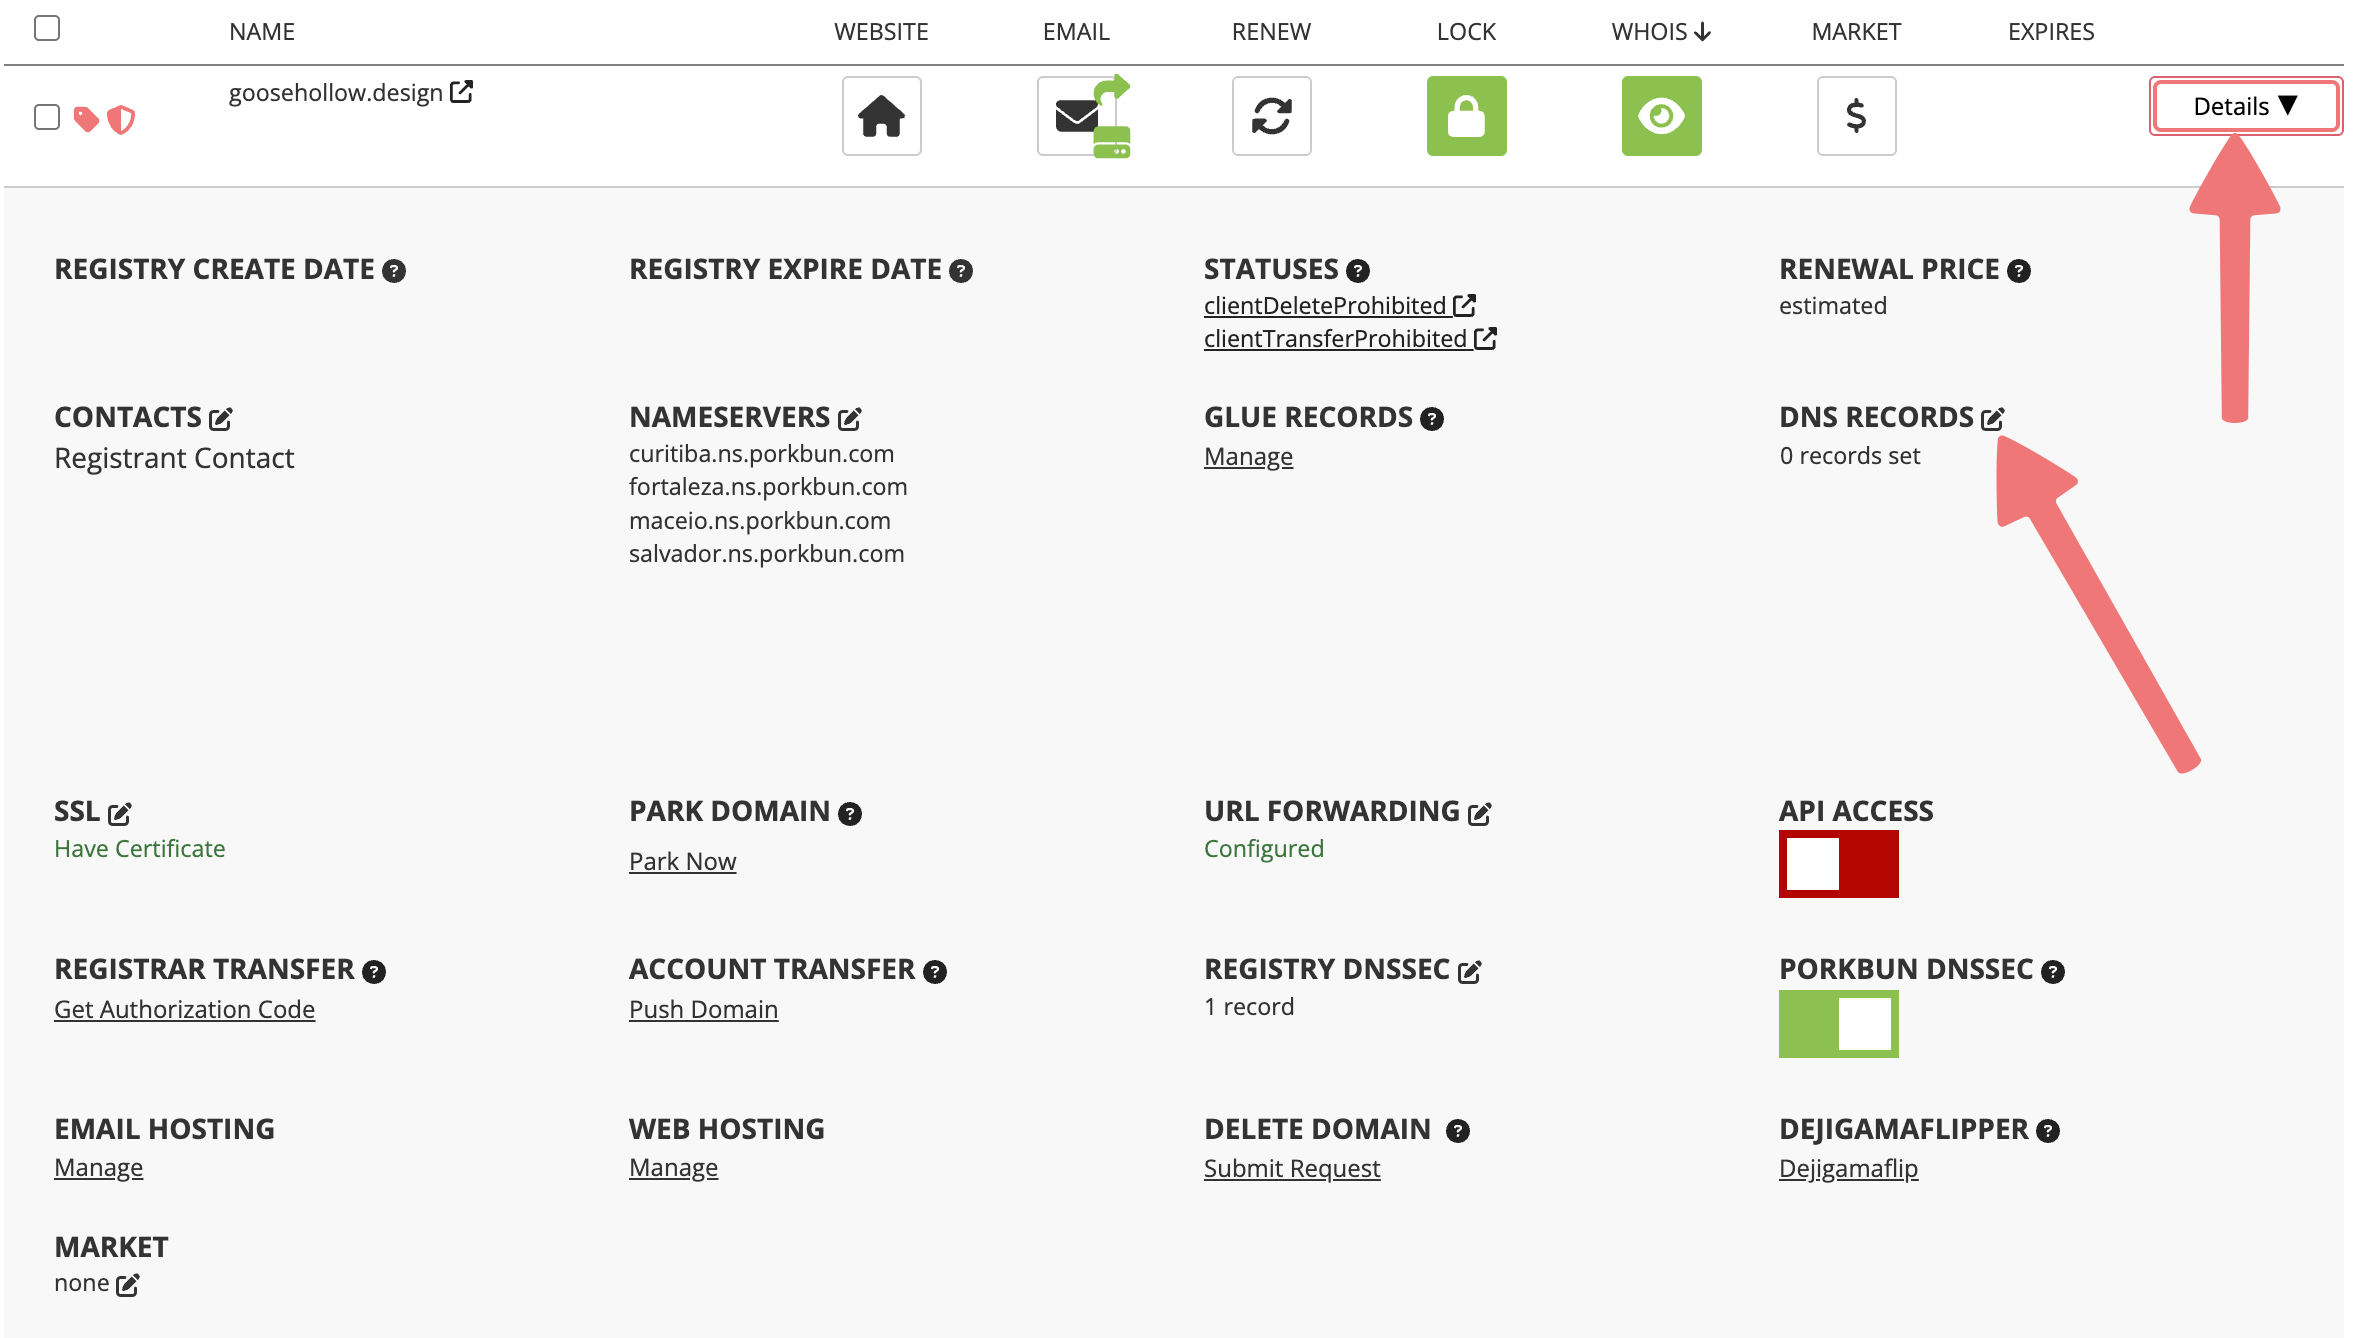
Scroll down to the domain that you're connecting to iCloud. All the way to the right of the domain, click on the "Details" button. In the details menu that opens up, locate the "DNS Records" option and click the edit icon.
3
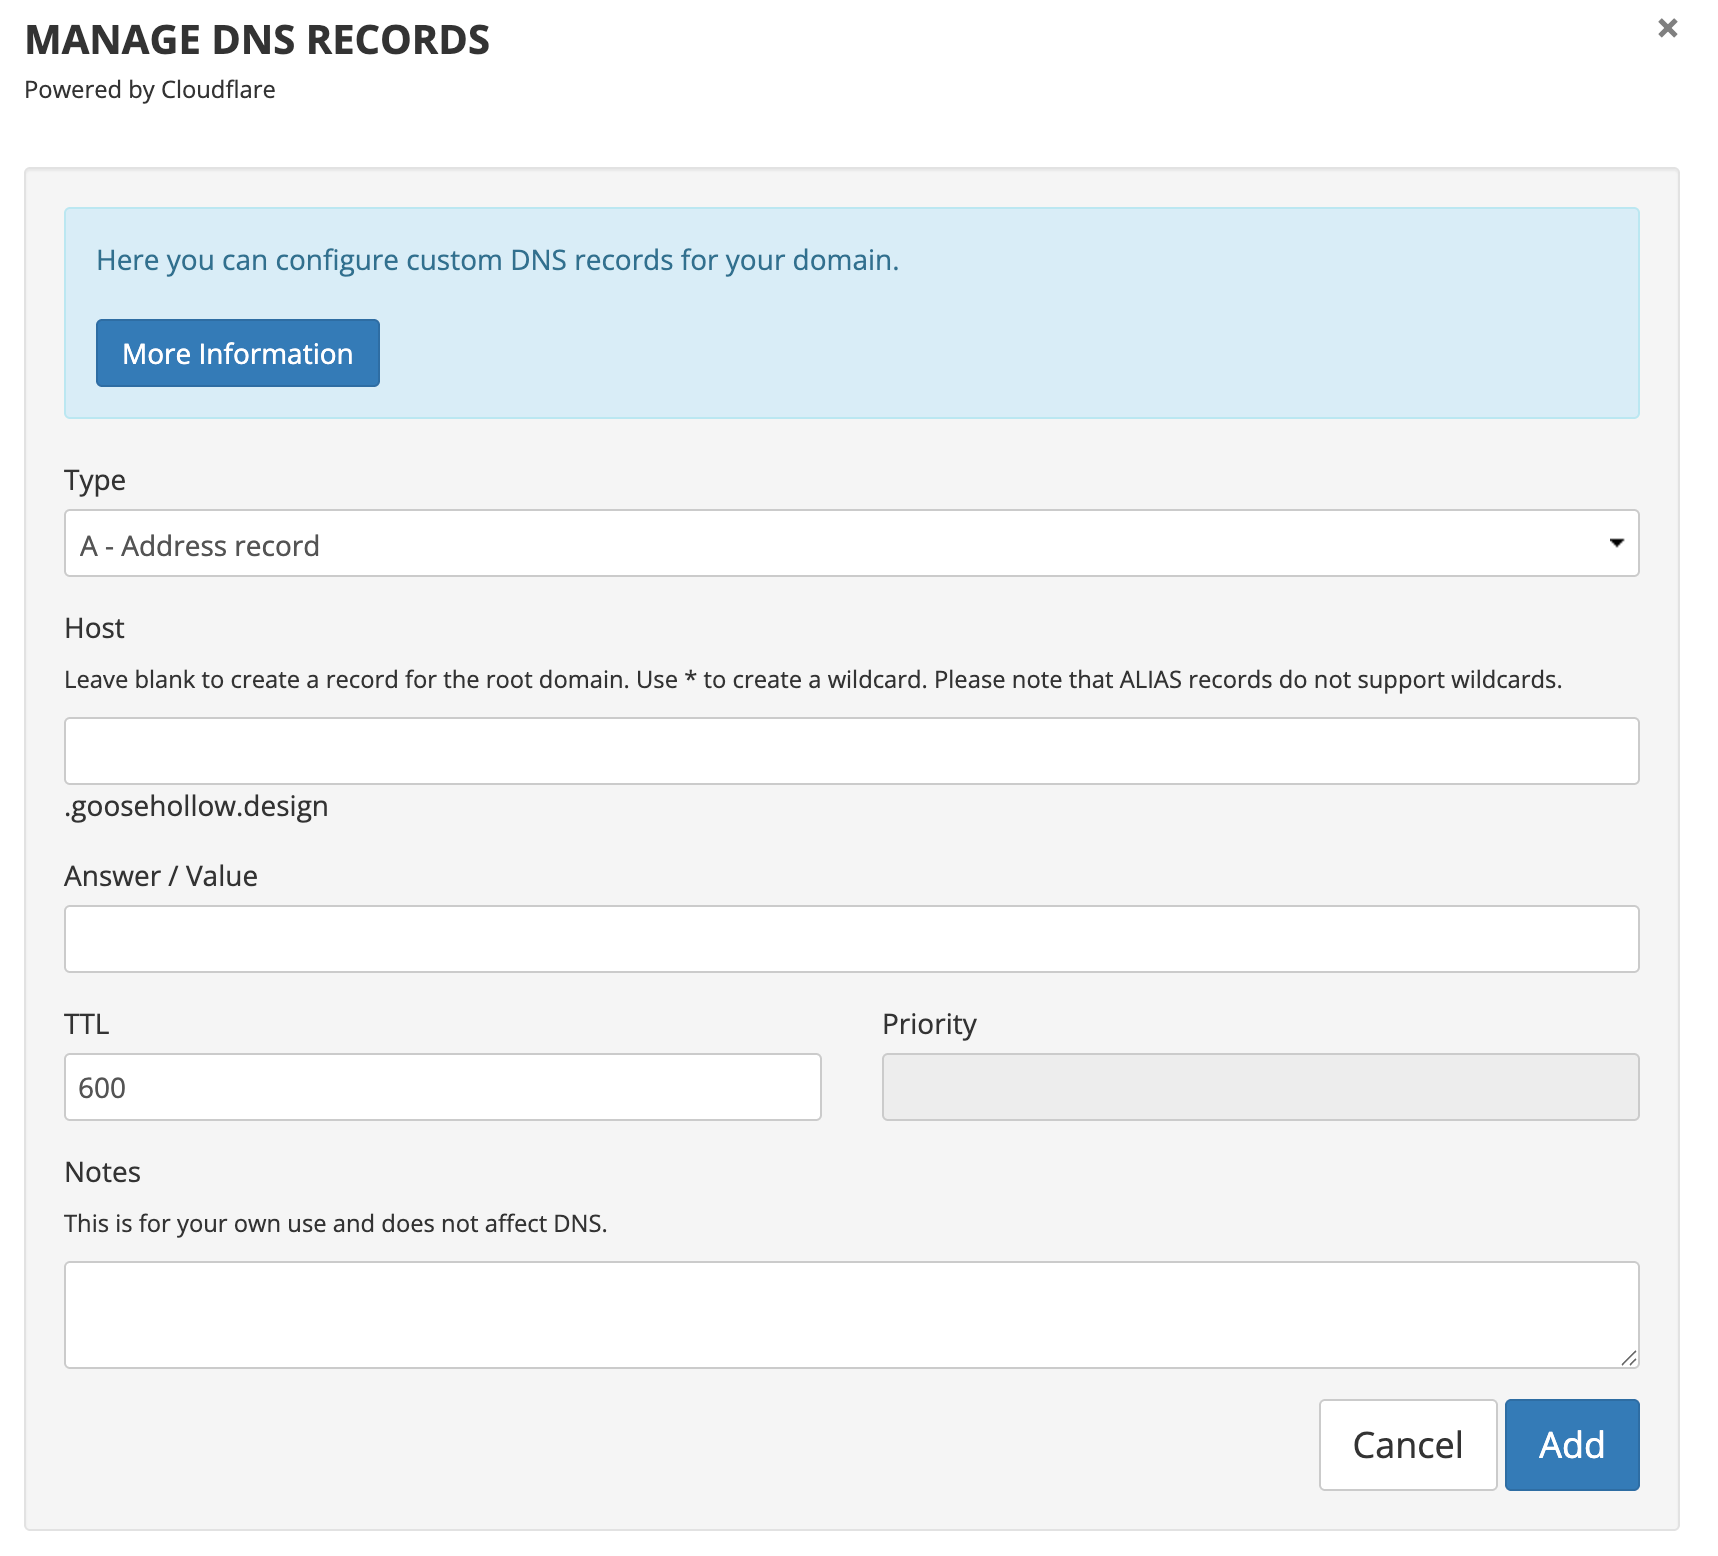
The "Manage DNS Records" window will appear, where we can create the DNS records for iCloud. Scroll down to the bottom section labeled "Current Records". If there are any existing records with a type of MX, delete them.
Also check if there are any TXT records that have a value starting with "v=spf1". If so, delete them too.
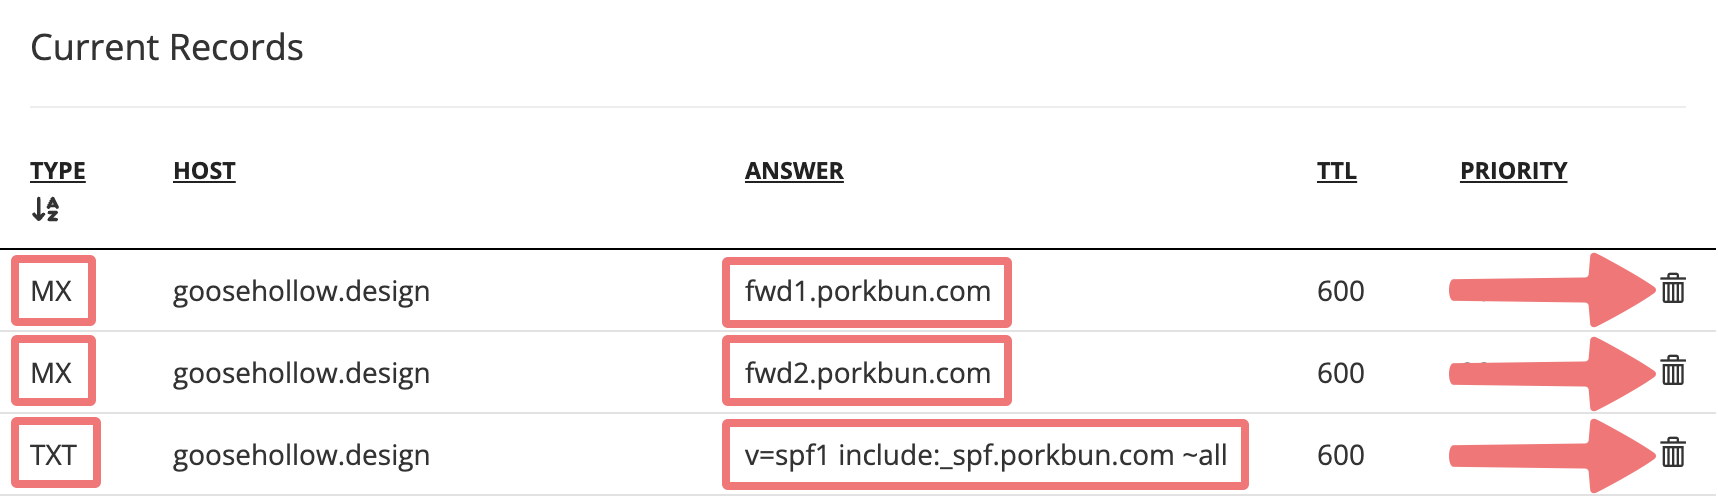
Once you've deleted any existing MX and SPF records, scroll back to the top of the menu and locate the section where you can add new records.
4
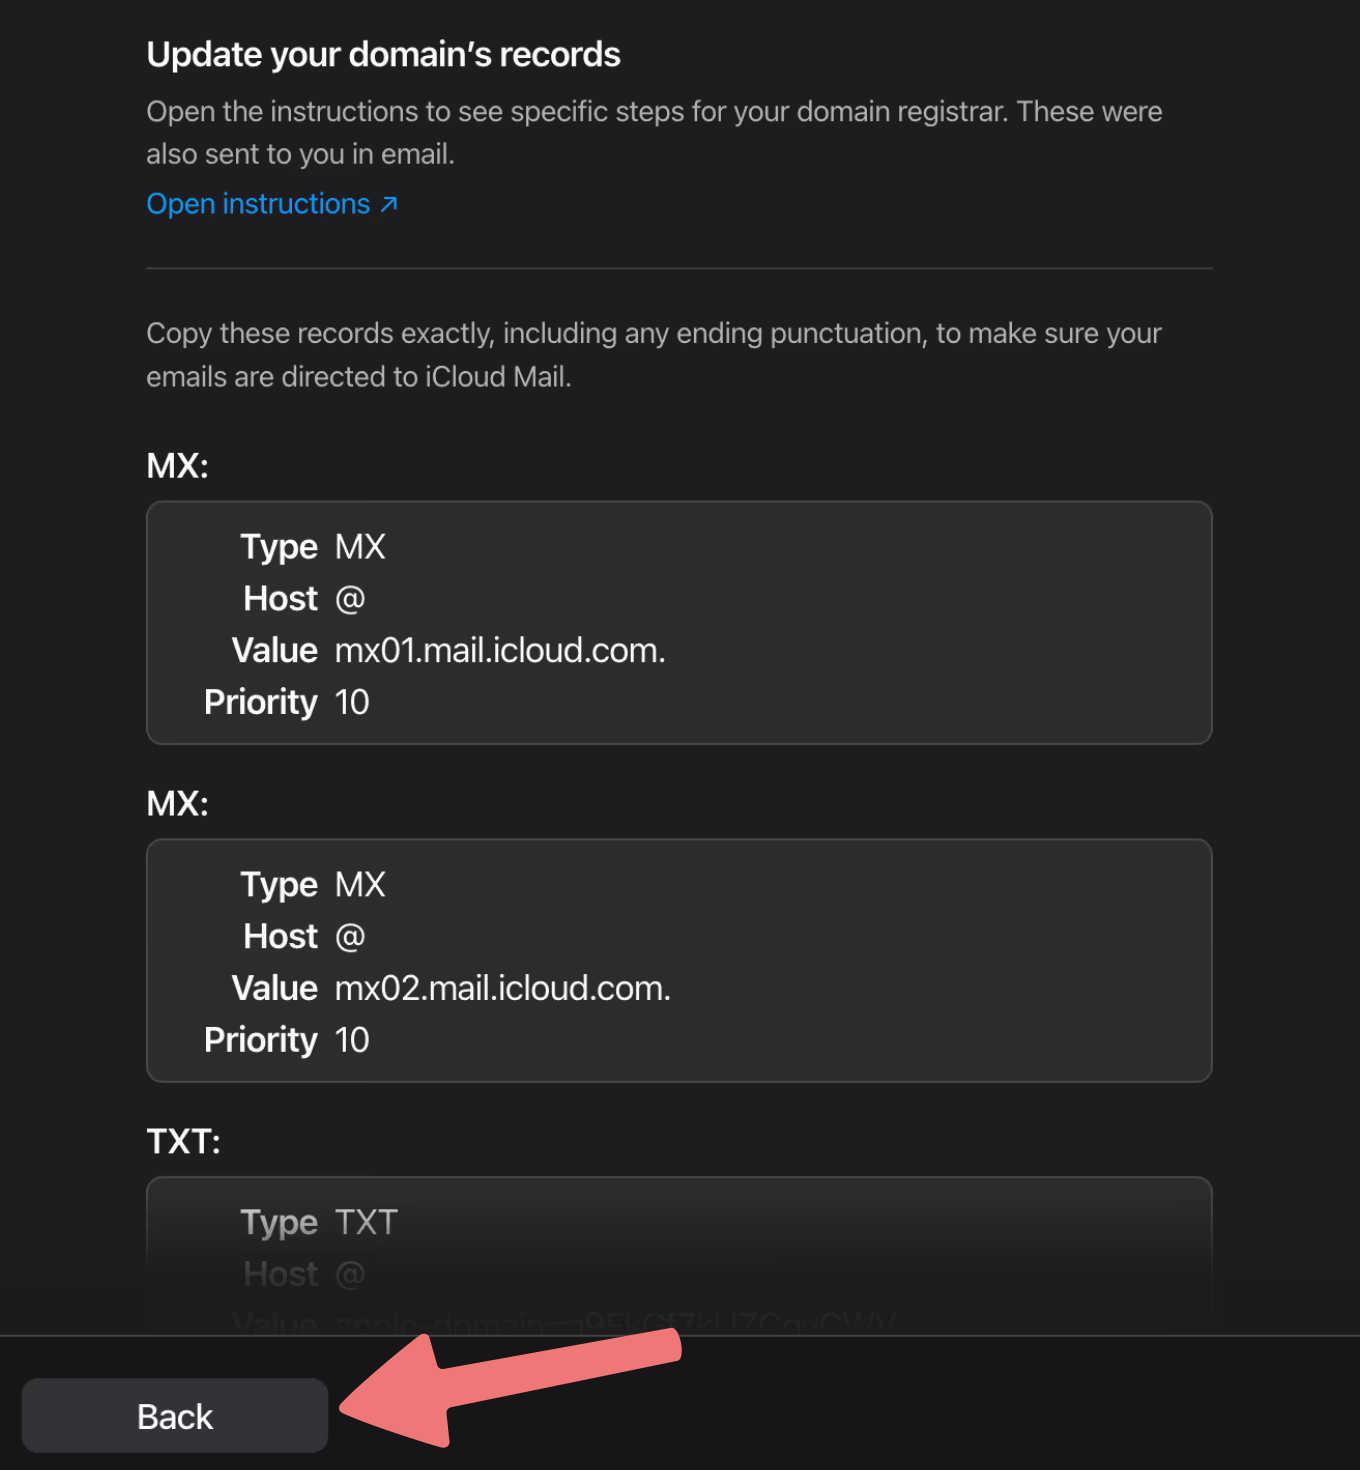
Leave the Porkbun DNS window open for now. Switch back to the tab you left open earlier, showing the DNS records that iCloud provided you for your domain.
Take note of the first record, particularly what's shown in the "Value" section. We will be creating this record on Porkbun.
5
Switch back to Porkbun and input the information for the first record. You'll notice that iCloud stated to use "@" in the "Host" field. On Porkbun, you can simply leave the Host field blank. Here's what your record should look like:
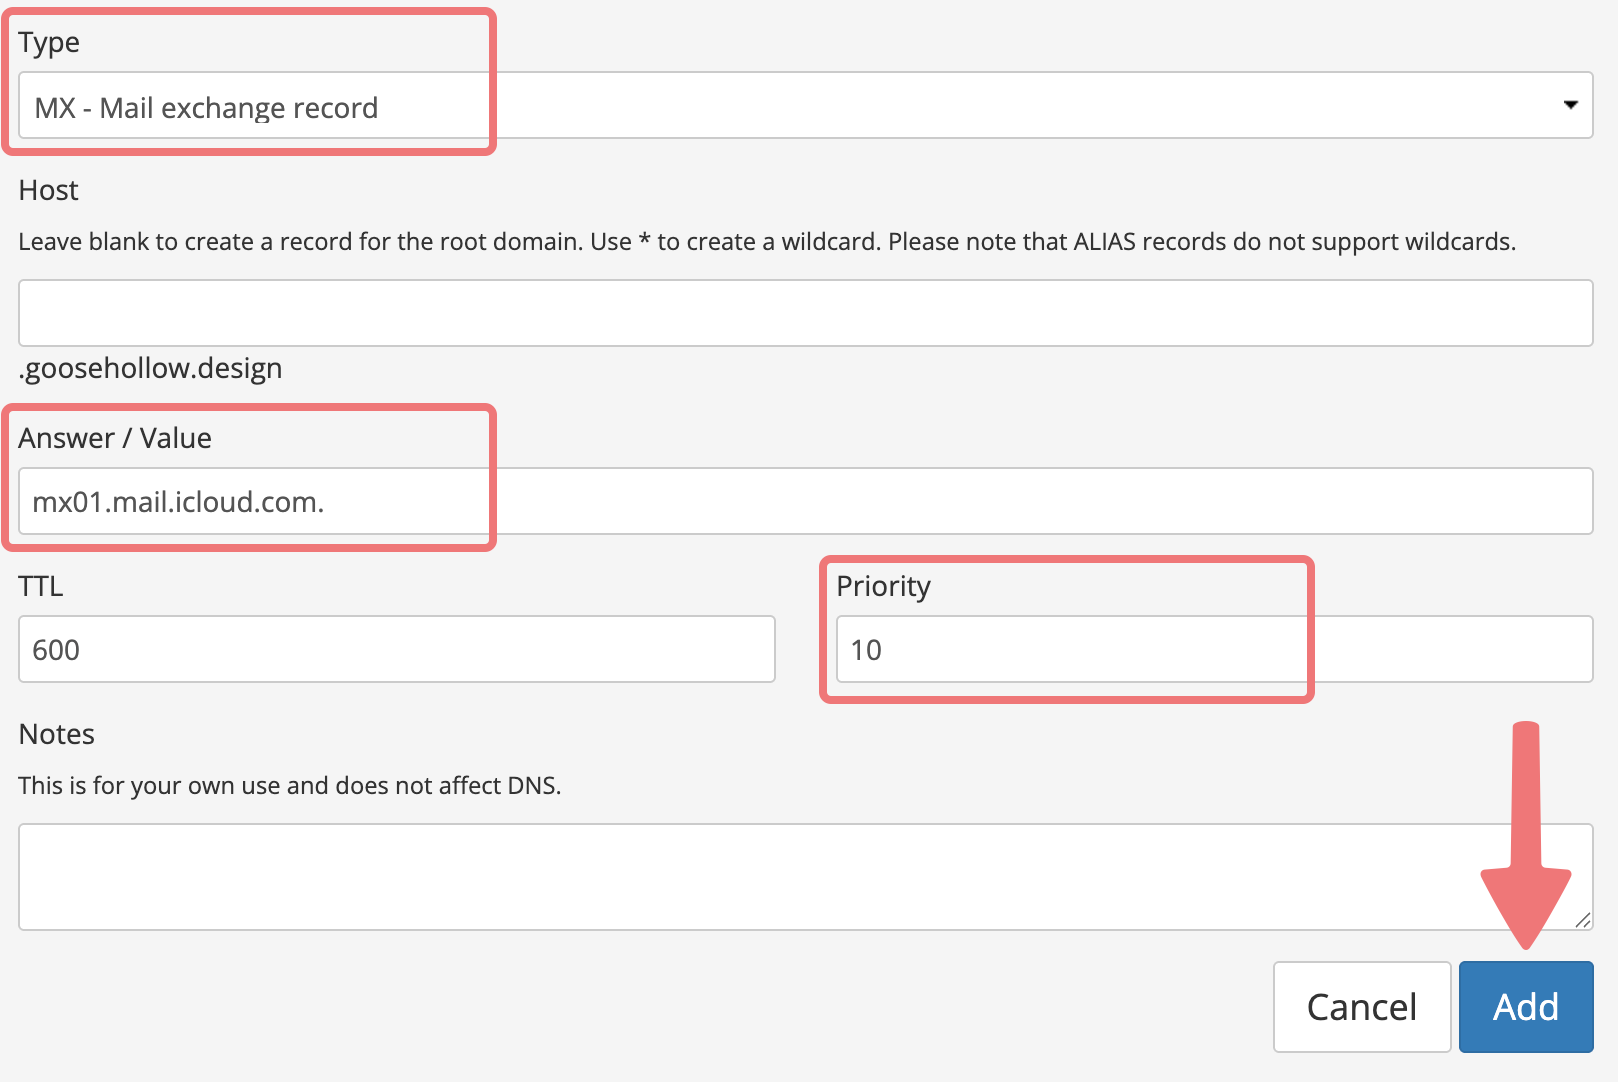
Once you've entered the right information, click on "Add" to finish creating the record.
6
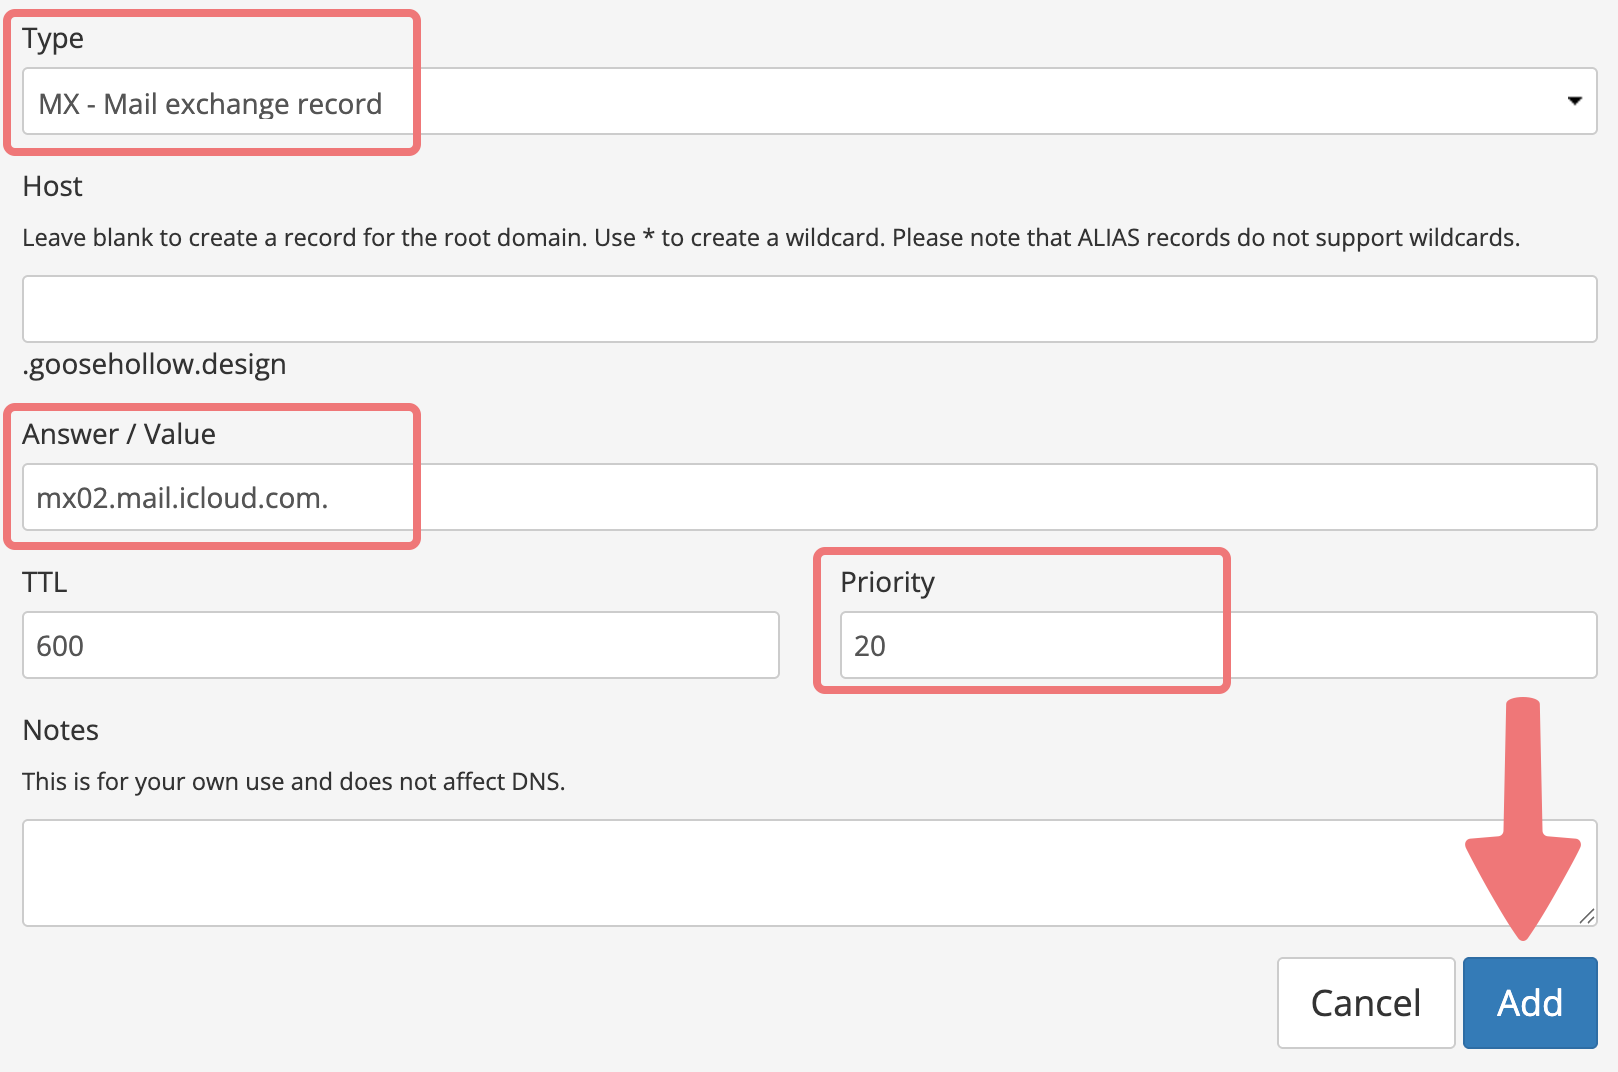
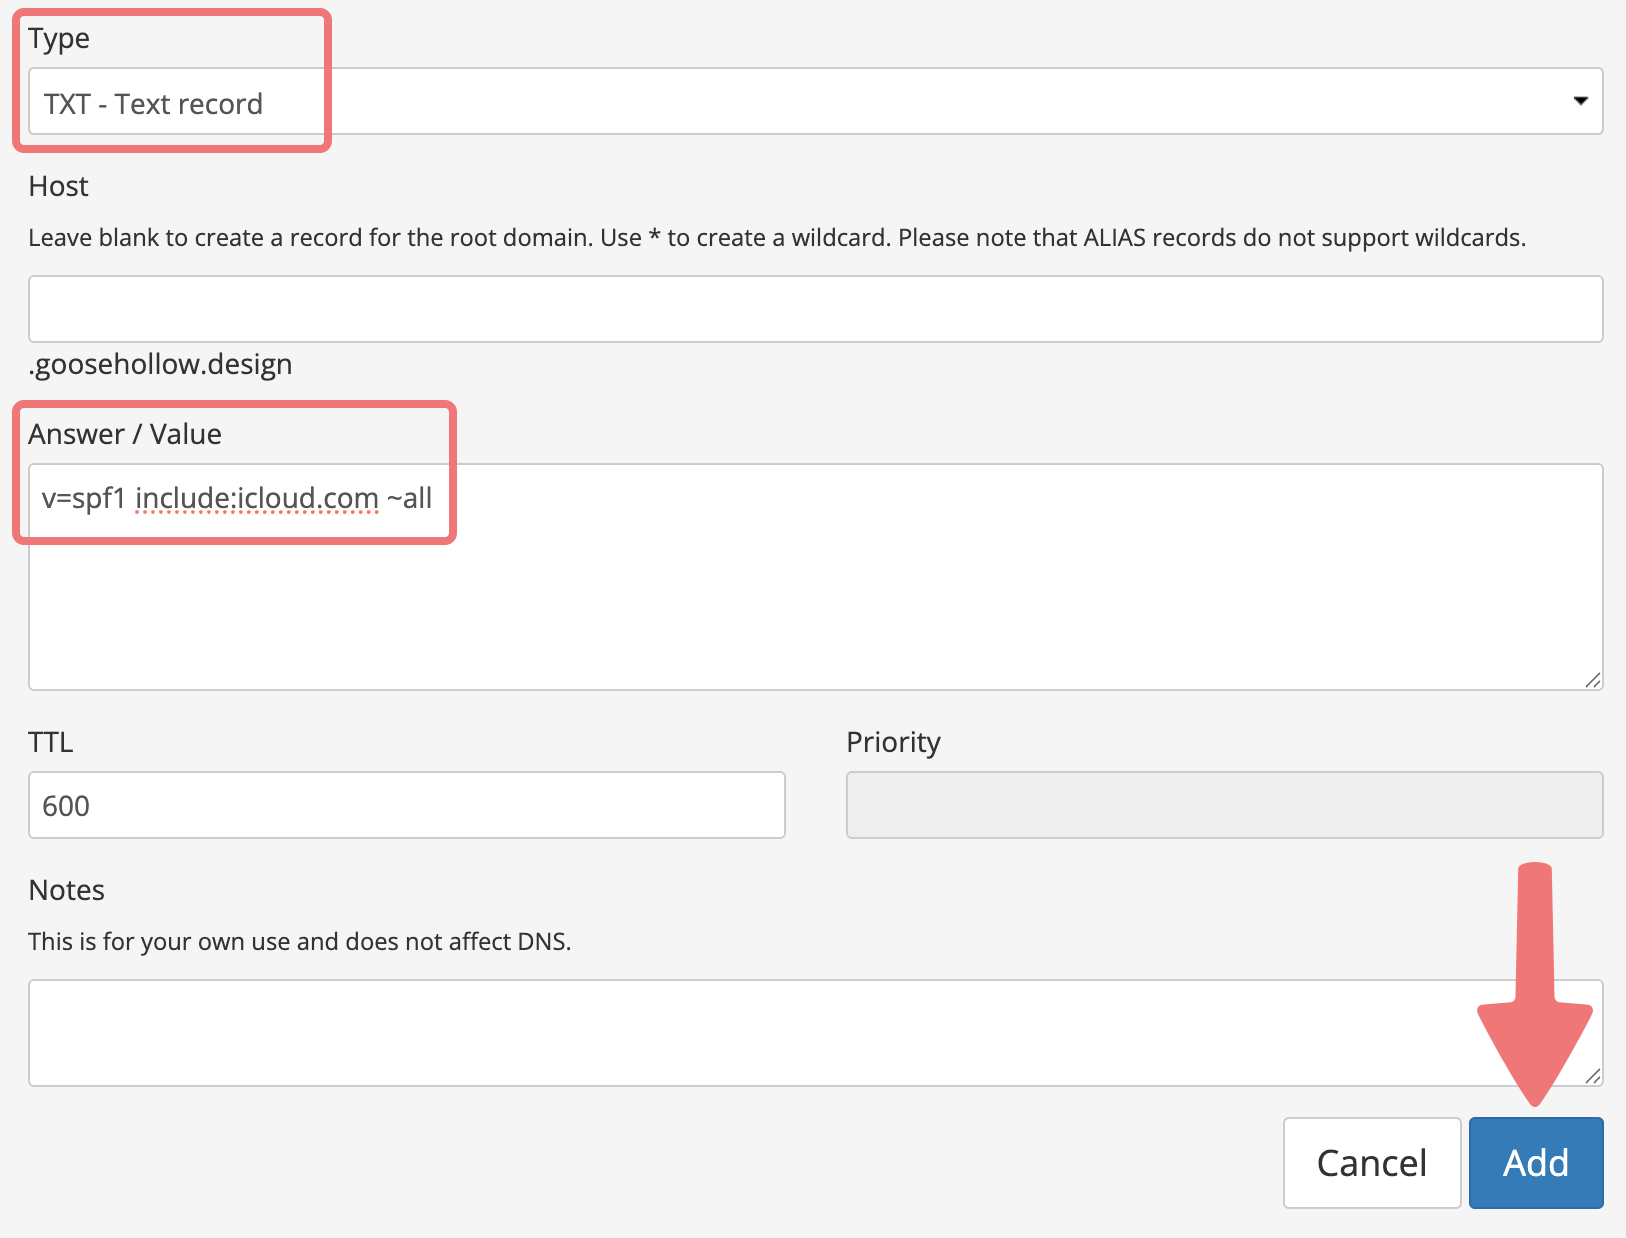
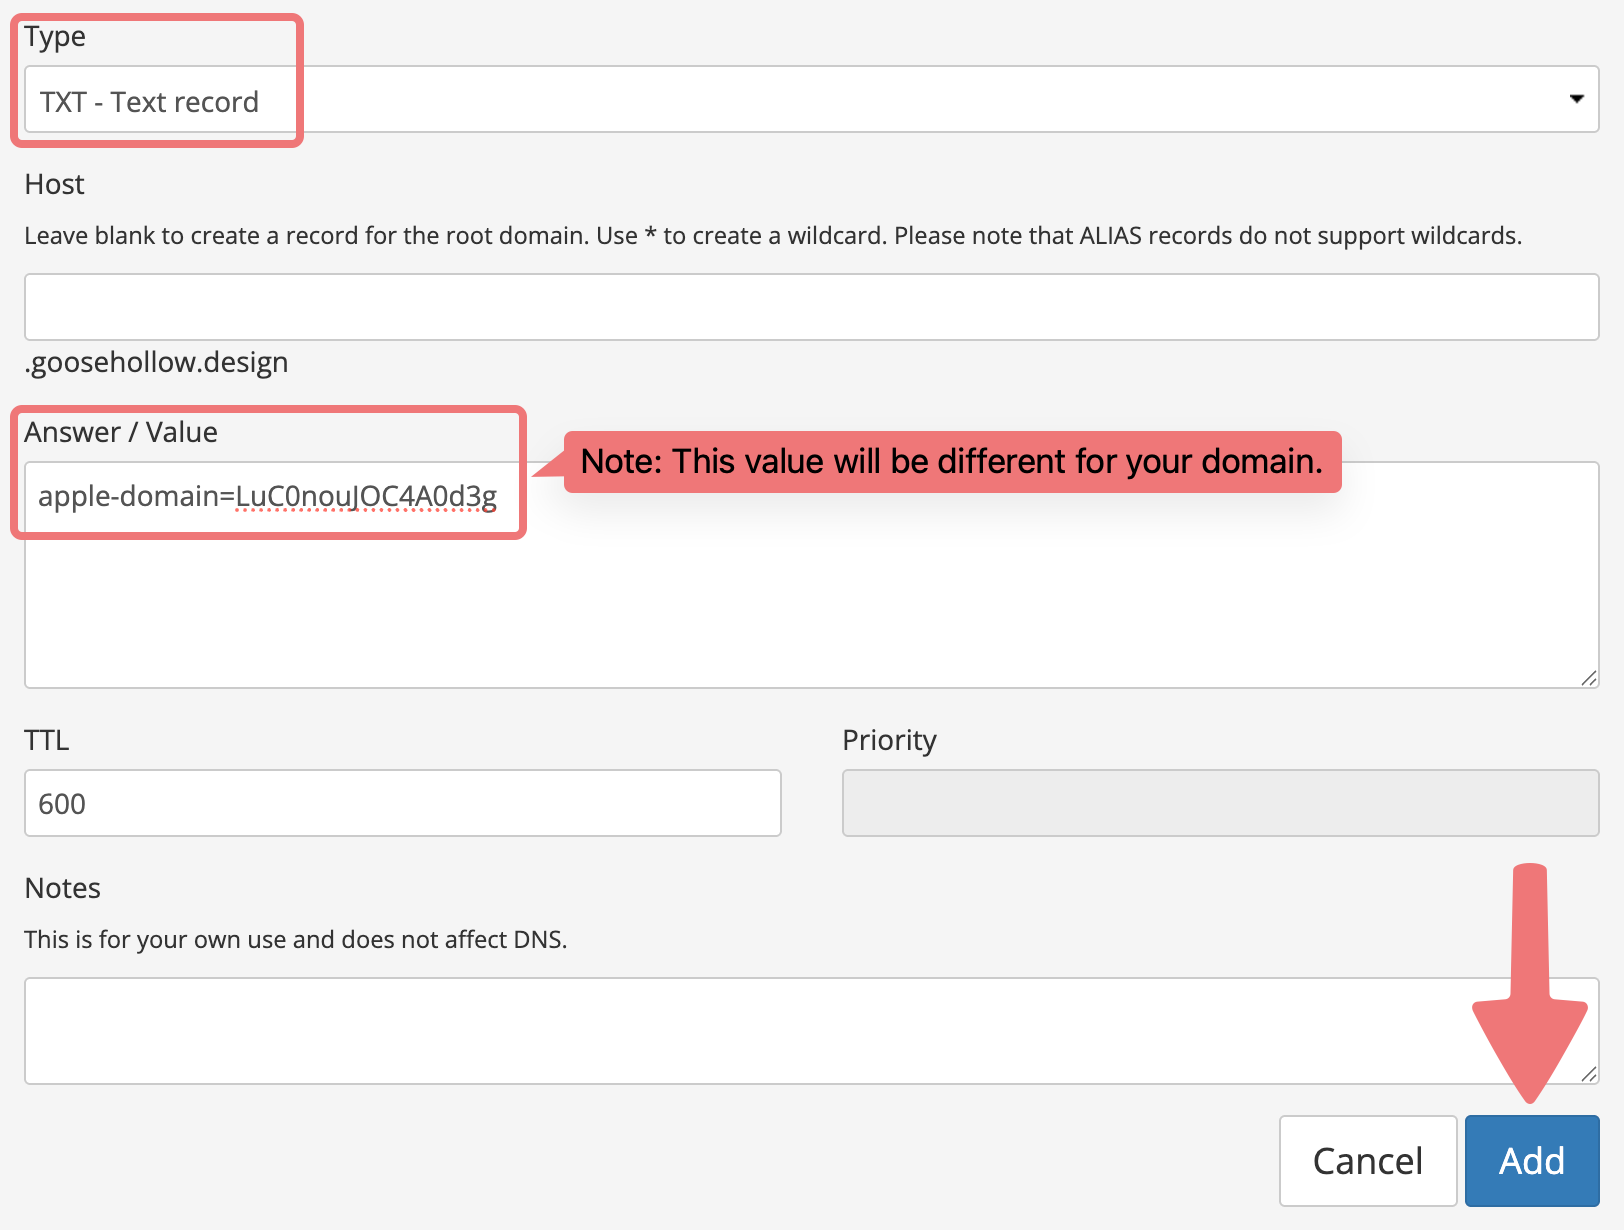
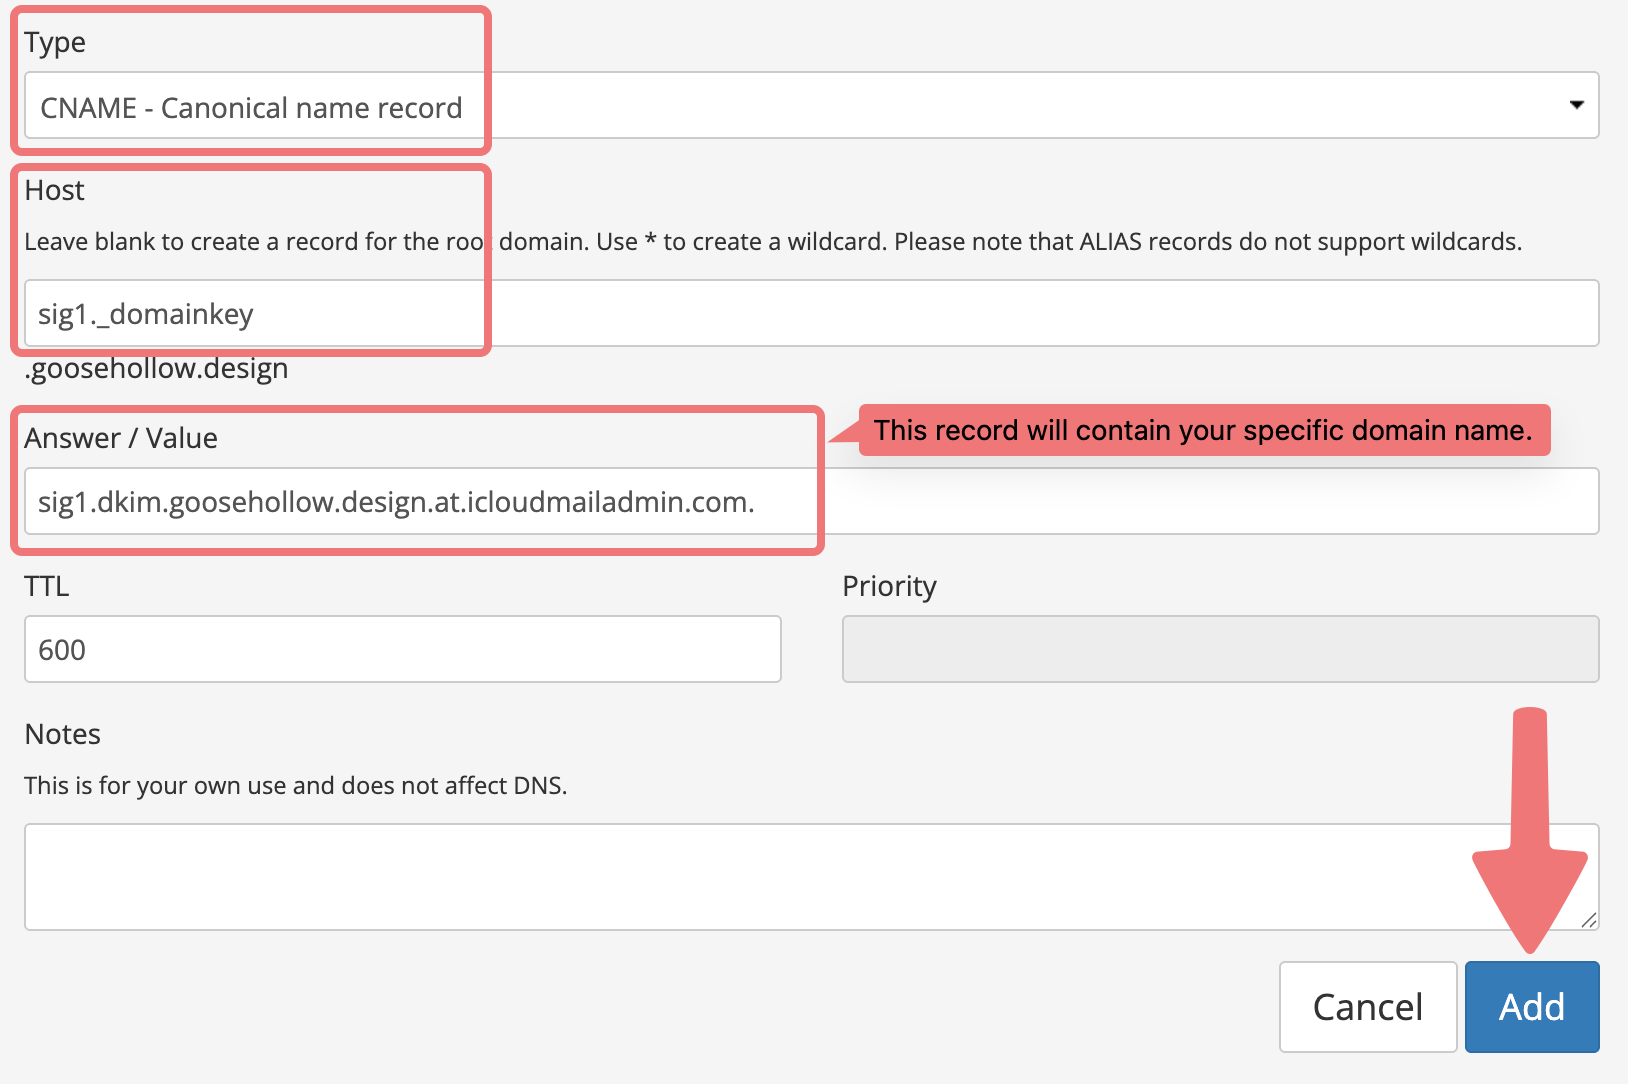
Repeat the same process for all of the other records iCloud is providing you. There will be about five records in total. Most of the records will involve leaving the "Host" field blank on Porkbun, but please note there will be a CNAME record with a host name of "sig1._domainkey".
Here are some further examples showing what your records should look like when you add them on Porkbun:
Finish setting up your iCloud hosted email address
1
Now that you've added the DNS records to your domain, you can finish the setup process. Switch back to your tab with iCloud open, and click on the "Back" button to return to the setup steps.
2
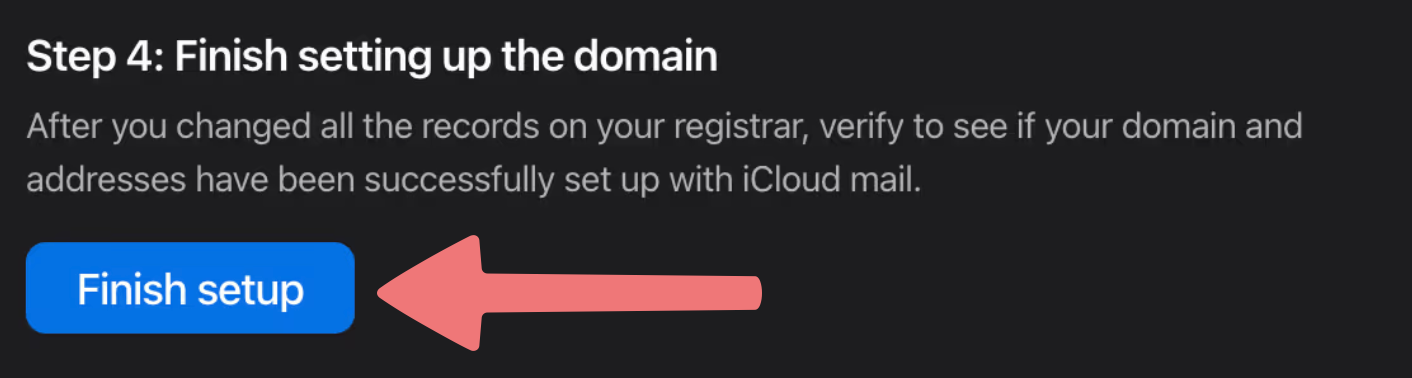
You'll be taken back to the main setup screen on iCloud. Under step 4, click on the "Finish setup" button.
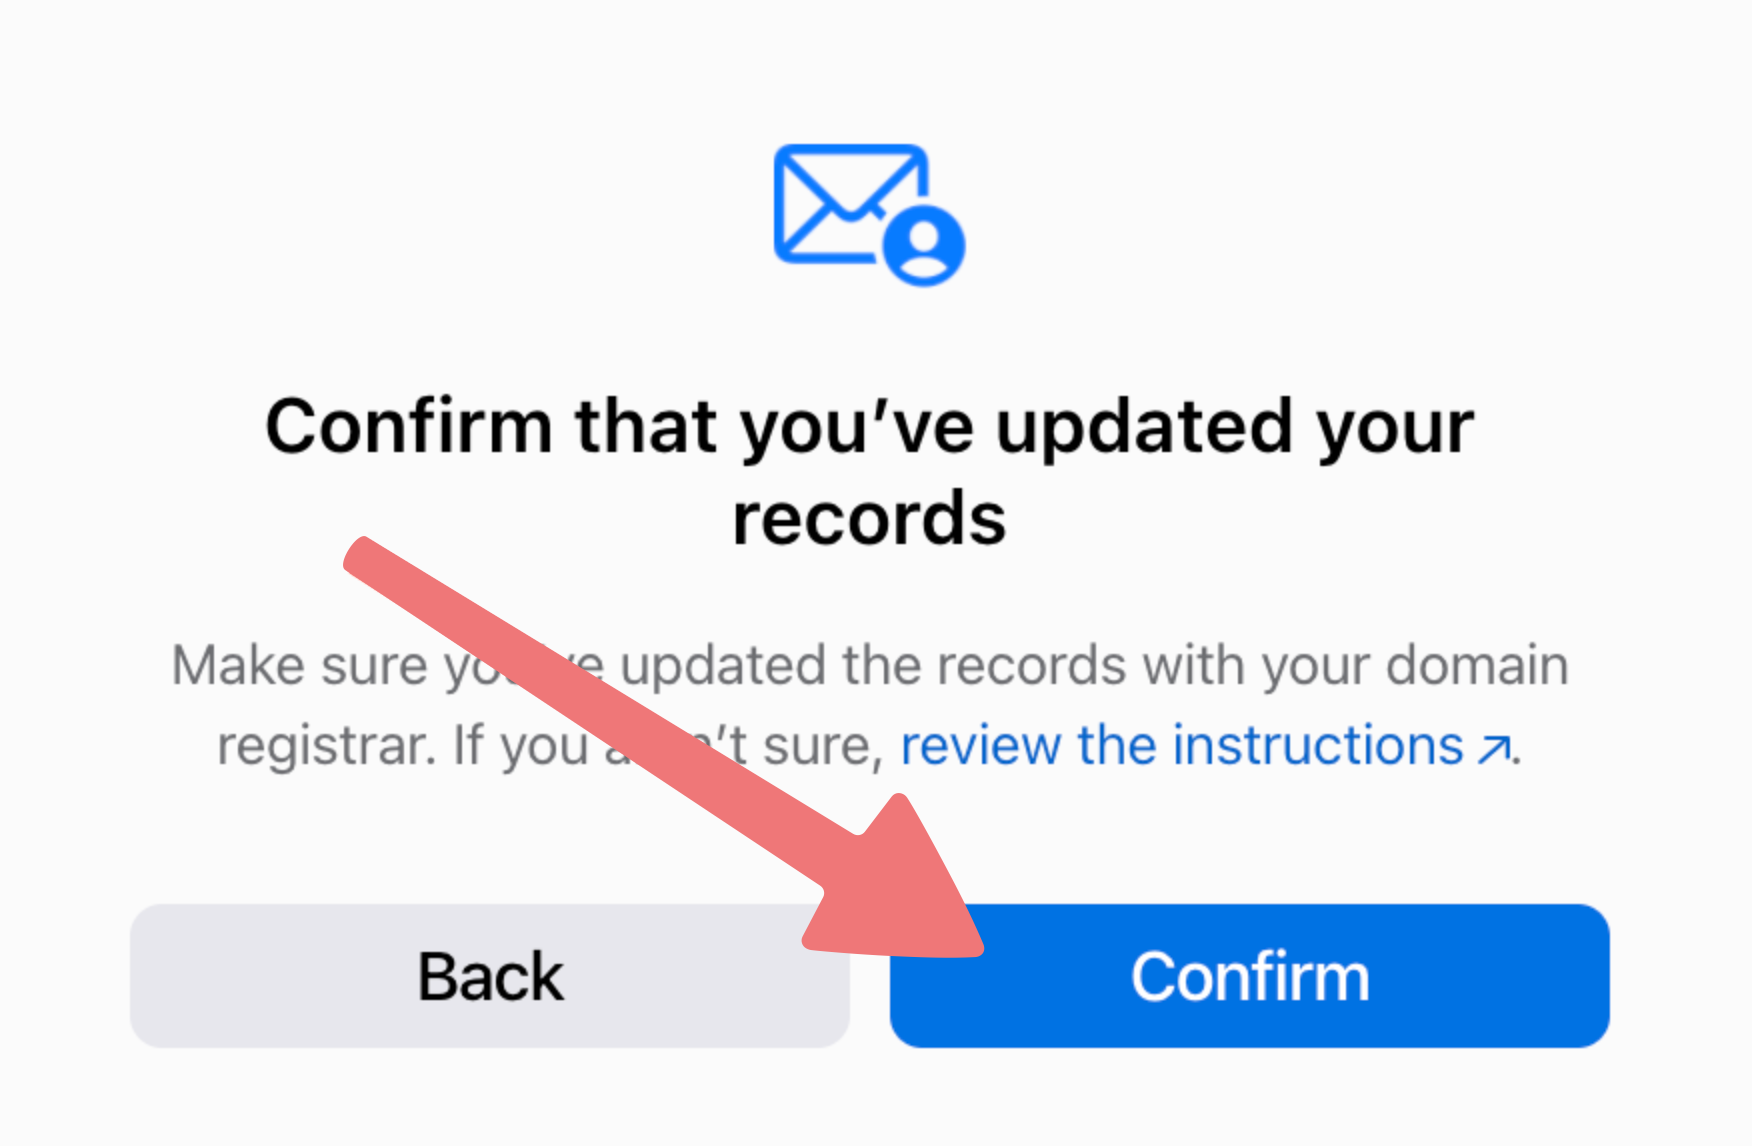
Then, click the "Confirm" button to confirm the records have been updated.
3
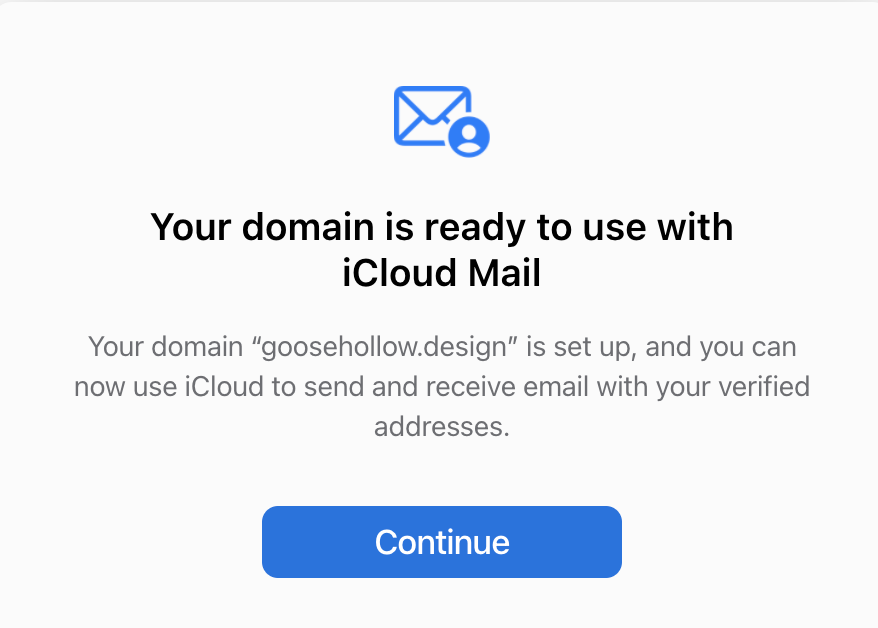
If all of your records were added successfully, you'll see a success message letting you know your domain is connected to iCloud! Click on the "Continue" button.
4
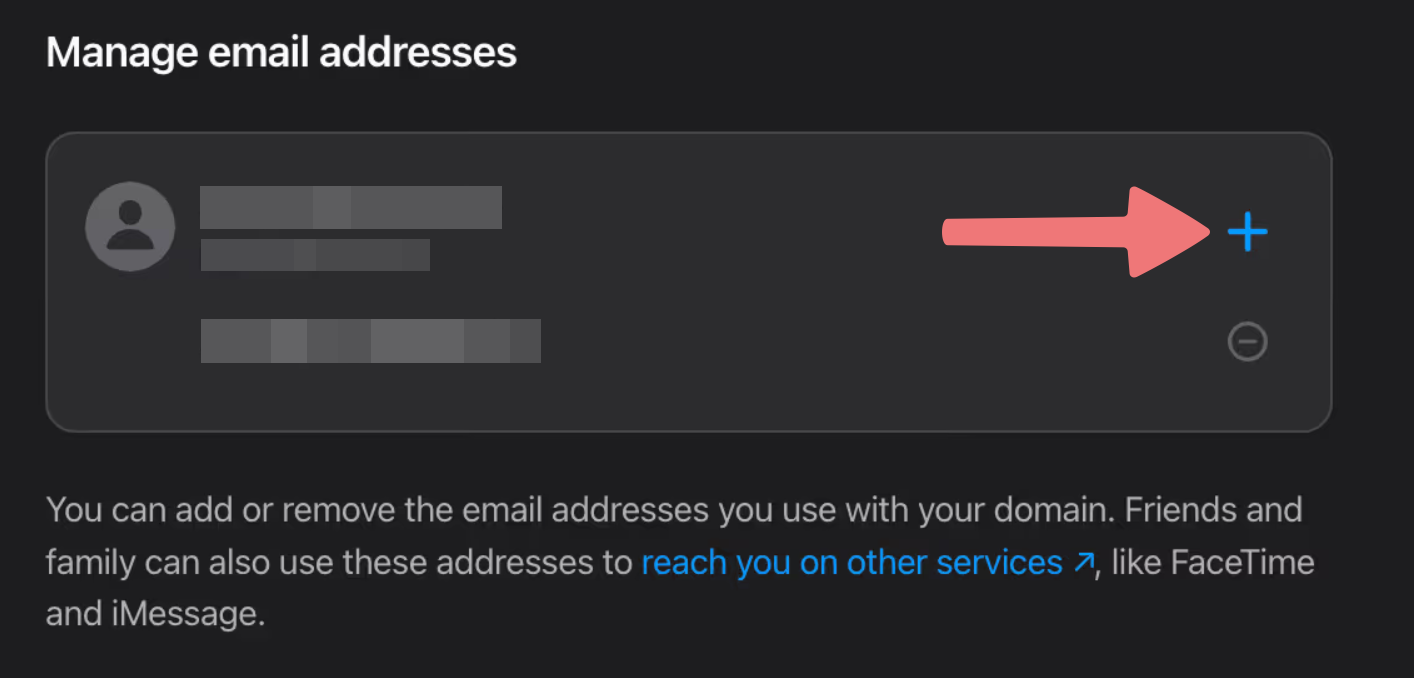
You can now return to the settings page on iCloud and create new your hosted email addresses as desired. You may also receive an email from iCloud directly with a link that will take you to your settings page. Create the hosted email address (or addresses) you want for your domain!
That's it! Once you've connected your domain to iCloud and set up the users/email addresses as needed, your email should be working. Feel free to get in touch with our support team if you run into any issues getting your domain connected to iCloud.


