How to enable Porkbun's Cloudflare DNSSEC
DNSSEC is a way to digitally "sign" your DNS data, preventing man-in-the-middle DNS attacks.
Note
This guide walks through how to enable DNSSEC on a domain using Porkbun's nameservers. If you are using external nameservers on your domain, please refer to the following guide instead: How to install DNSSEC
1
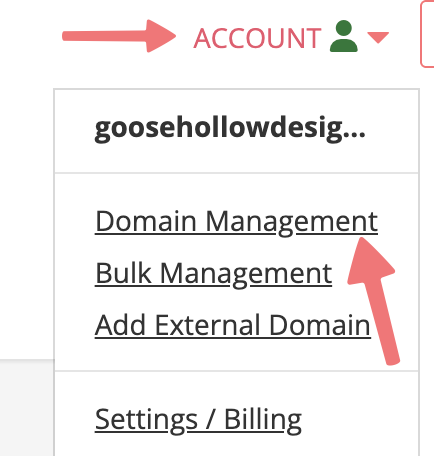
Log in. You should arrive at the Domain Management screen. If you're already logged in, click on ACCOUNT in the top-right corner and select Domain Management.
2
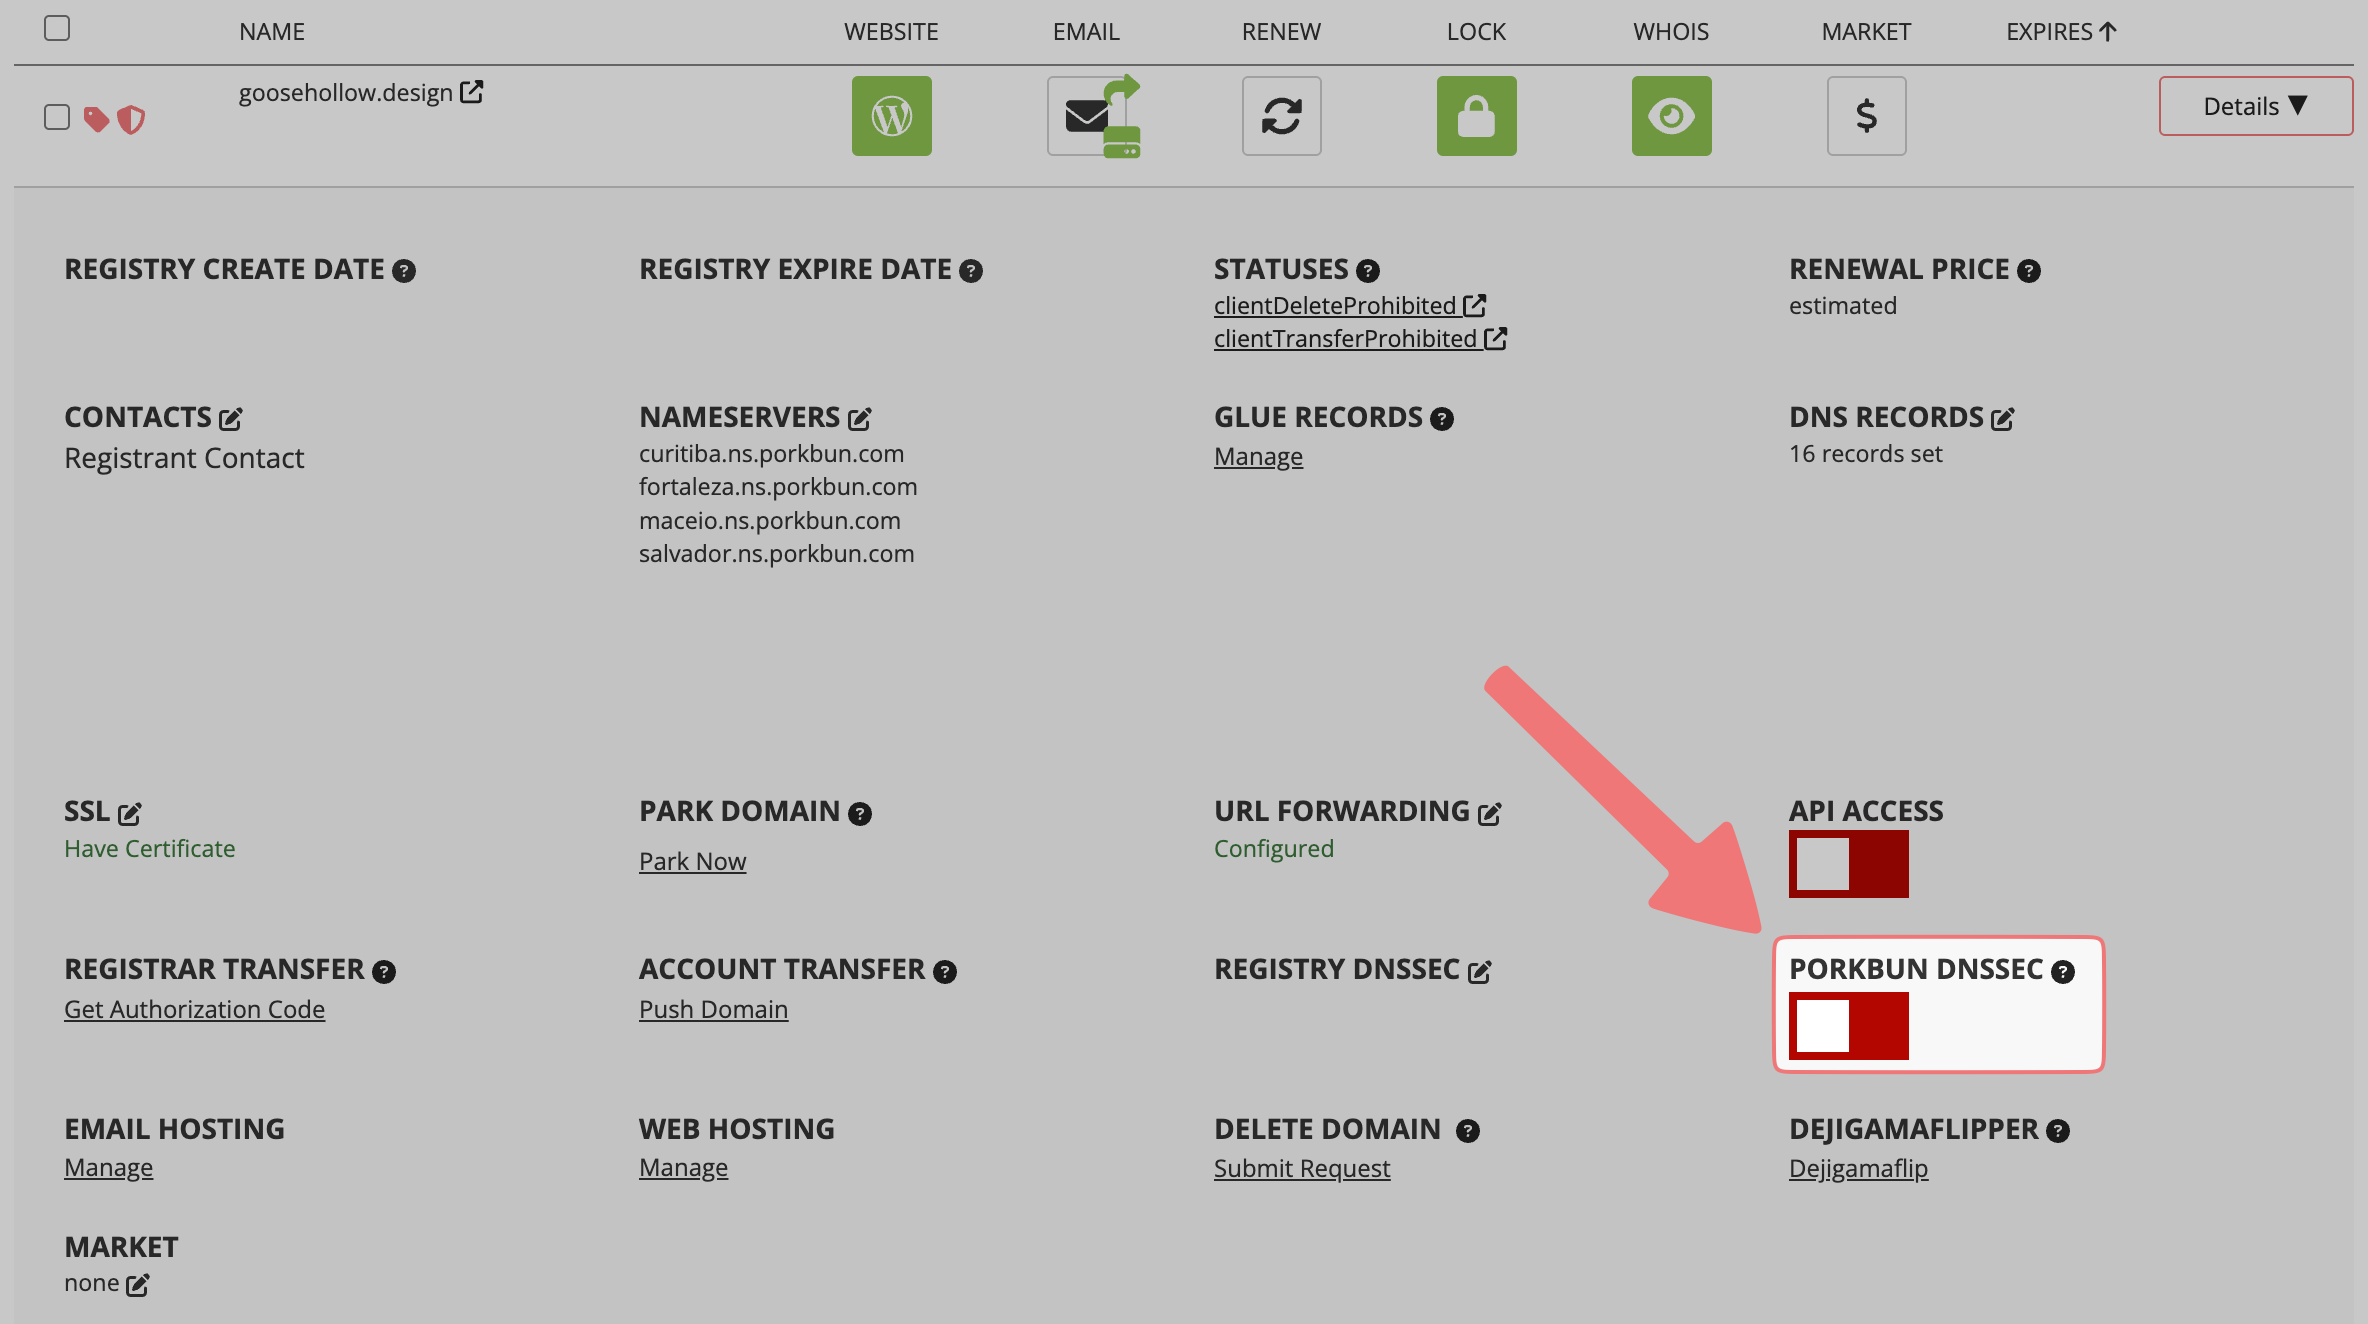
Scroll down and locate the domain you are enabling DNSSEC on. Click on the "Details" button all the way to the right of the domain name to open the details menu.

3
In the Details dropdown menu, find the option labeled "Porkbun DNSSEC". Click on the red toggle switch to enable the setting.
4
Once you've clicked the toggle switch it should turn green, and a DNSSEC record will be created. If the toggle does not turn green, delete any existing DNSSEC records and then try again. If you have an existing DNSSEC record, you can manage it by clicking on the "Registry DNSSEC" option.

That's it! DNSSEC has been enabled for your domain. There are some tools out there such as dnsviz.net that you can use to check the validity of your DNSSEC record. Feel free to contact our support team if you have any questions or concerns.


