How to Grant Access to Another Porkbun User as an Authorized User
Note
Before you can add another account as an authorized user, we require both accounts to have verified their account email address and phone number and to have enabled either app-based 2FA or a 2FA security key.
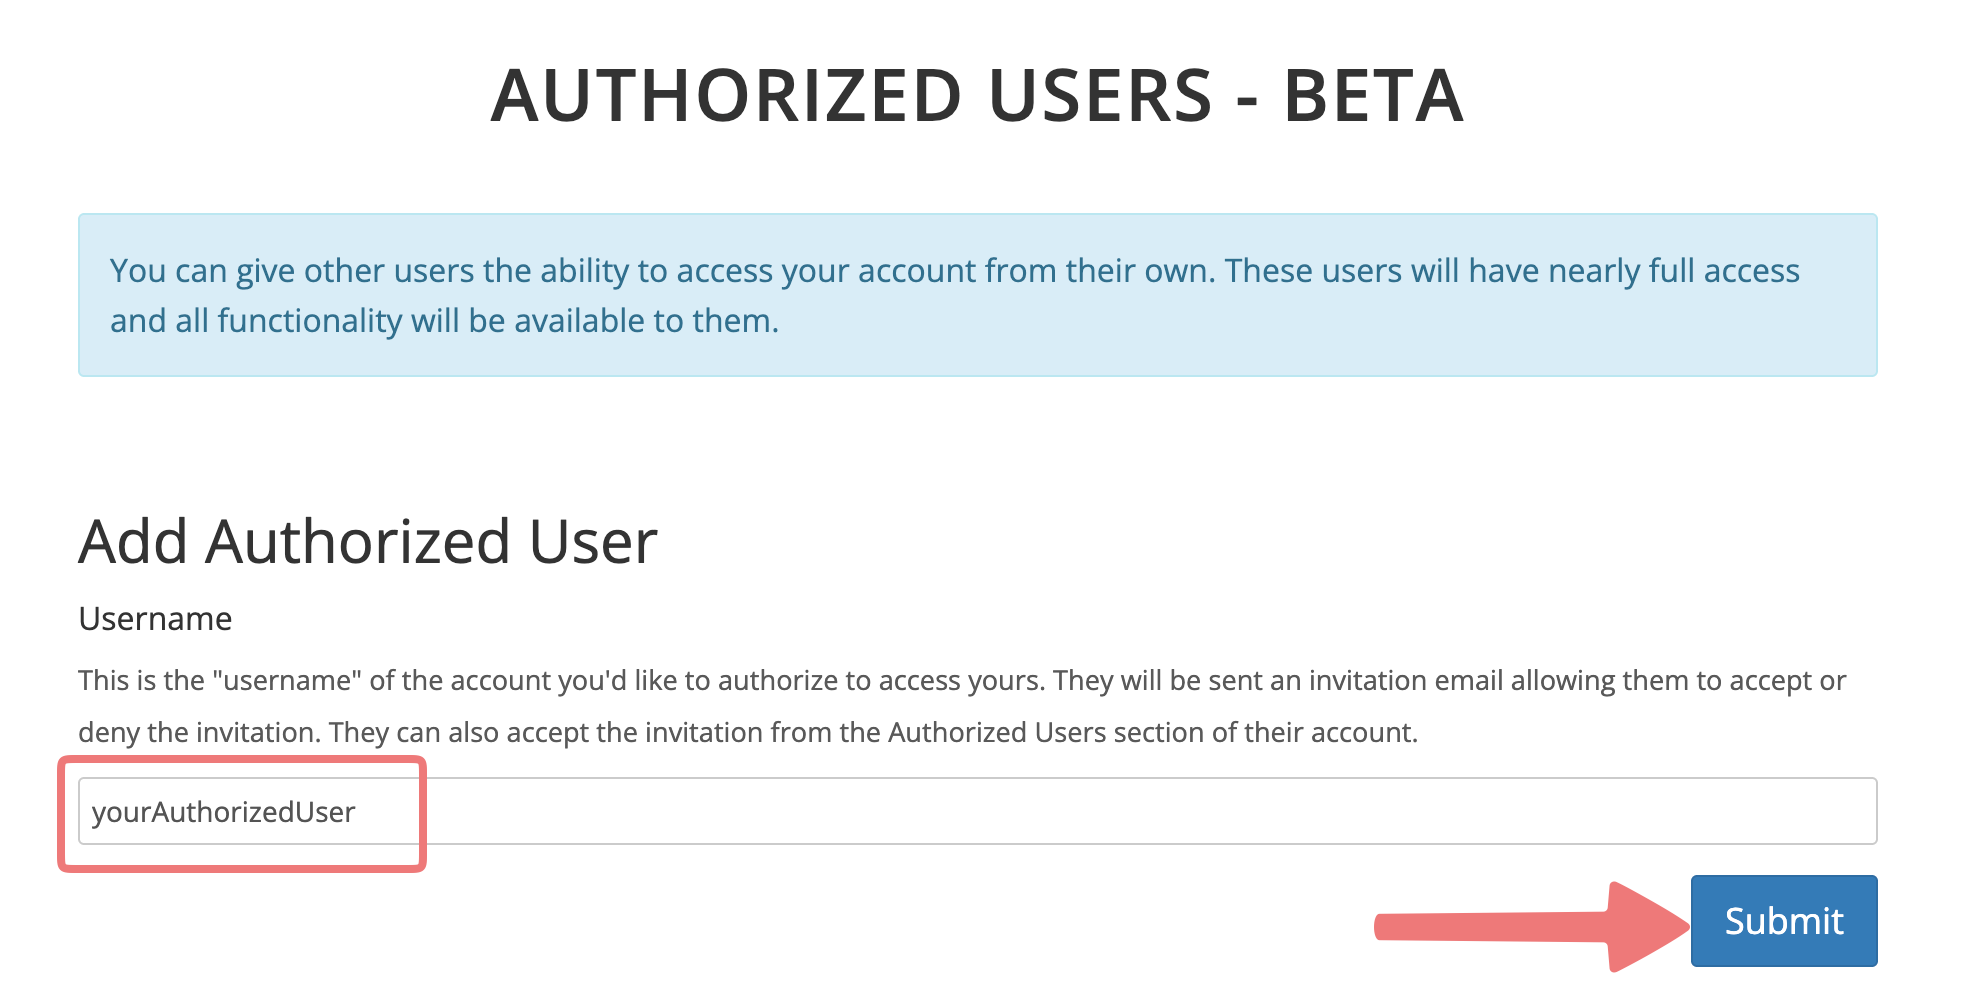
There are times when you may want to allow other users to manage your domain's DNS and hosting settings. You can do this by adding their Porkbun account as an Authorized User. Authorized Users will have full access to make changes to your account, but are not able to unlock the domain or initiate account transfers.
For more info on what permissions are granted to authorized users (and subaccounts), you can review this guide.
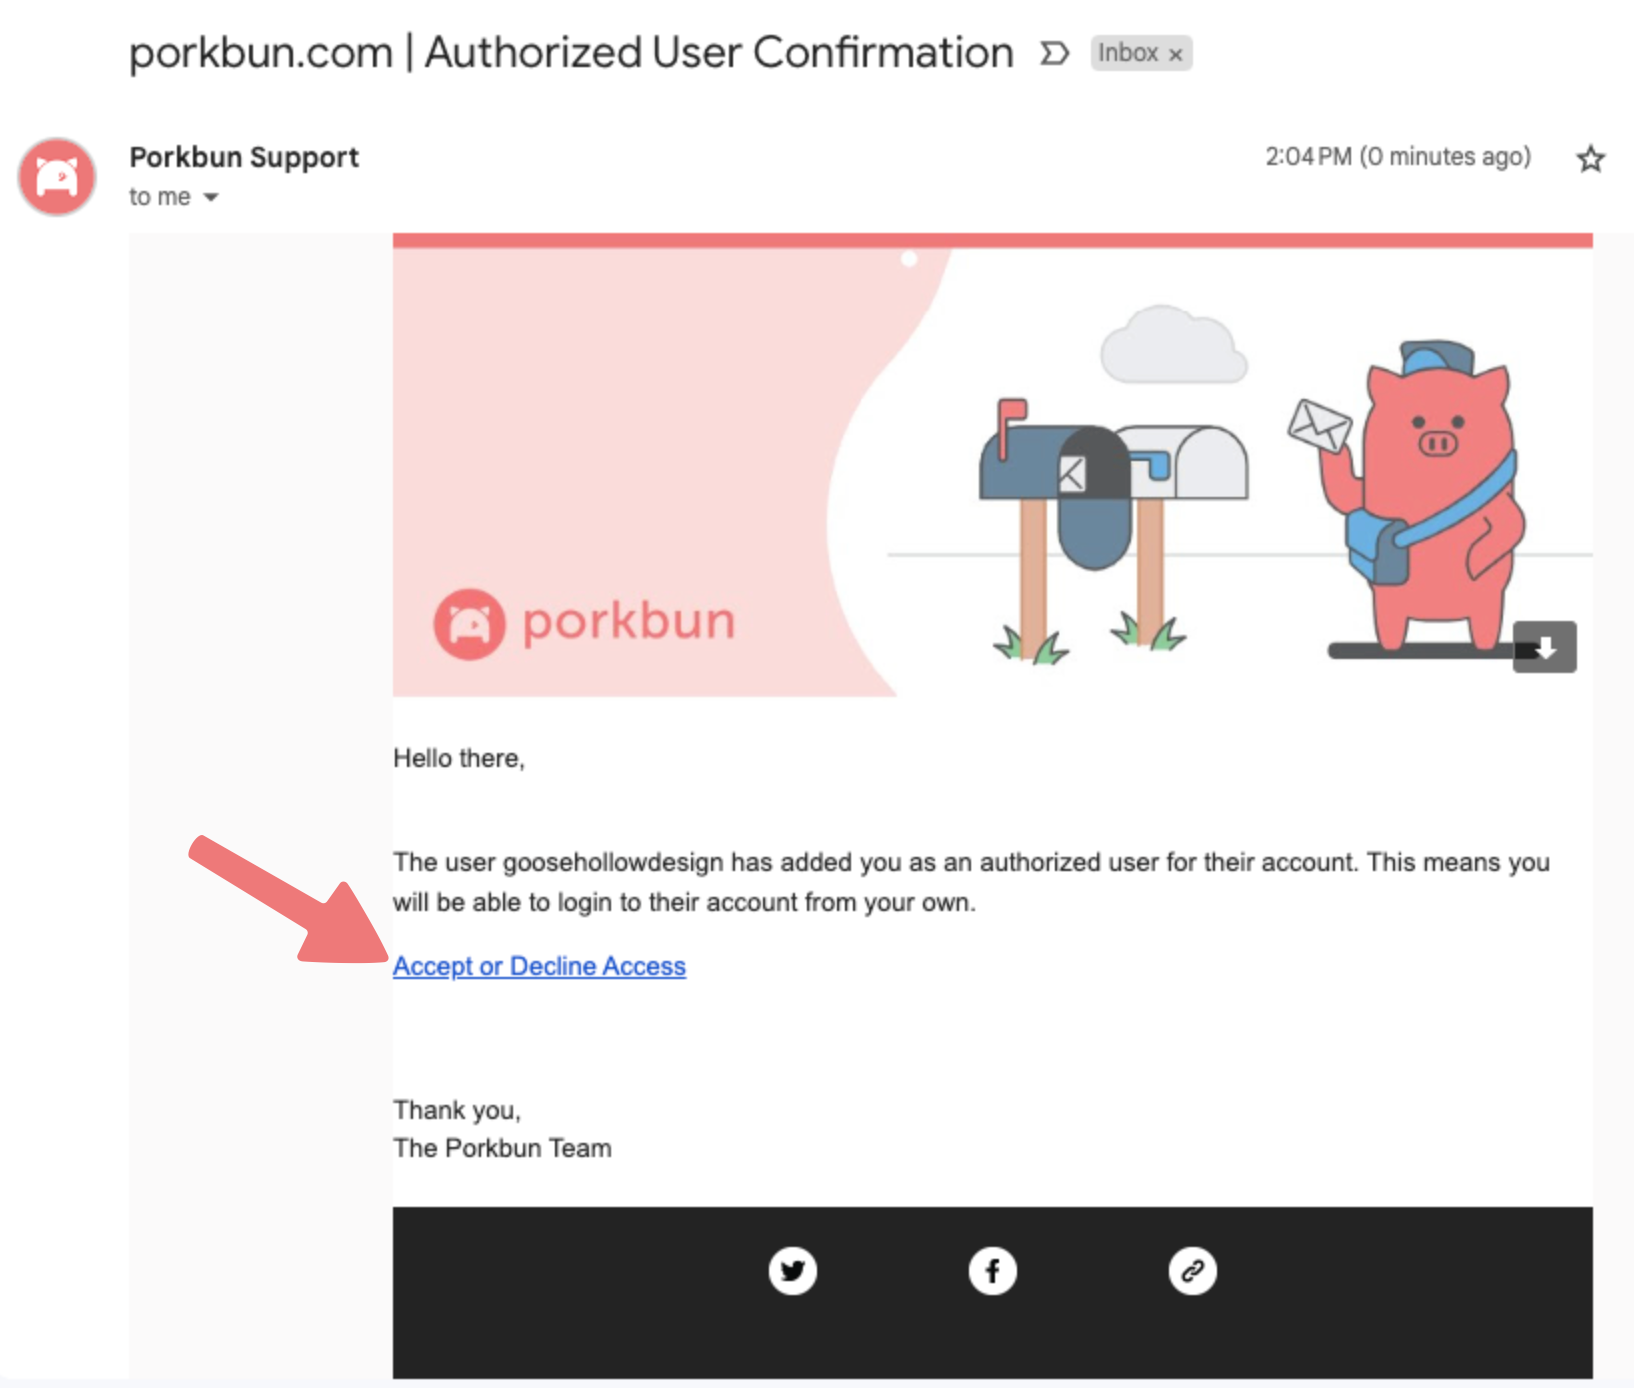
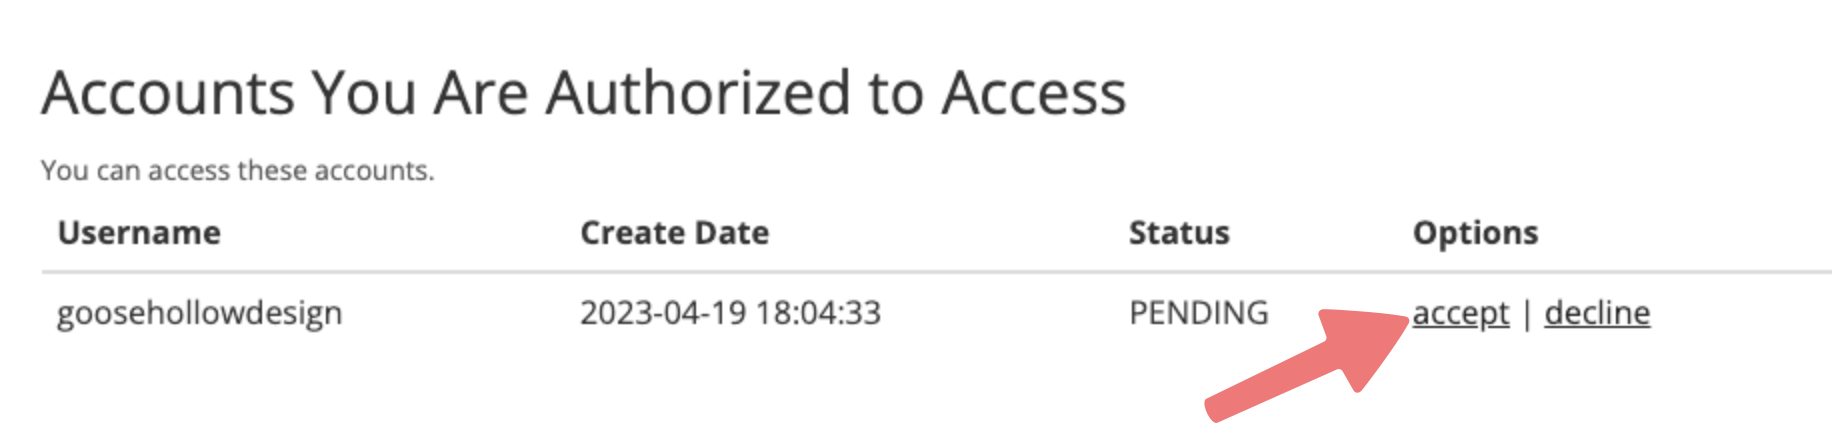
To invite an authorized user, they will need to already have a Porkbun account created, and you will then invite them with their Porkbun username. The account will also need to have the email address and phone number verified and also must have enabled either app-based 2FA or a 2FA security key.
The following steps walk through assigning another account as an Authorized User.

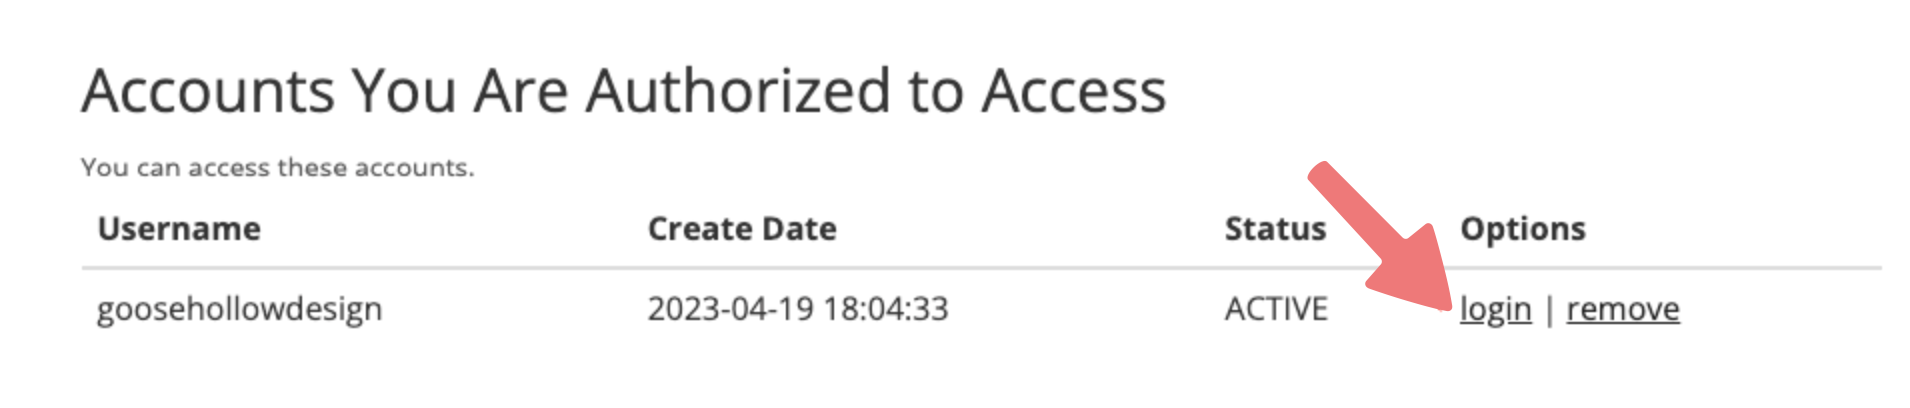

That's it! Now your authorized user will be able to access your account directly and help with setting things up. For more info on the feature and how it compares with our "subaccount" feature, you can review this guide:
Subaccounts vs. Authorized Users
Feel free to get in touch with our support team if you need any assistance with this process.