How to connect a domain to Zoho Mail
If you are using Zoho Mail as your domain's email hosting provider, you'll need to configure your domain to work with their mail system. We'll show you how!
Note
This guide assumes you are using Porkbun's default DNS nameservers on your domain. If you're using nameservers from a different provider such as your web host, you will need to add the DNS records from Zoho over at your hosting provider's end for them to work.
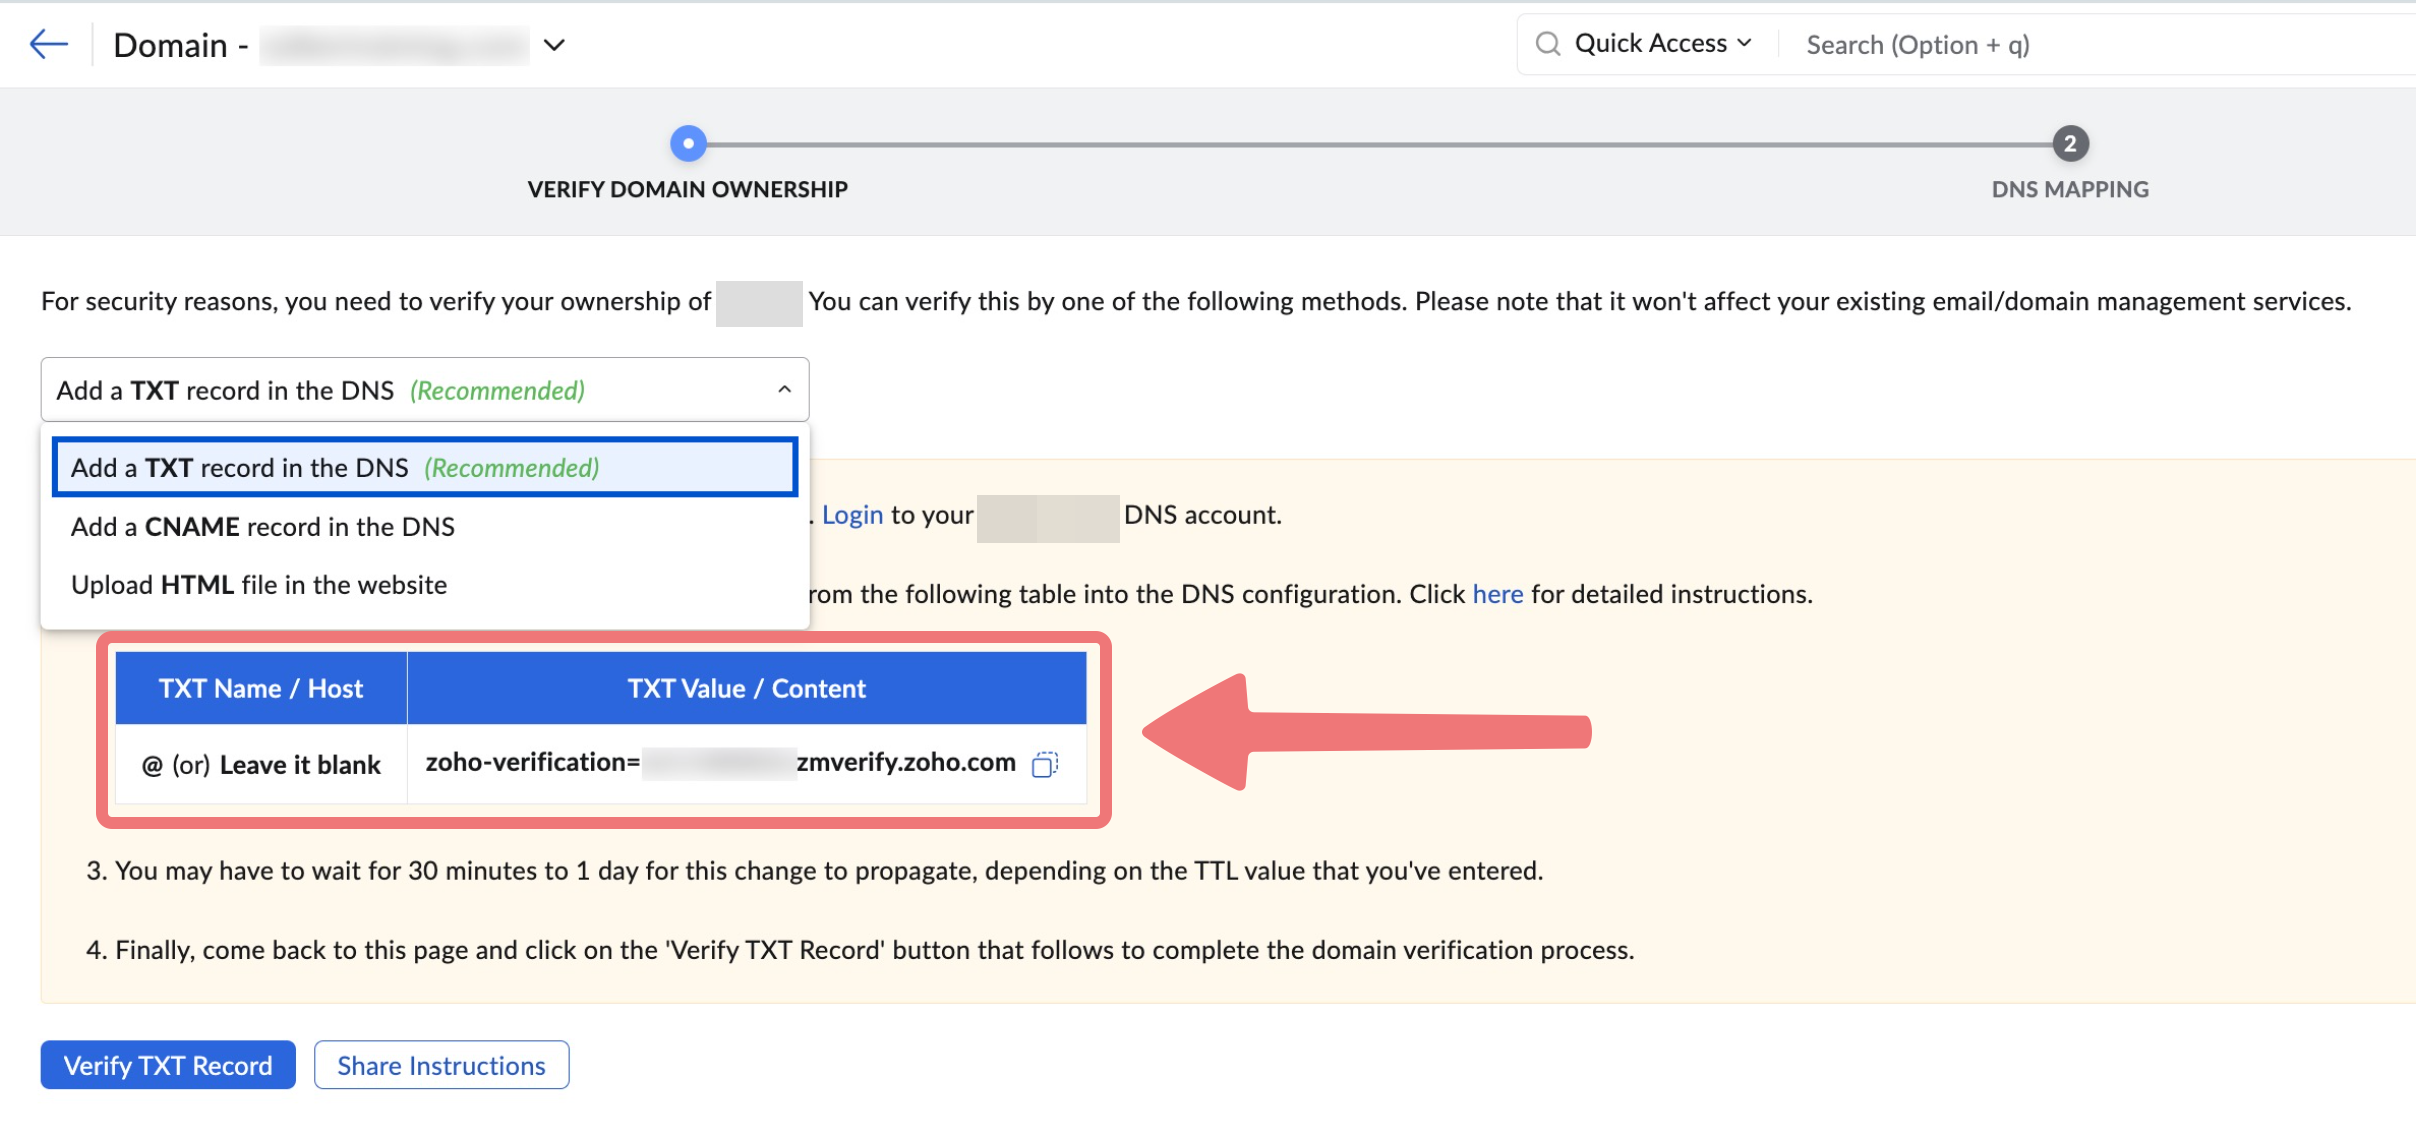
After entering your domain name, you'll be prompted to manually verify your domain via DNS records. You can choose to either add a CNAME record or a TXT record, but for this guide we'll assume you're choosing the TXT record method.
2
You'll be provided a DNS record with a "Name / Host" column and a "Value / Content" column. Take note of the information displayed in those fields.
3
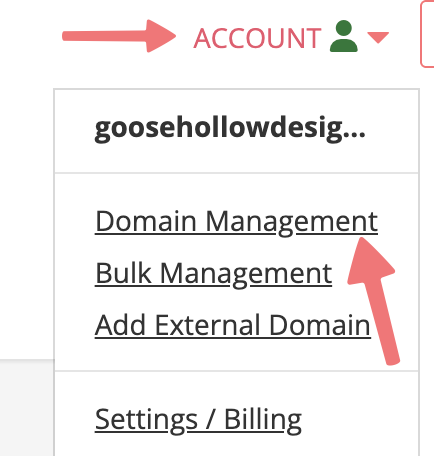
In a new browser tab, log in to your Porkbun account. You should arrive at the Domain Management screen. If you're already logged in, click on ACCOUNT in the top-right corner and select Domain Management.
4
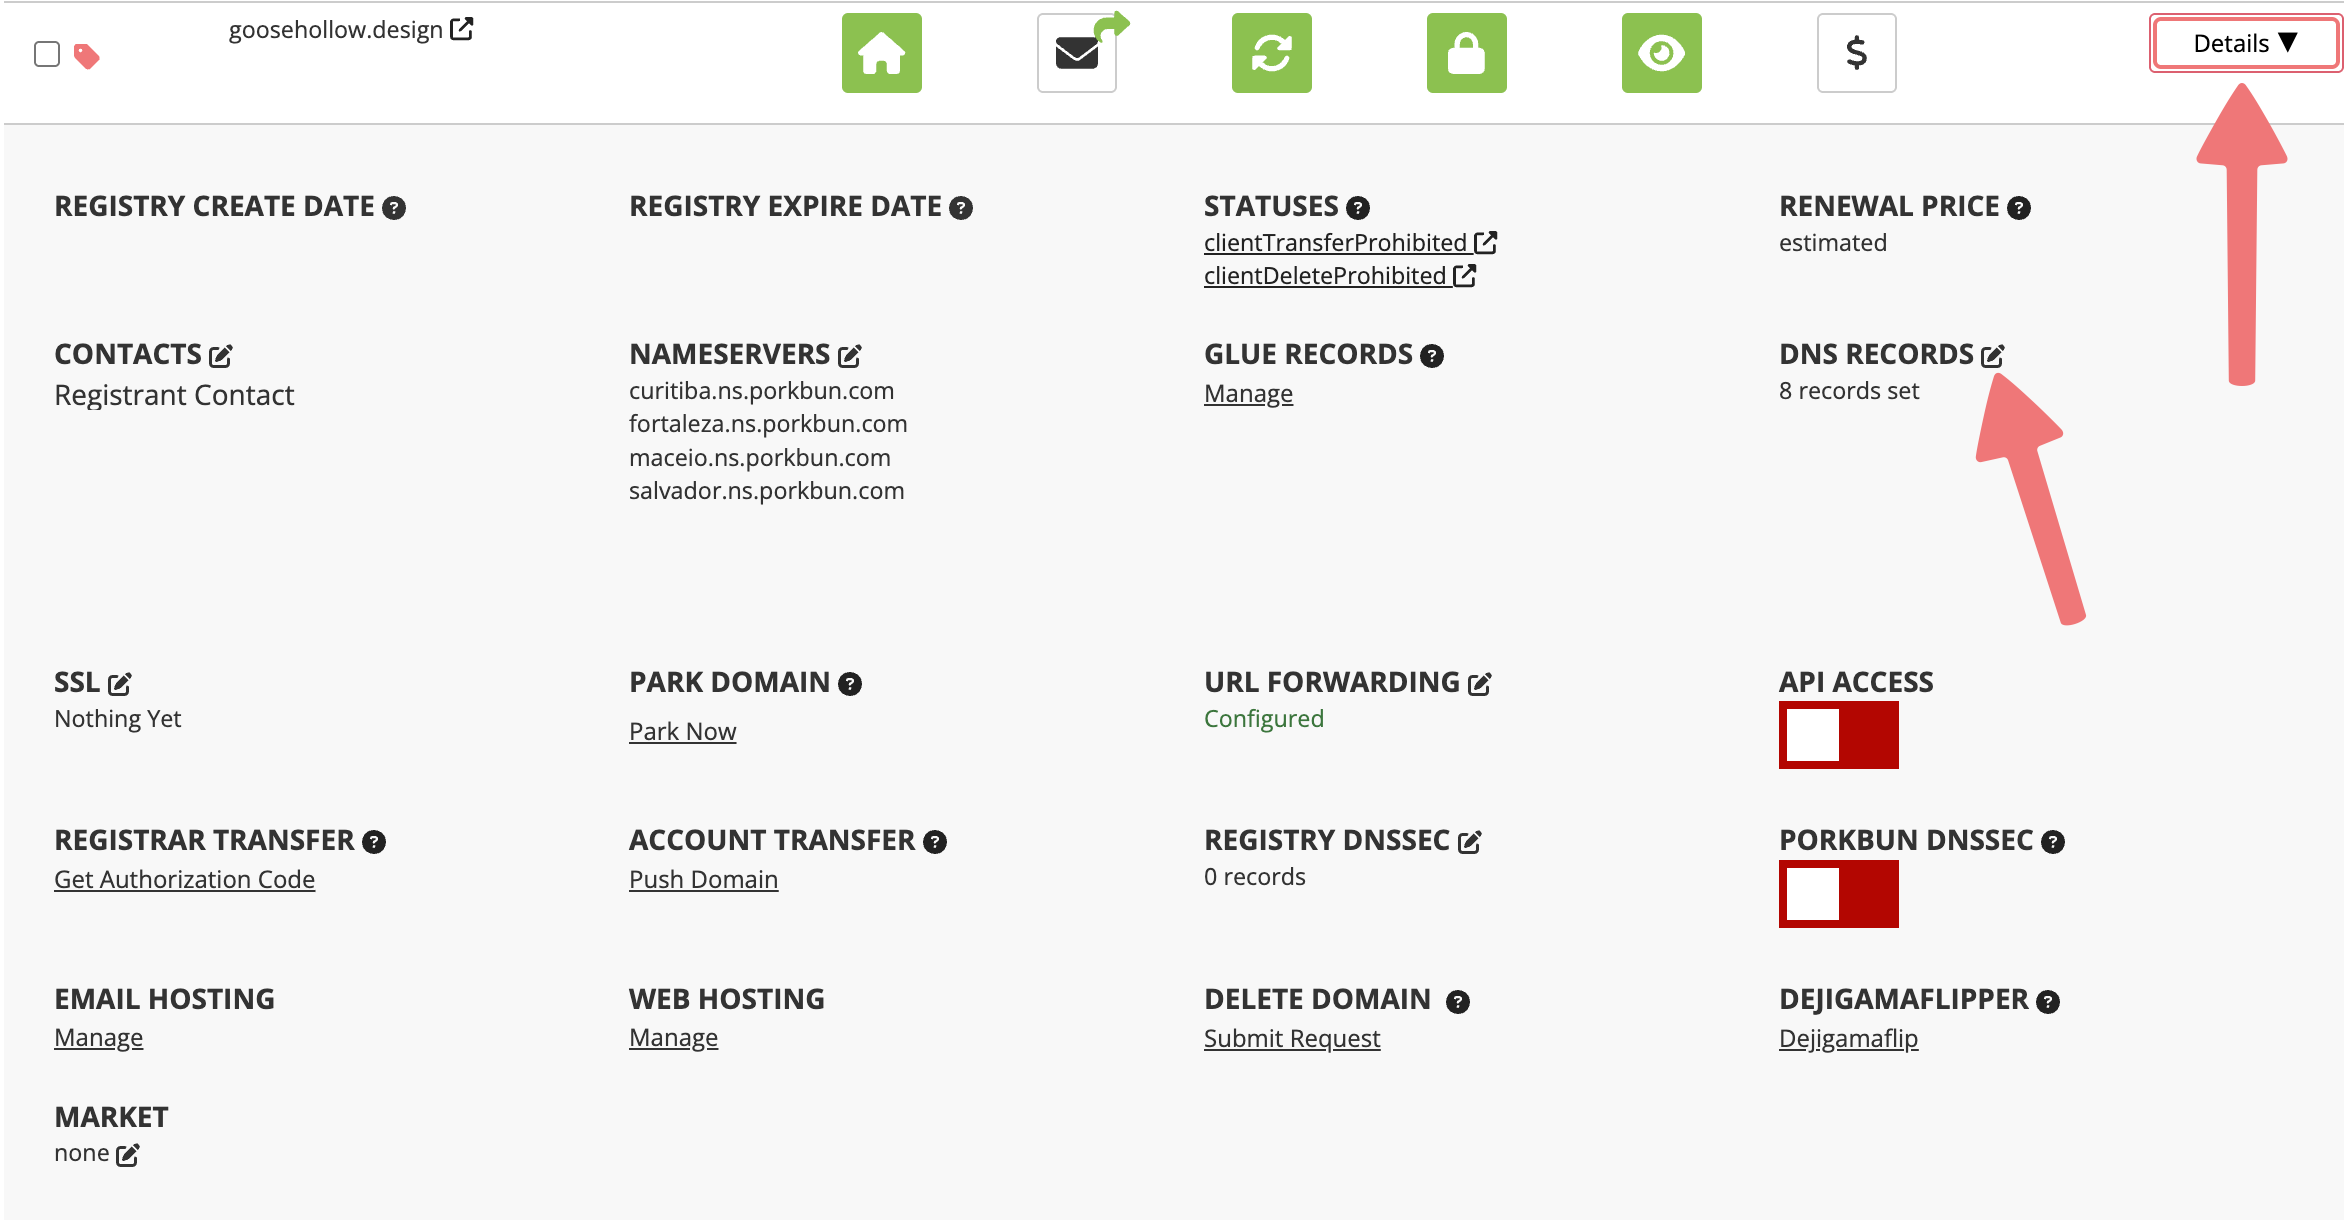
Locate the domain you're connecting to Zoho Mail. Click on the "Details" button all the way to the right of the domain name. On the details dropdown menu that appears, find the option labeled "DNS RECORDS" and click on the edit icon.
5
You'll be presented with the "MANAGE DNS RECORDS" menu. This menu is where you'll configure your domain to connect to Zoho Mail.
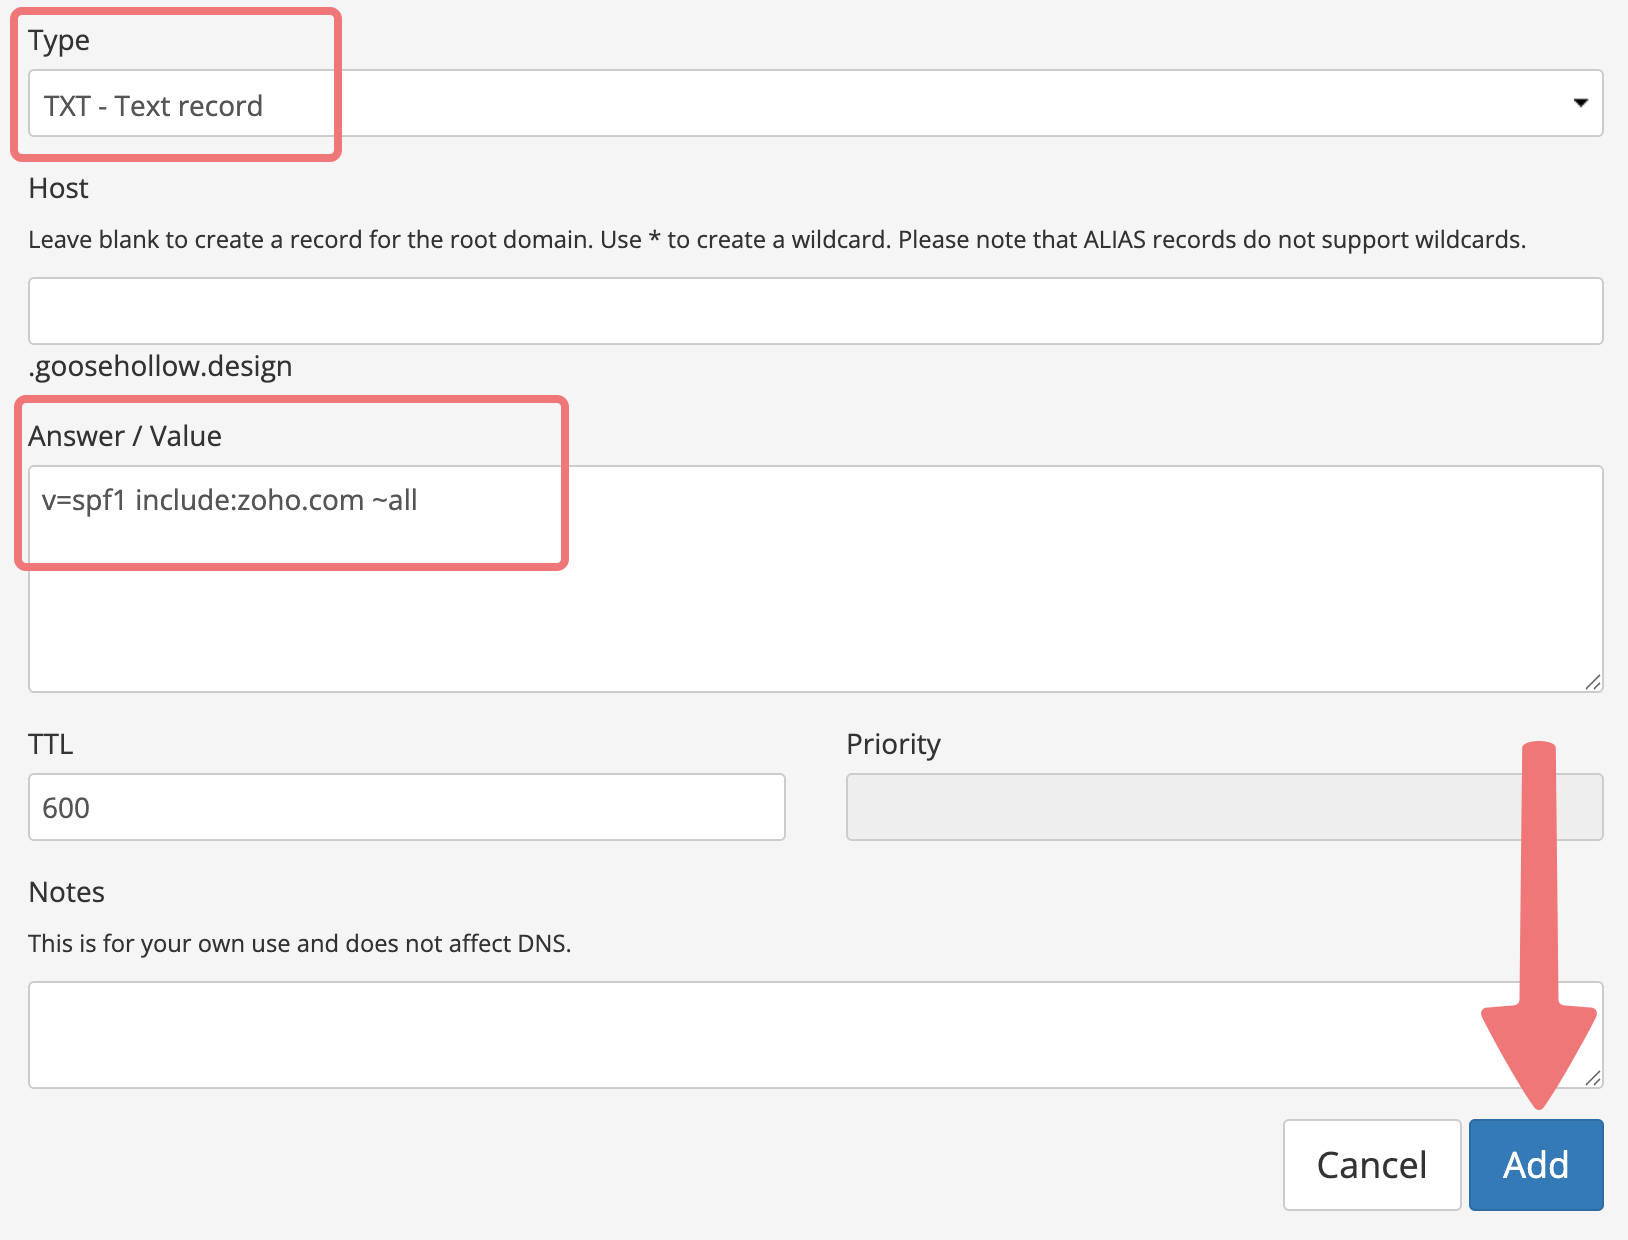
Set the "Type" option to "TXT - Text Record". You'll most likely leave the "Host" field blank, but you can check the "Name / Host" column on the record Zoho gave you to confirm that.
In the "Answer / Value" field on Porkbun, paste the value of the TXT record that Zoho provided you. Here's an example of how the record should be formatted:
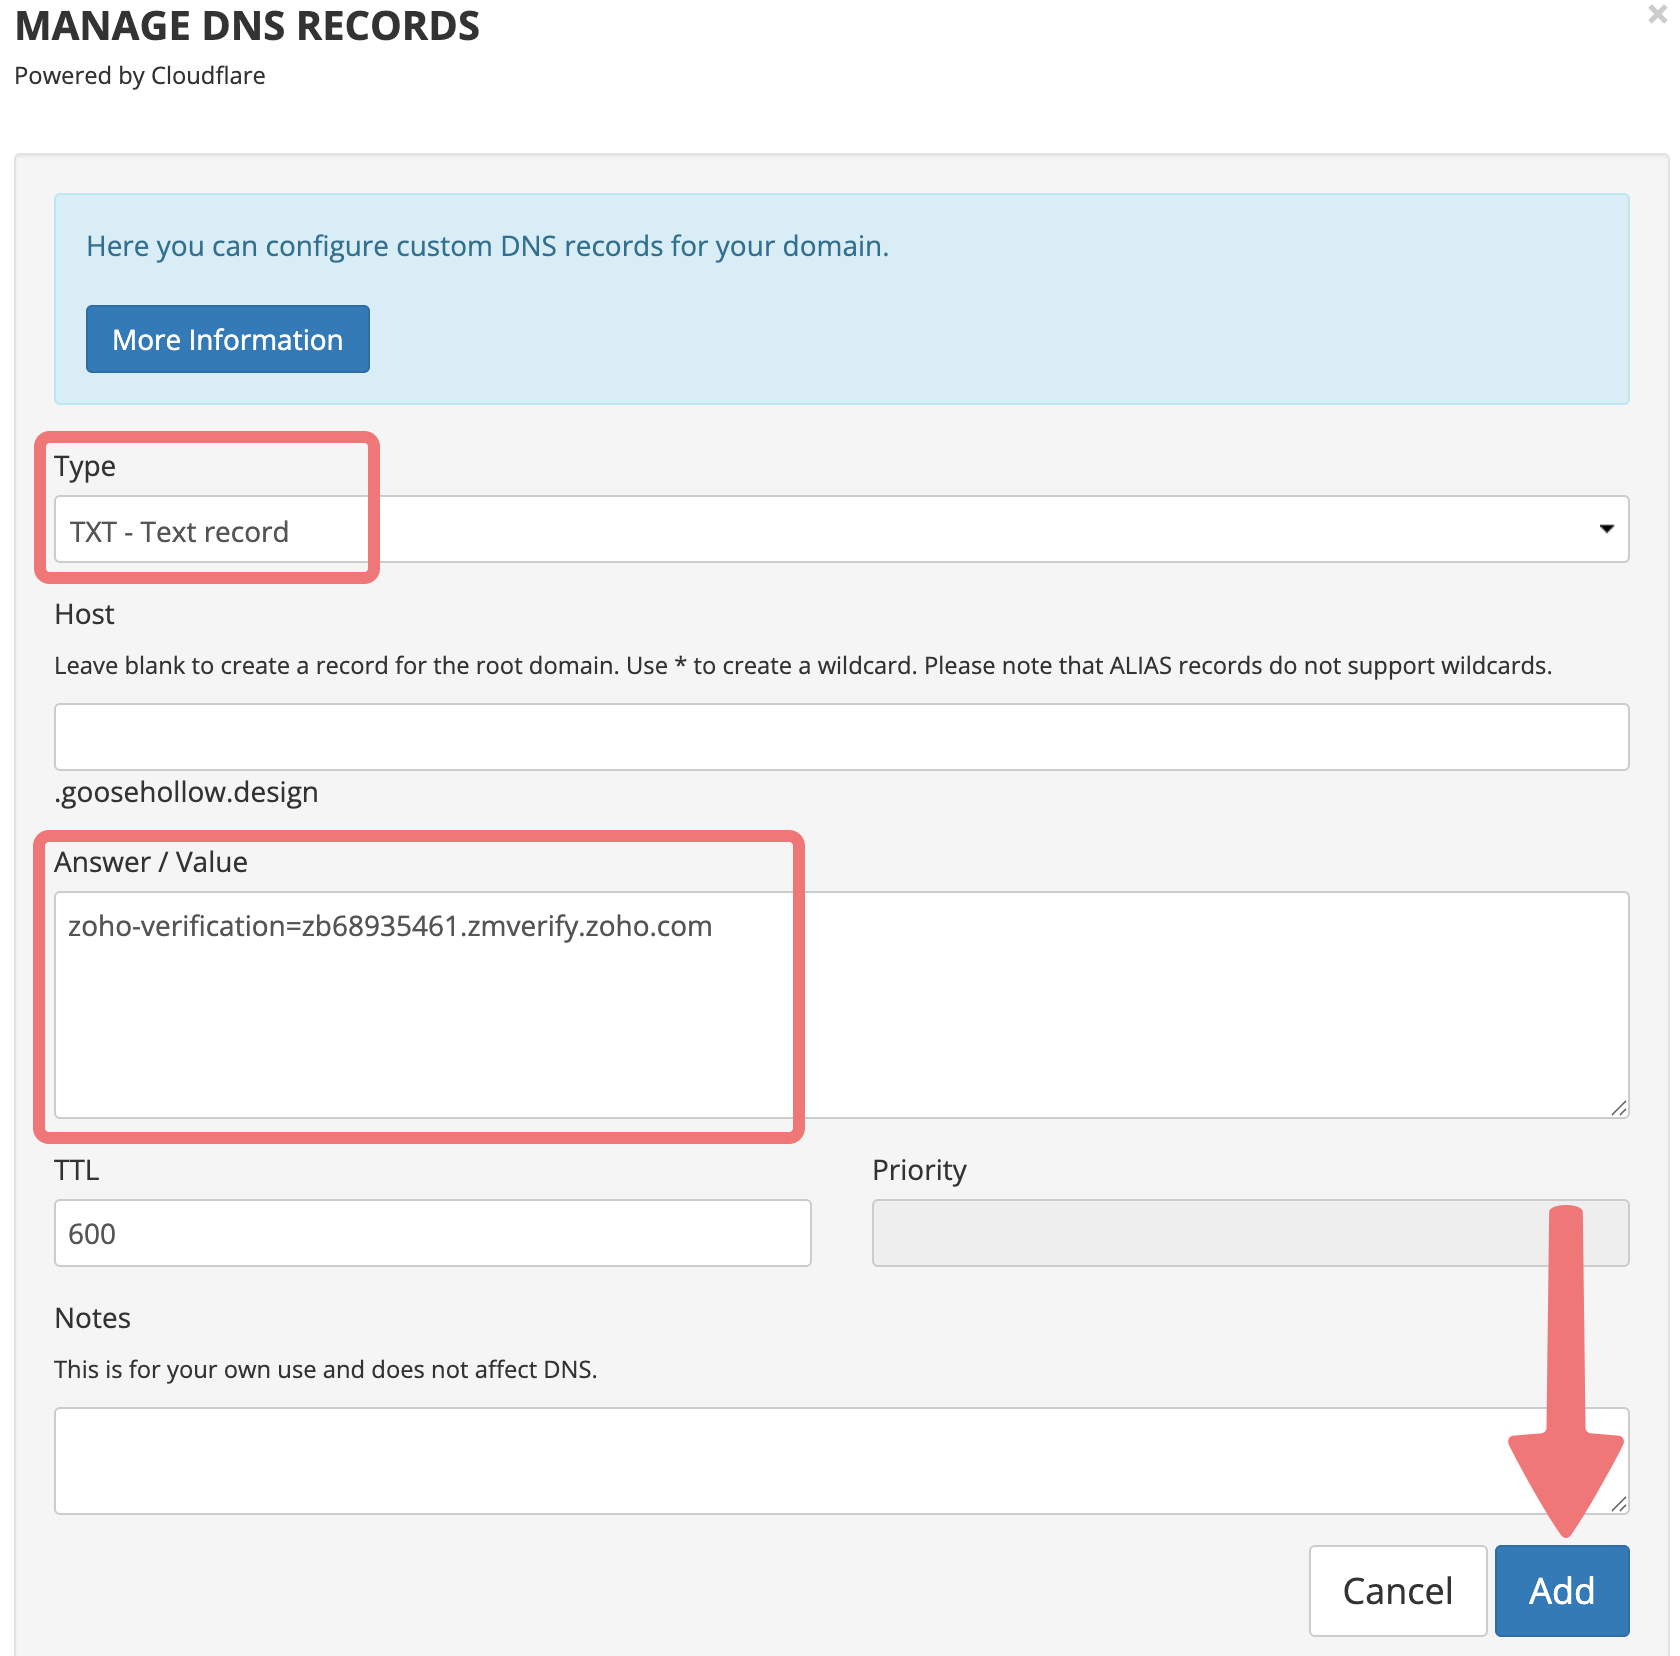
6
Click on the "Add" button. If you scroll down in the same menu to the "Current Records" section, you'll see the new record you created.

7
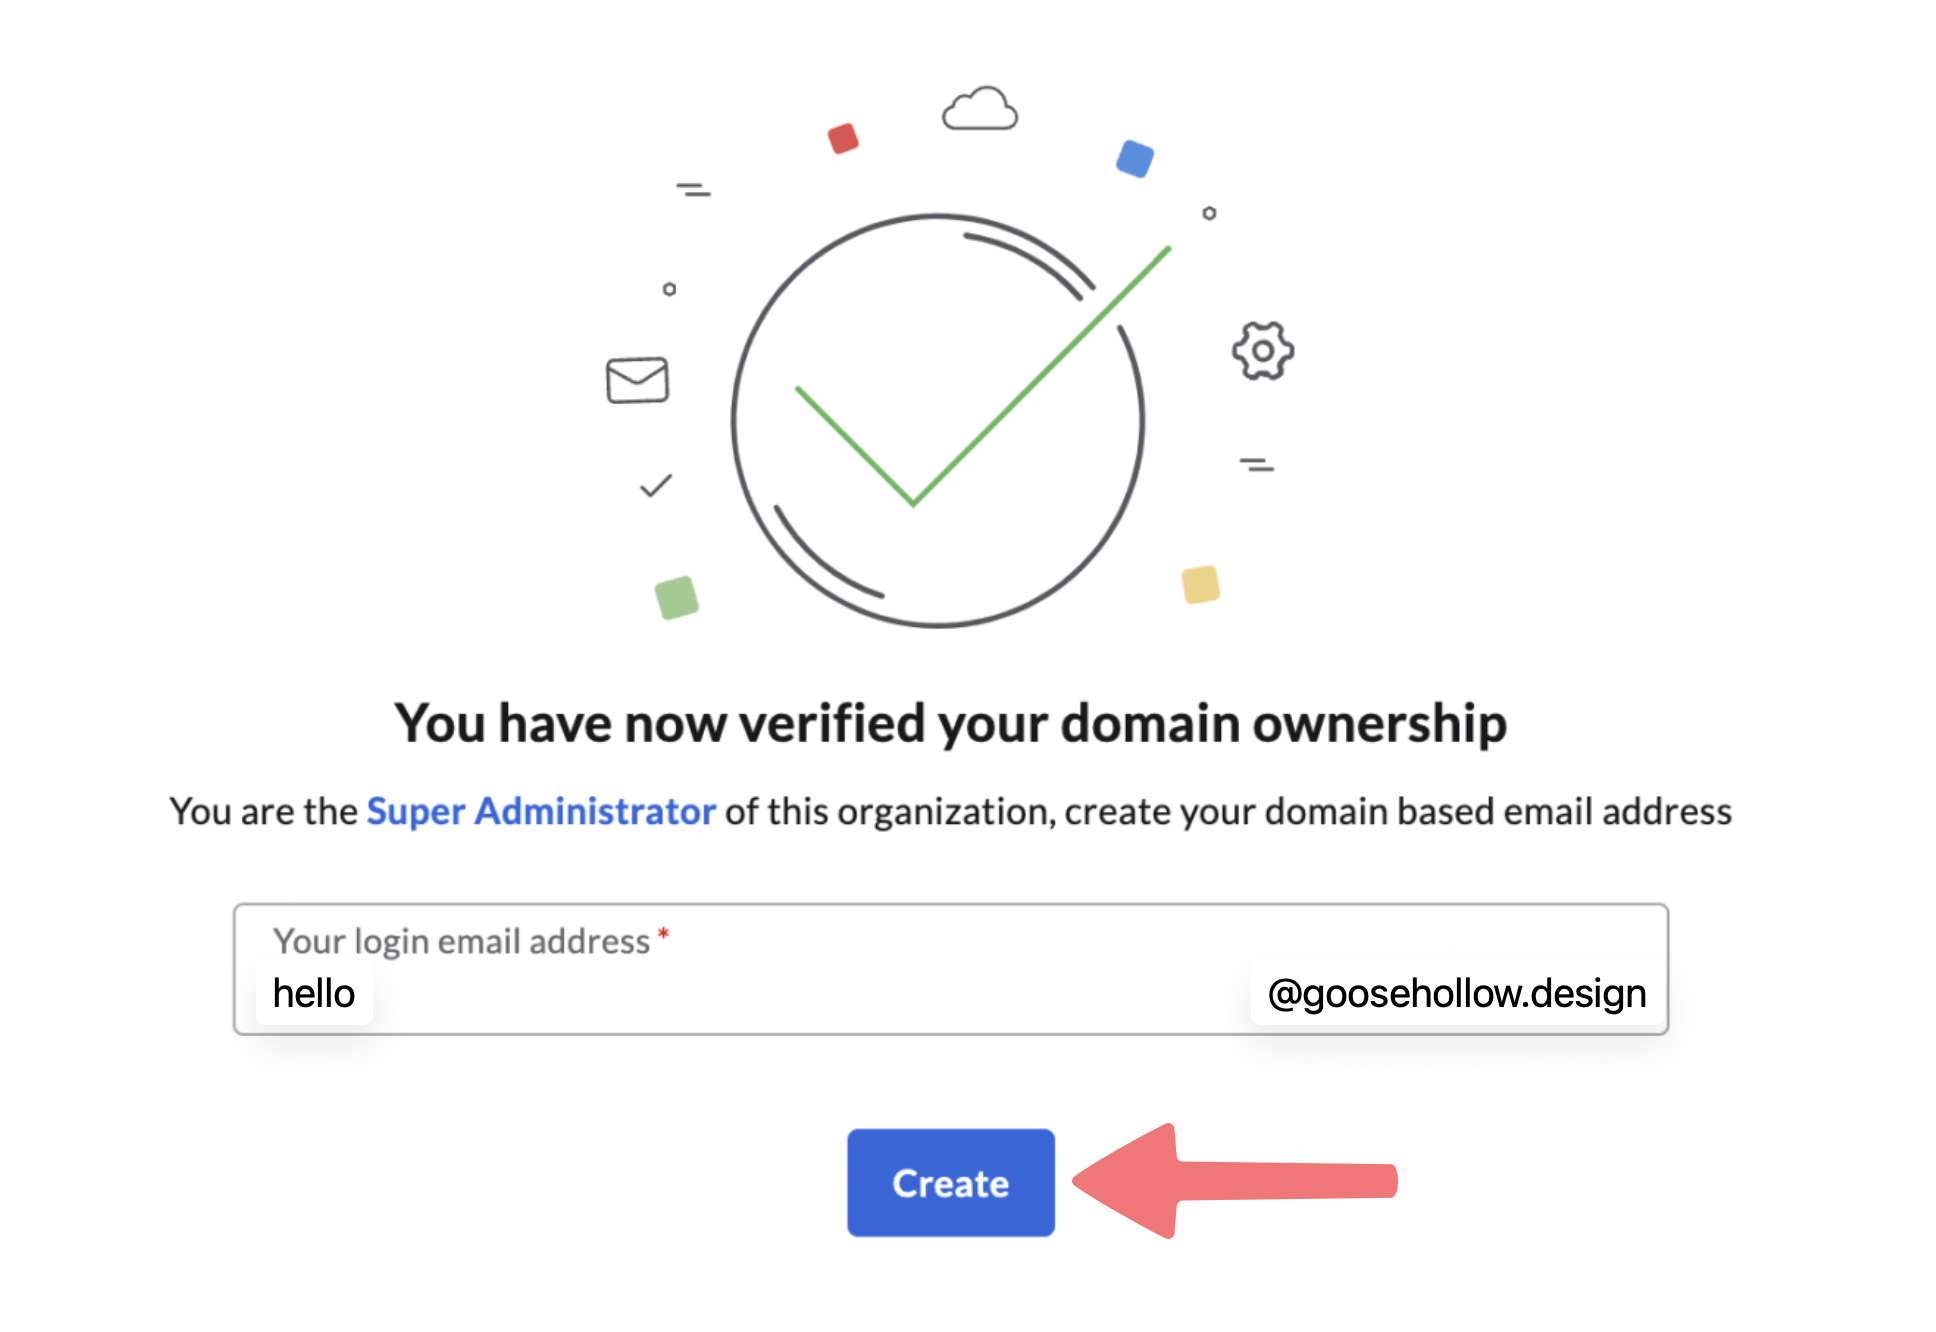
Go back to Zoho and click on the "Verify TXT Record" option. If you added the record correctly, you'll see a message saying your domain ownership has been verified. Now you can create the first user/email address for your domain. Enter the email address you want to configure, then click "Create".
8
You'll be given the option to add additional users or create "groups" for your email users. Once you've set things up as desired, continue through the setup guide on Zoho until you get to the "DNS Mapping" section.
You will be provided a set of DNS records that also need to be added to your domain. You'll see a few MX records, an SPF record (TXT), and a DKIM record (also TXT). Note that for most of the records, the "Name / Host" field will be shown as "@". This means the same thing as simply leaving the "Host" field on Porkbun blank, like you did earlier with the verification record.
9
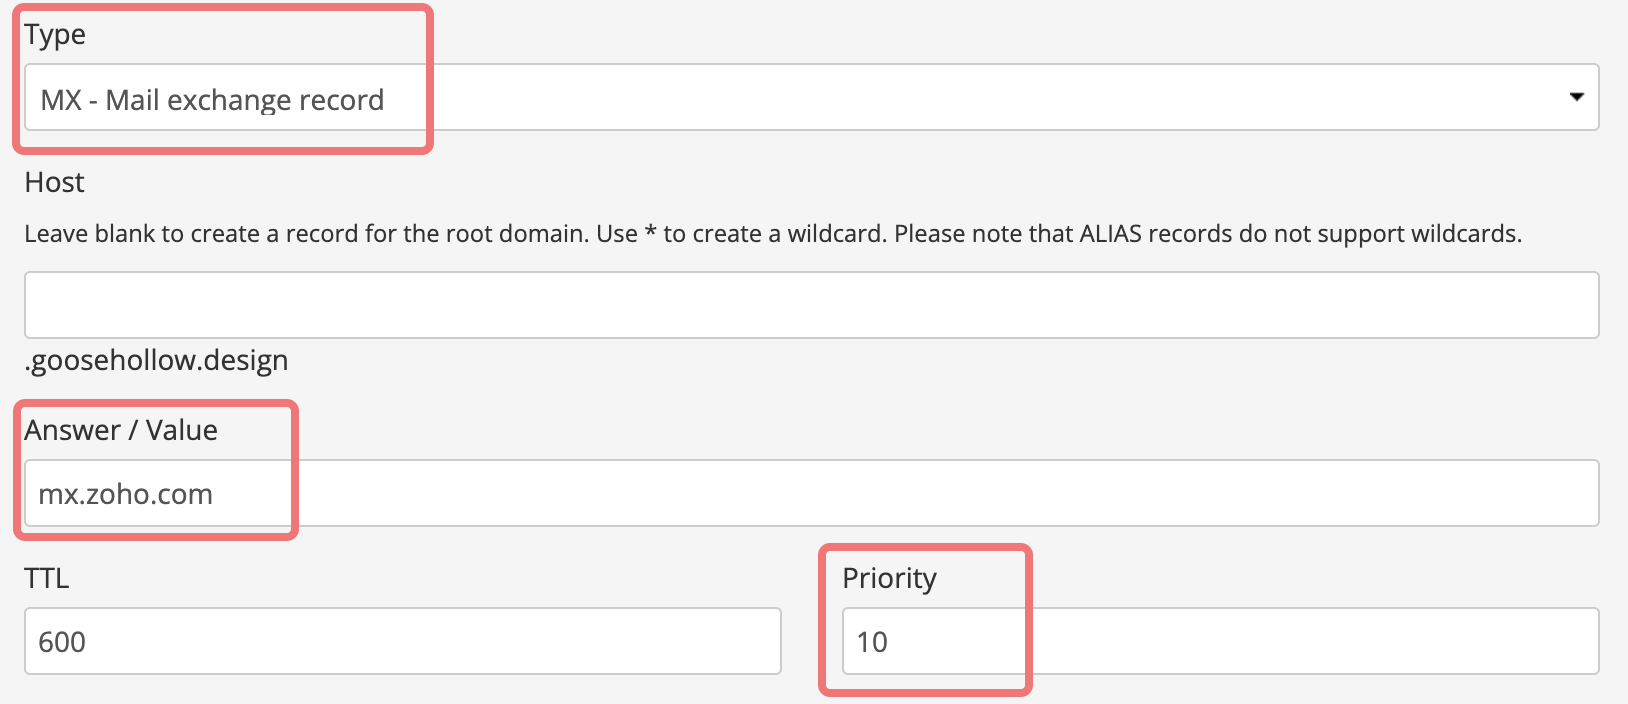
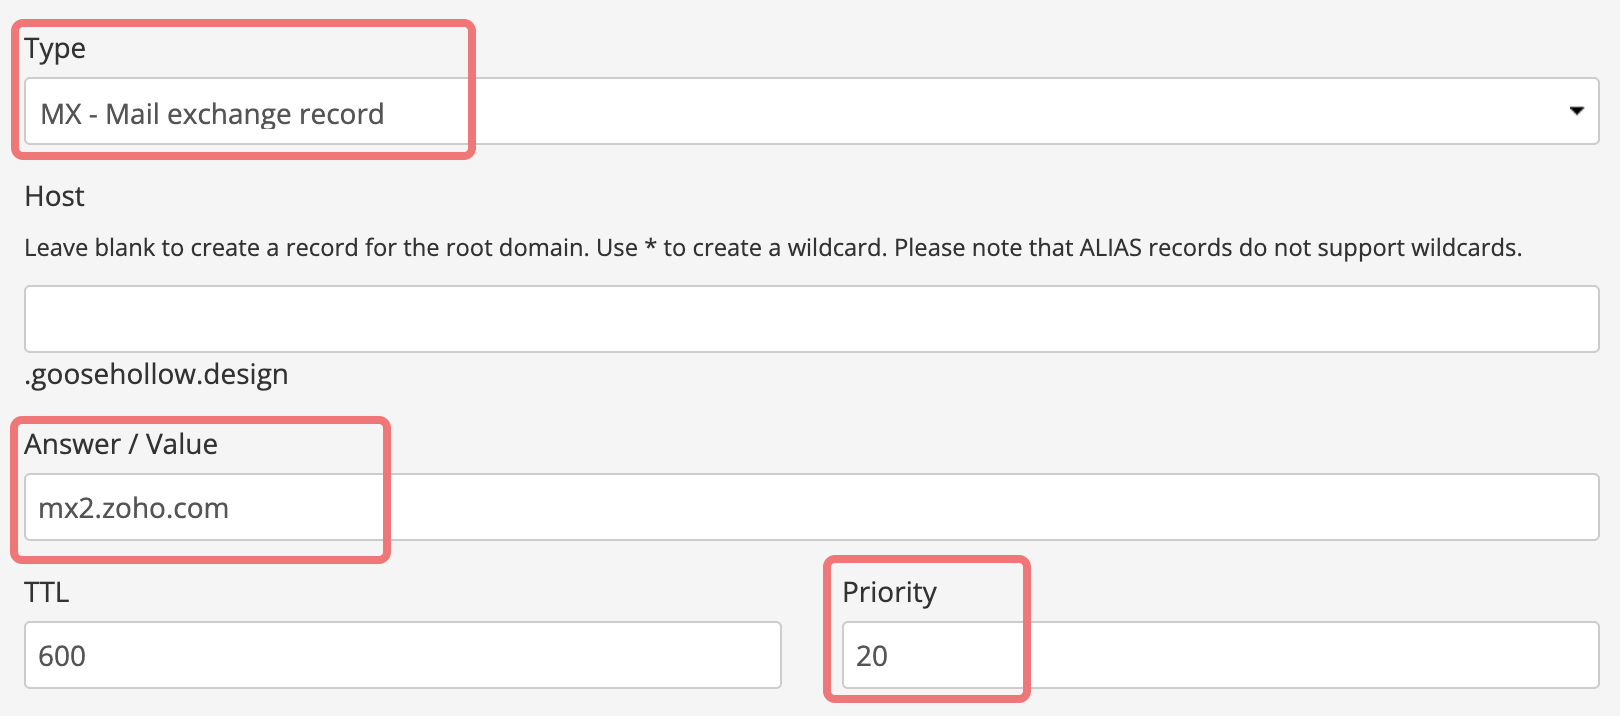
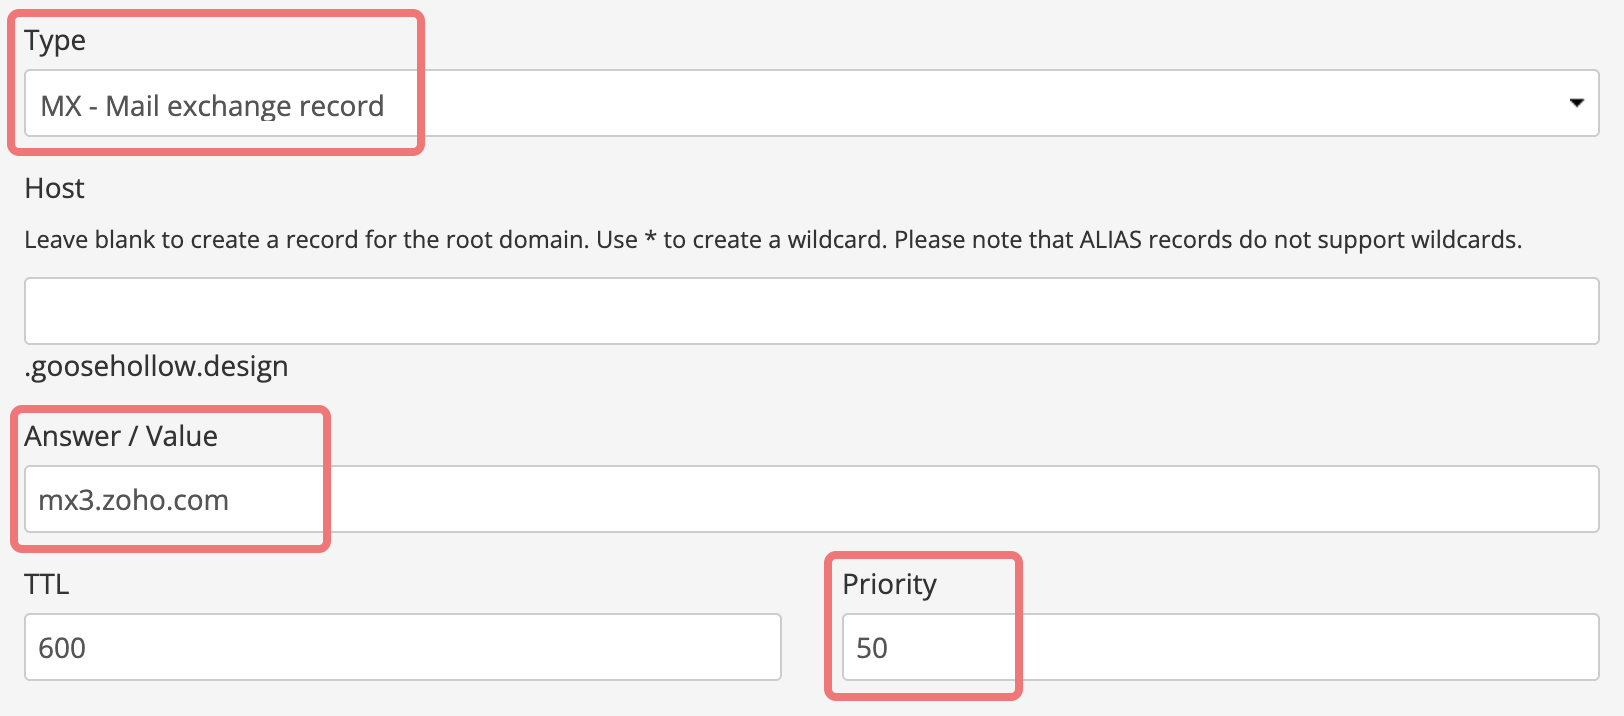
Copy over each MX record, one at a time. With MX records, you'll need to copy the "Value / Content" and paste it into the "Answer / Value" field on Porkbun. Make sure you set the "Priority" as instructed by Zoho too. The MX records should be formatted like this:
Note
If the values of your MX records look different than what's shown above (such as .in or .eu instead of .com), that's okay! Just copy over the exact records given to you by Zoho.
10
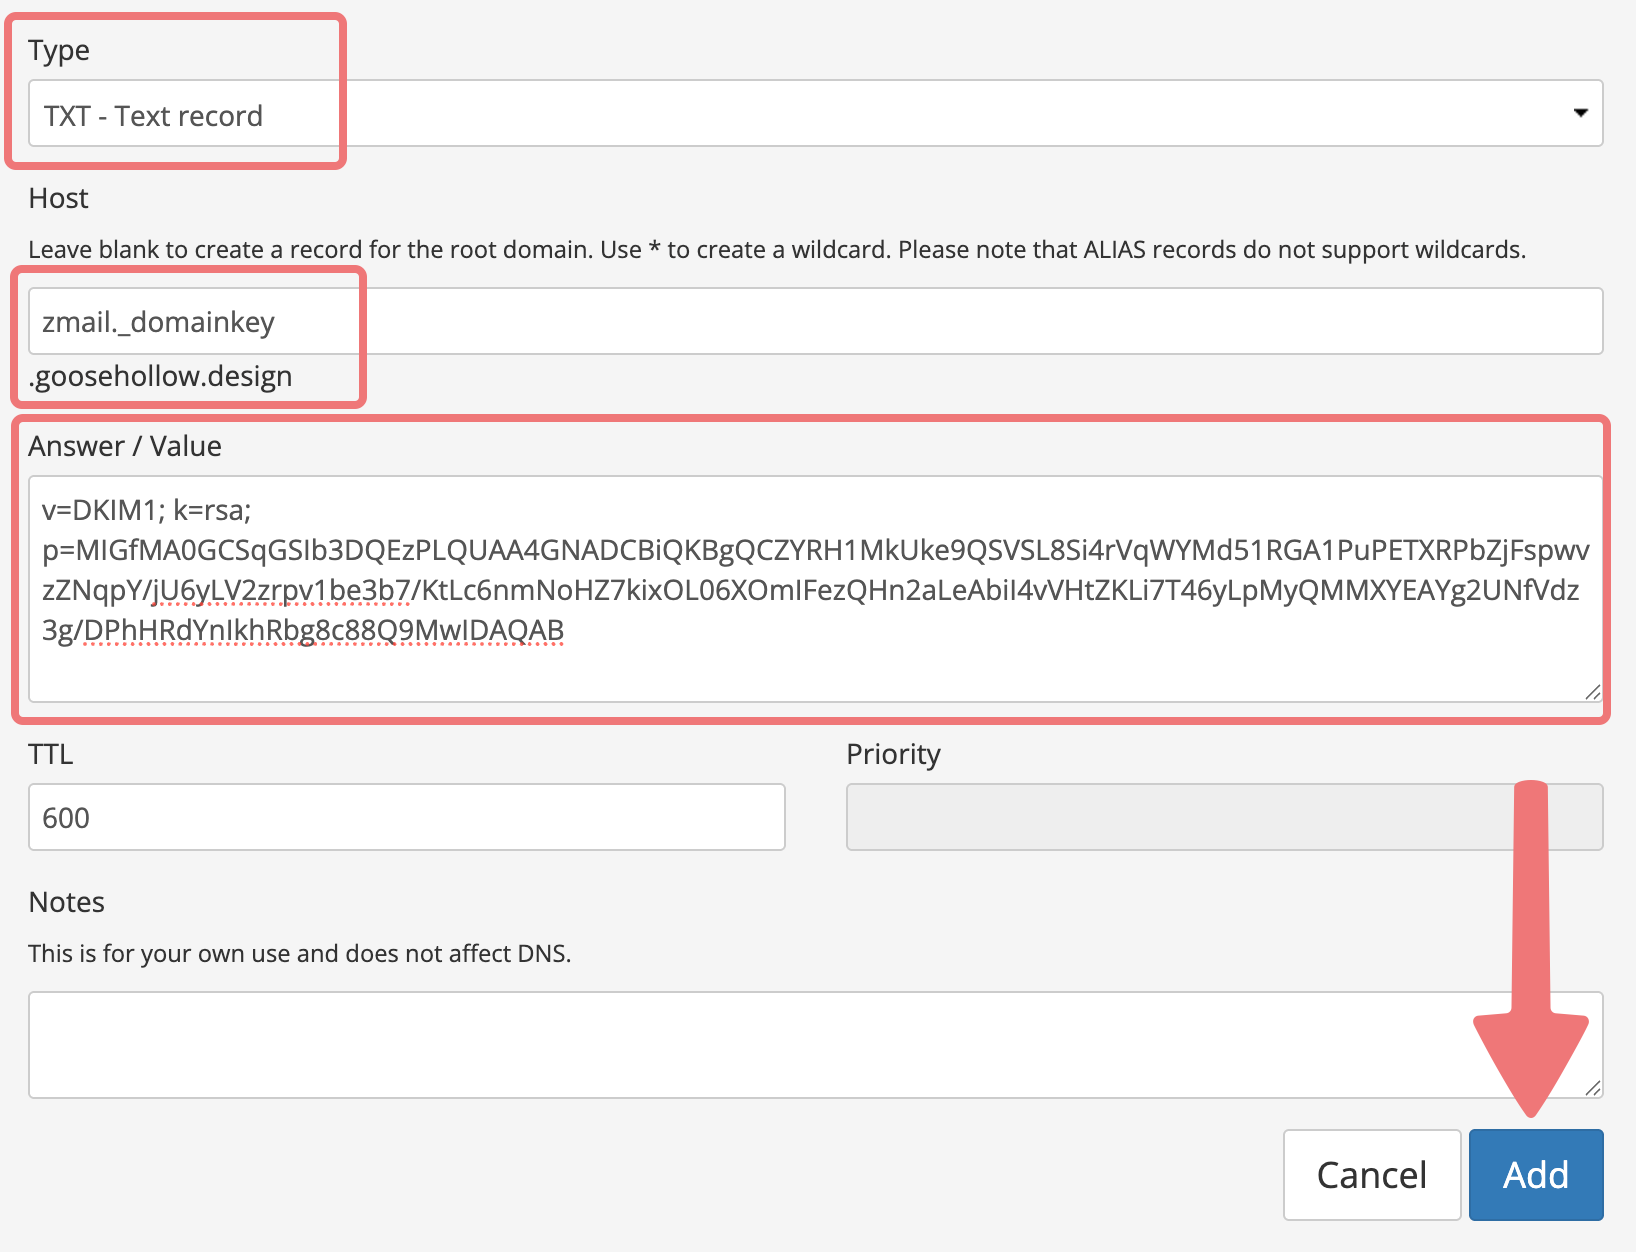
Once the MX records have been created on Porkbun, you'll repeat the same process with the SPF record. Be sure that you select the "TXT" type, then paste the value of the SPF record as given to you by Zoho. After doing so, click "Add".
11
Finally, the last record you'll add is a DKIM record. Note that the "Host" field for this record won't be blank like it is with the other records. Copy over the "Name / Host" and the "Value / Content" to the respective fields on Porkbun, then click on "Add". Your record will end up being formatted something like this:
12
Go back to Zoho Mail and click on the "Verify All Records" option. If everything was added correctly, you'll see a success screen letting you know the records have been verified.
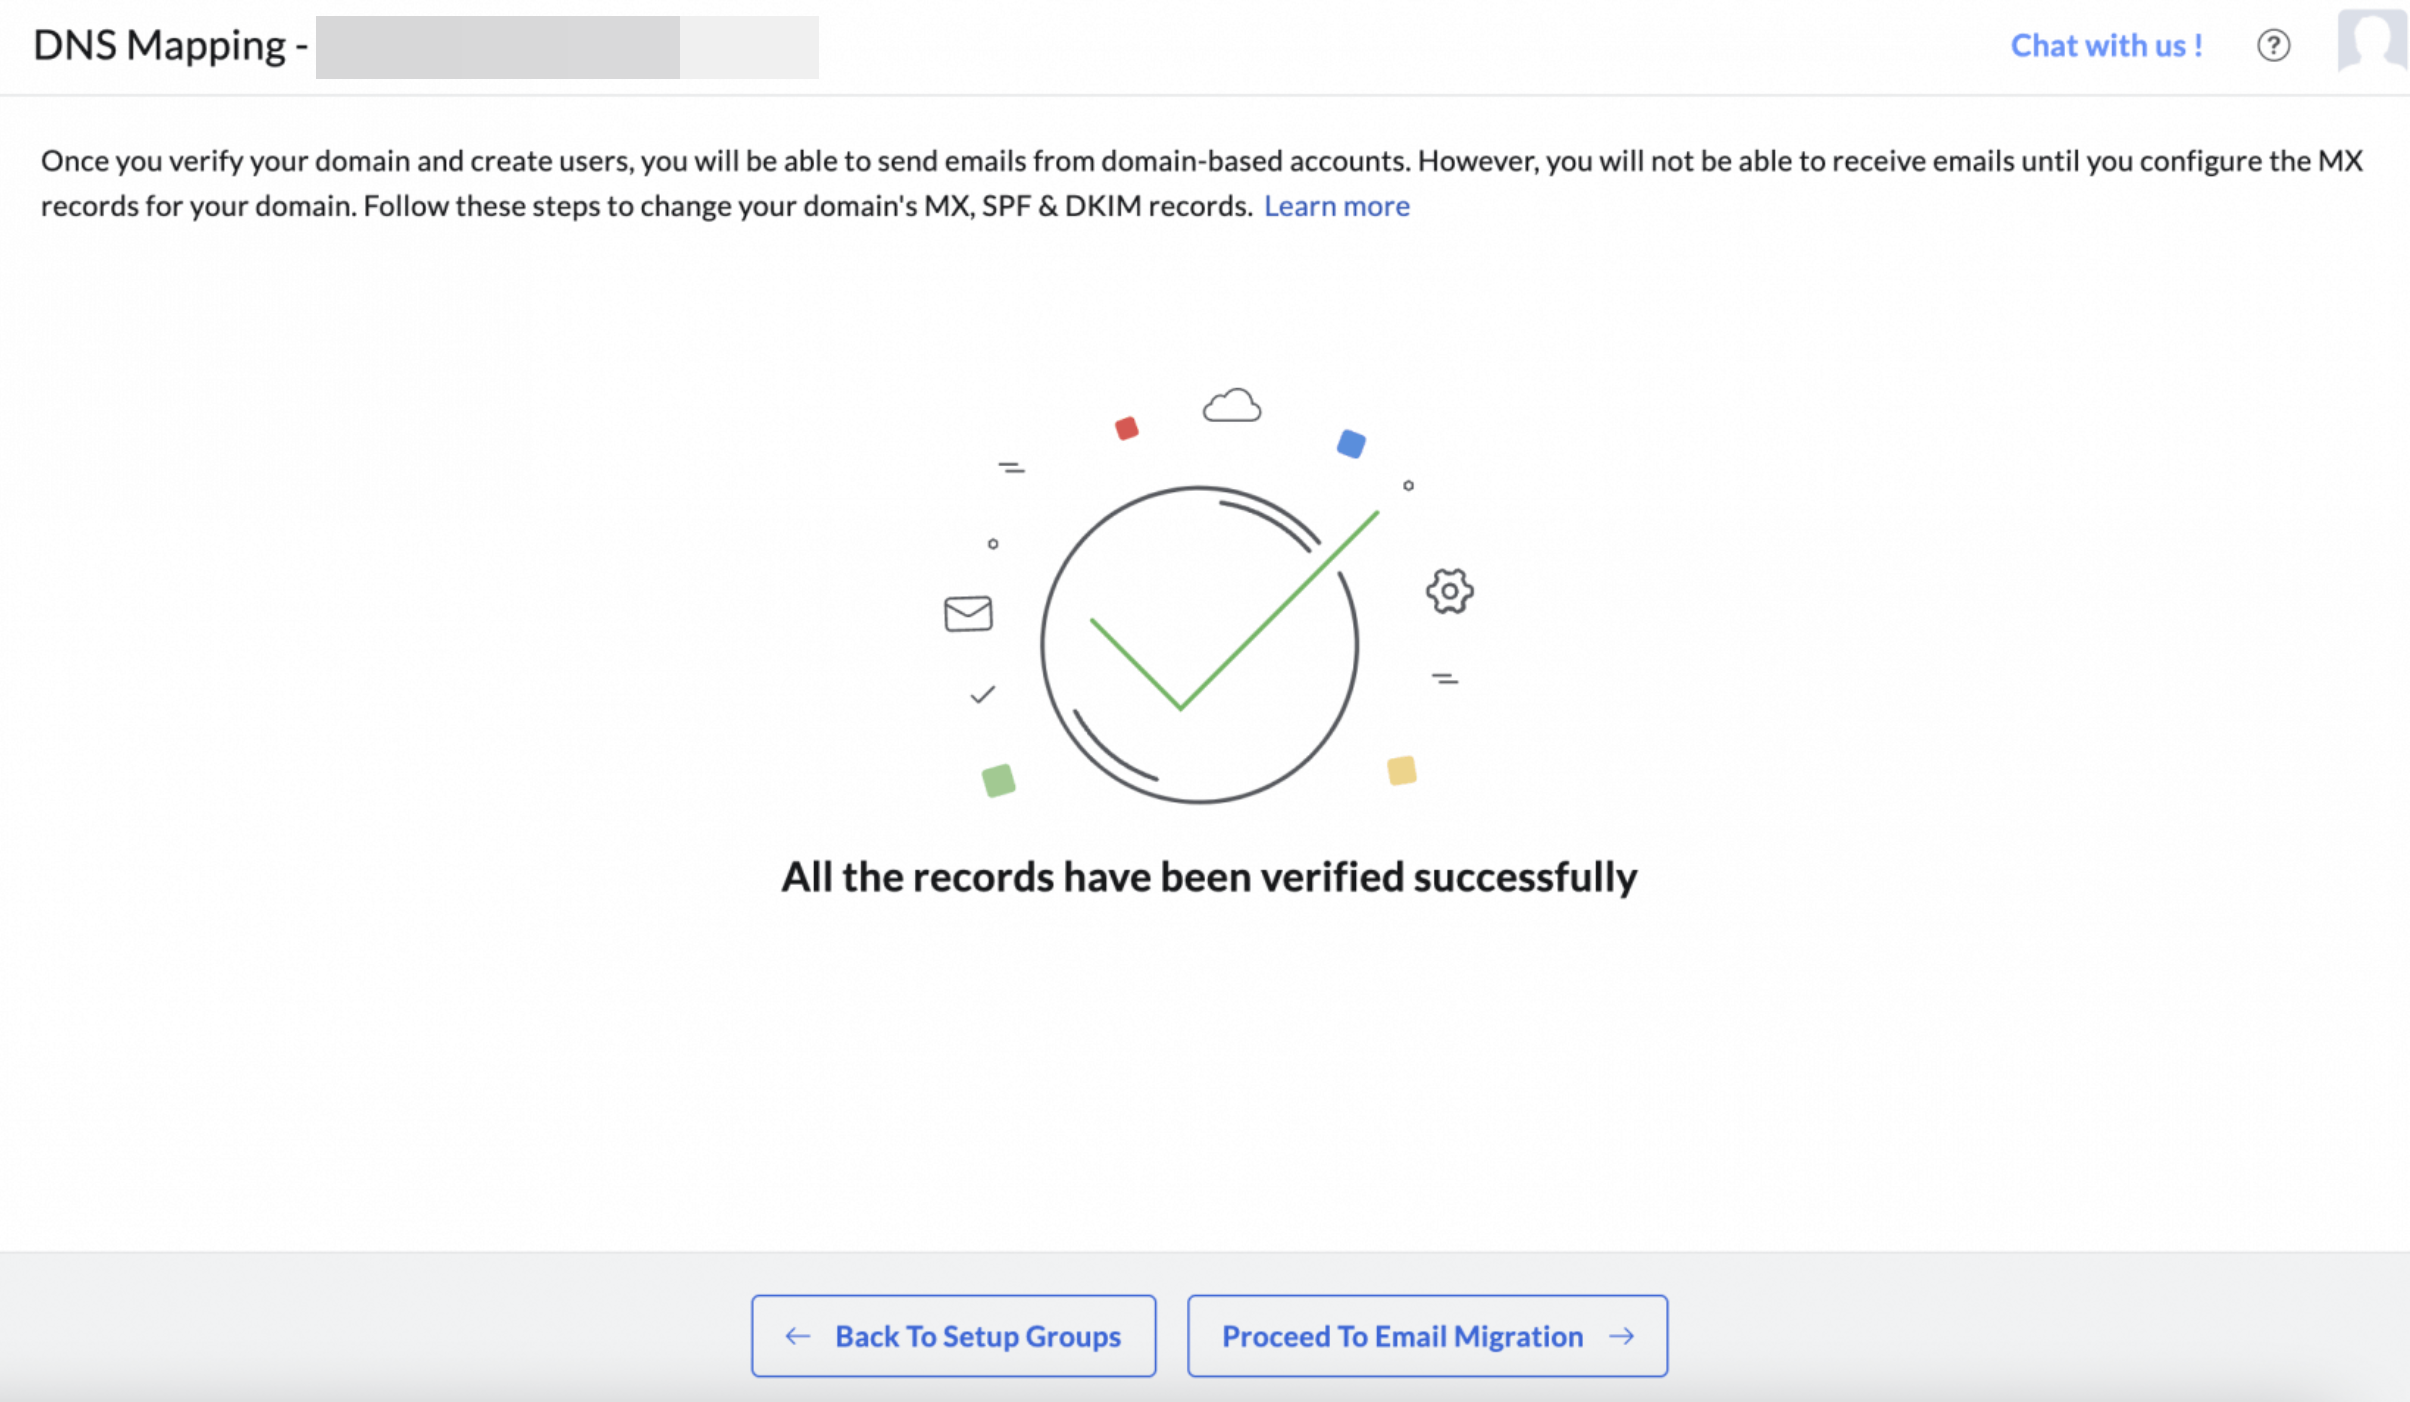
That's it! Your domain has been successfully connected to Zoho Mail. You can optionally go through the "Email Migration" portion of Zoho's setup if you're migrating from a different email provider. Otherwise, you can go to your inbox on Zoho and begin using your domain's email address. Congrats!
If you run into any issues connecting your domain to Zoho Mail, feel free to reach out to our support team for assistance.


