How to connect your domain to Wix
Want to link your domain to a website built on Wix? Porkbun has you covered!
Note
If you're currently using a free plan from Wix, you will need to upgrade to a paid plan before you can connect your domain to your Wix website.
You have three options for connecting your Porkbun domain to your Wix website. The first method is to use the automatic connection offered by Wix and Porkbun via Entri. If you would prefer to connect your domain manually instead, we'll show you how to do so either via nameservers, or DNS records. Let's get started!
Method 1: Connect automatically via Entri
This method will allow Entri to connect your website built on Wix to your domain on Porkbun automatically.
2
After adding your domain, you'll see a notification from Wix saying their system can connect your domain automatically. Click on "Continue".
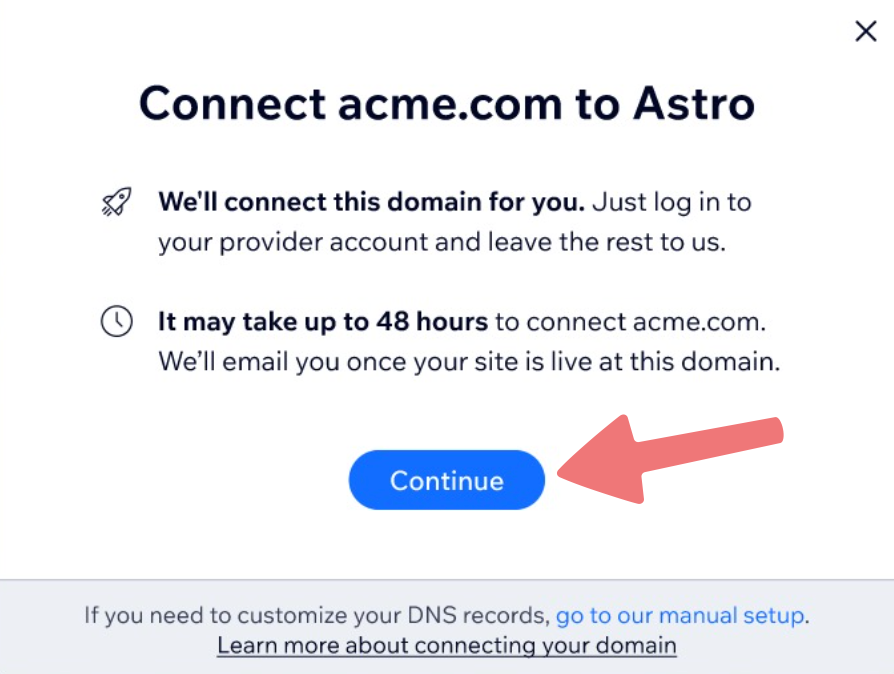
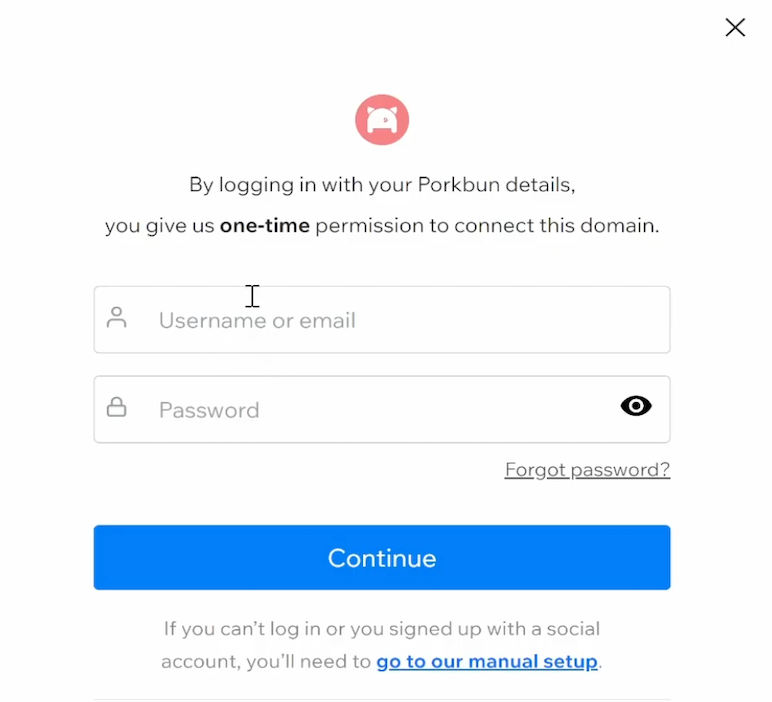
You'll be prompted to sign in with your Porkbun account credentials, allowing Wix one-time permission to connect the domain to your account. Enter your Porkbun account login information, and click "Continue".
3
You'll see a couple of loading screens while the process completes. Afterwards, you'll see a success message letting you know your domain is being connected.
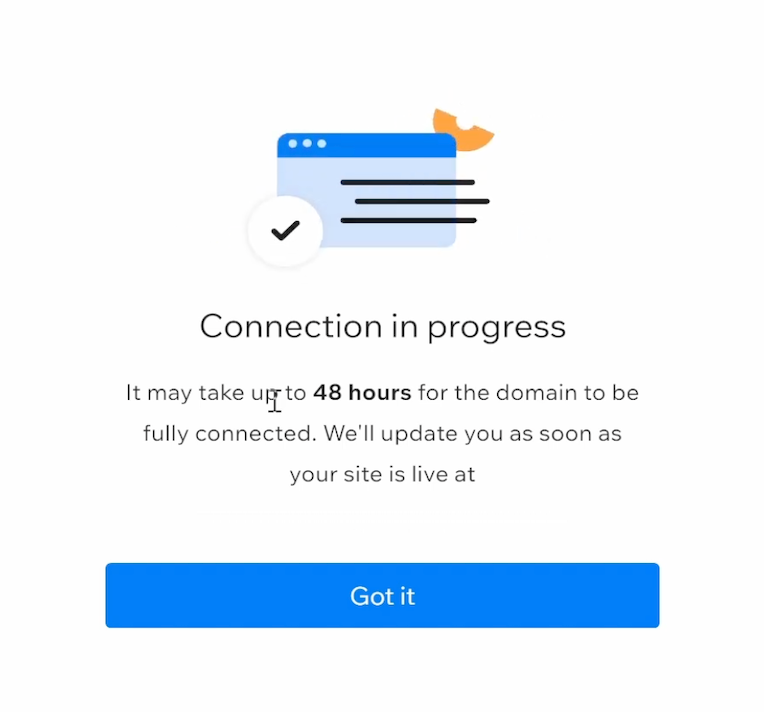
That's it! Your domain will connect automatically to your website on Wix, and within 48 hours (usually much quicker) everything will come online. Check back on your Wix account periodically to make sure there aren't any error messages pertaining to your domain's connection to the website.
Method 2: Connect via Wix nameservers
This method ends up working in the same way as the first method, but you'll make the configuration changes to your domain manually. We'll show you how!
Note
If you've set up any custom DNS records on your domain on Porkbun, changing to Wix's nameservers will cause the records on Porkbun to stop working. You will need to re-add those records to your domain on Wix if you use their nameservers. This applies to Porkbun's email services too.
2
When prompted to connect your domain to the website on Wix, click on the option labeled "go to our manual setup".
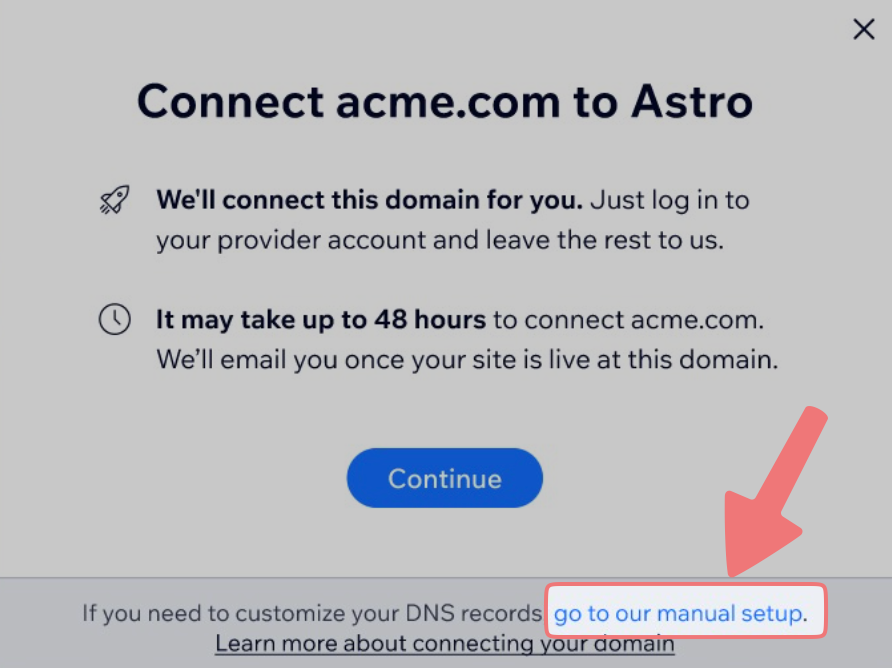
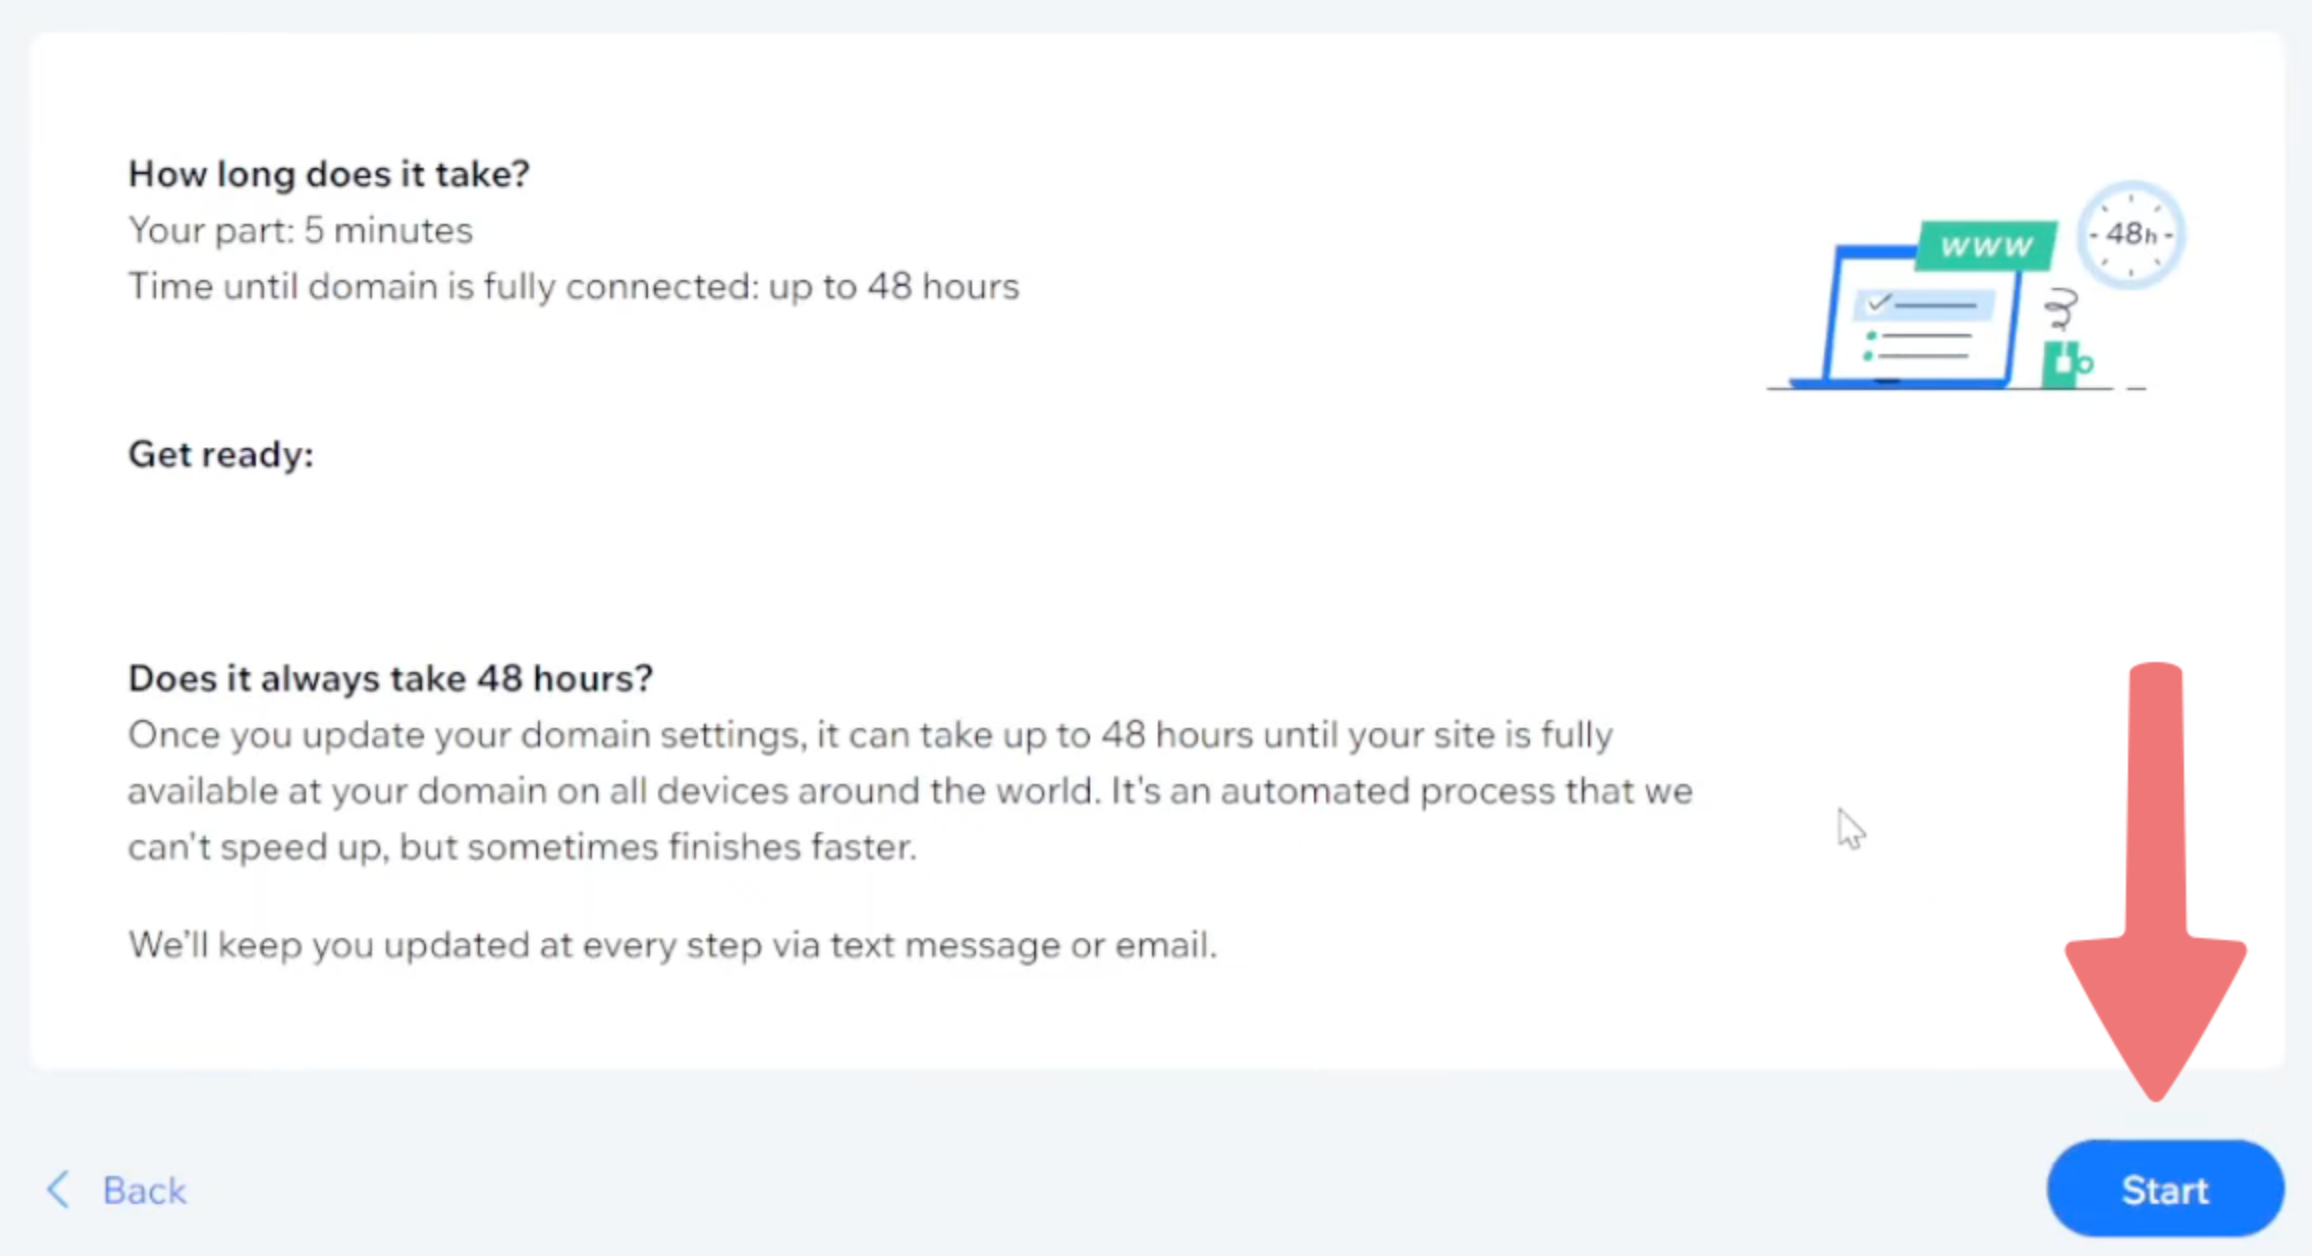
Review the info on the next screen, and then click on the "Start" button to begin the process.
3
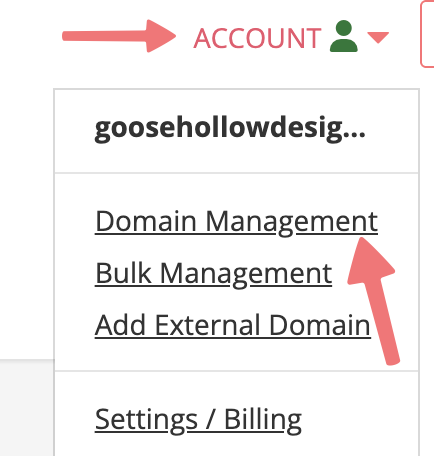
In a new tab or window, log in to your Porkbun account. You should arrive at the Domain Management screen. If you're already logged in, click on ACCOUNT in the top-right corner and select Domain Management.
4
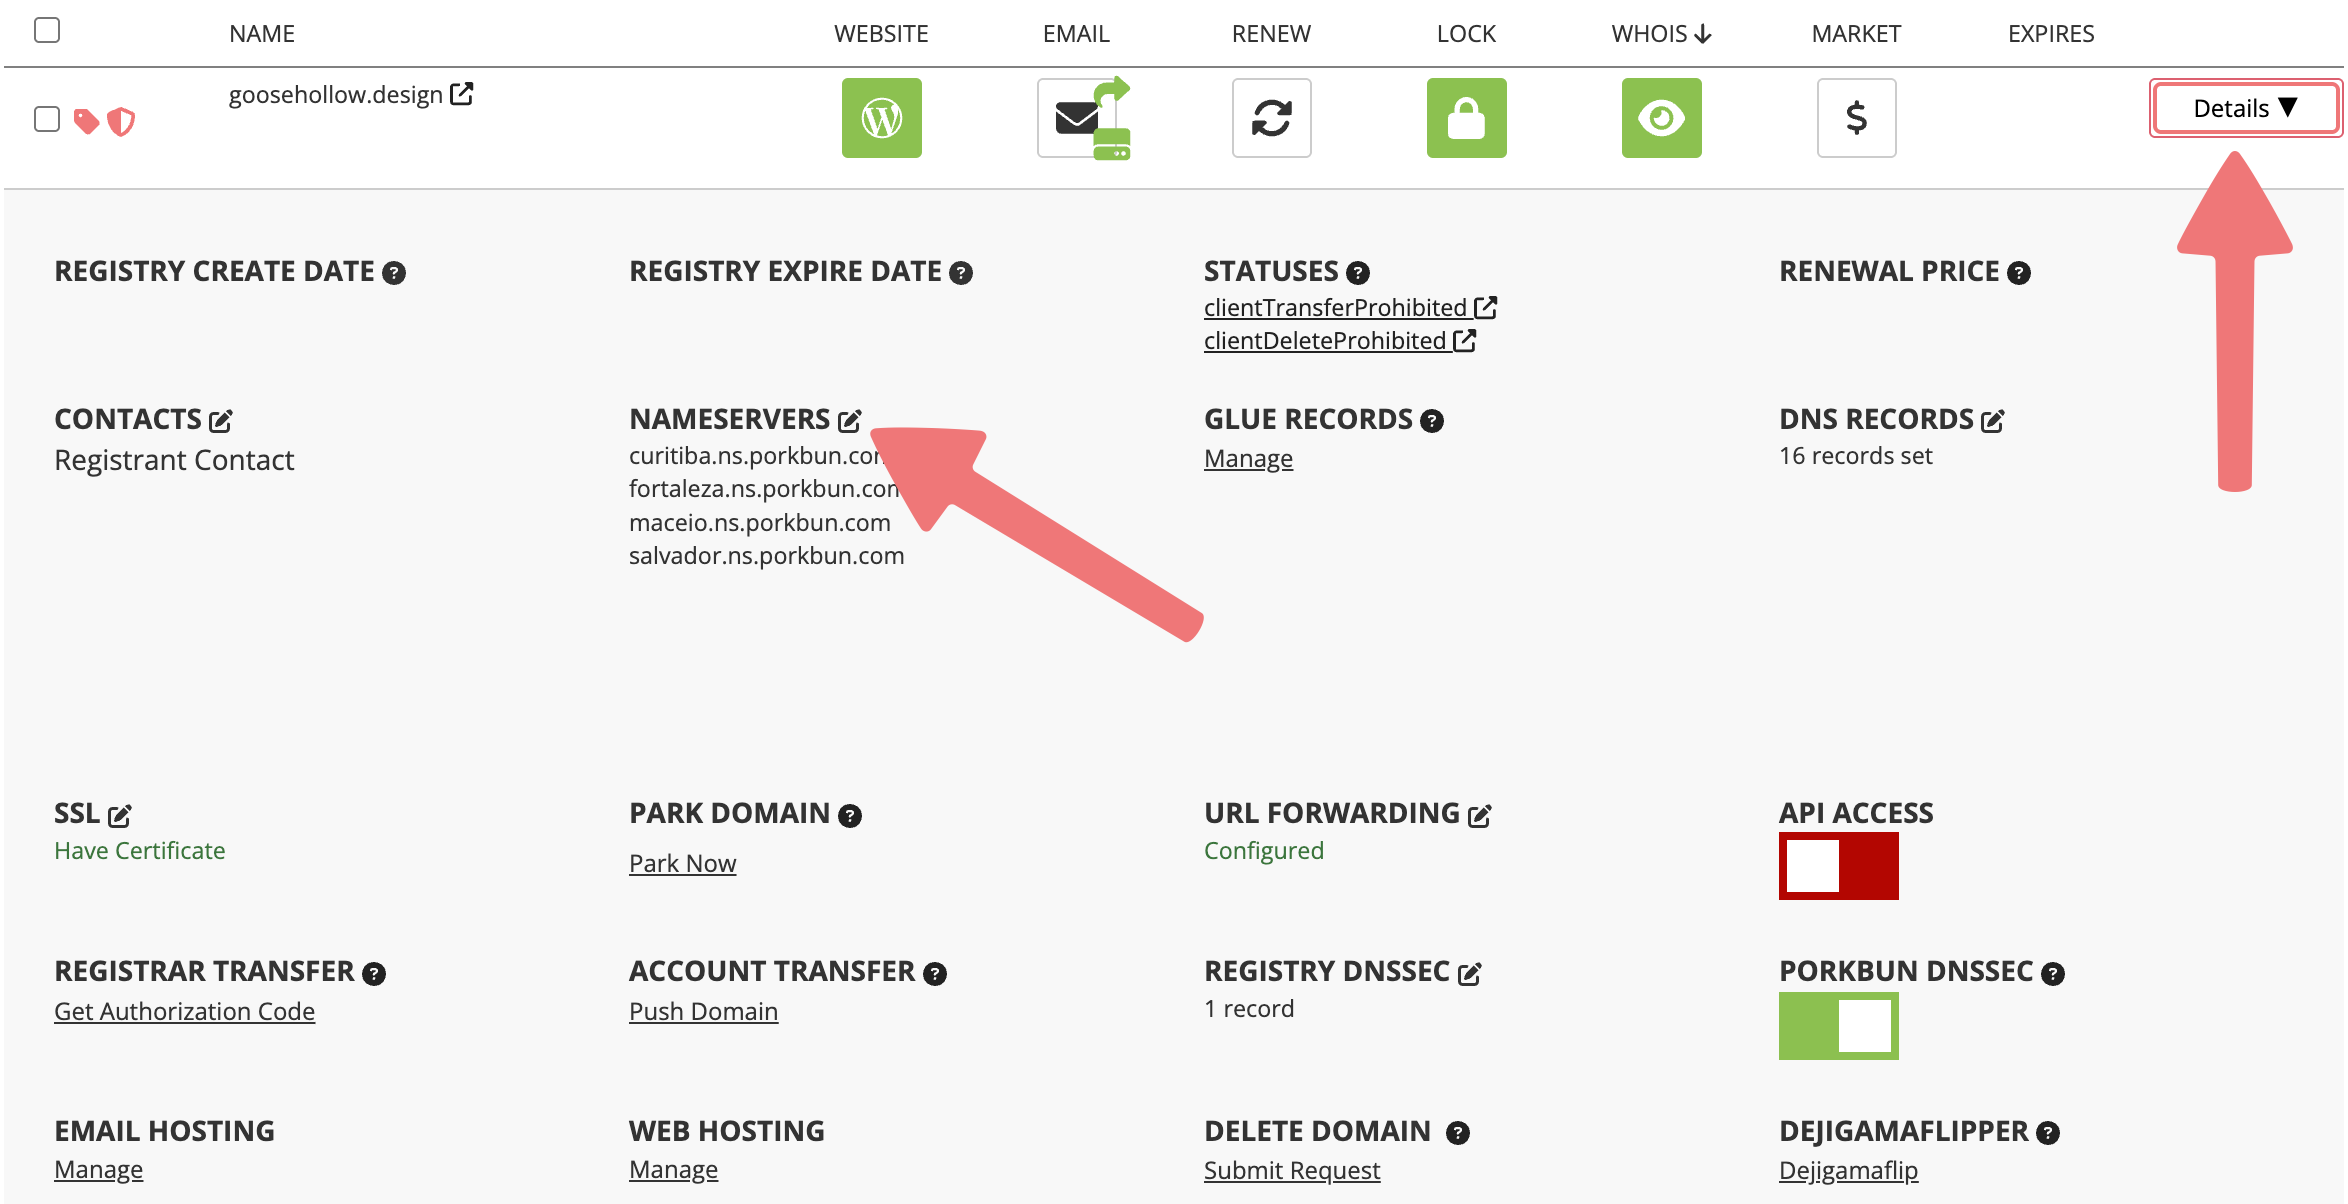
Locate the domain you're connecting to Wix. Click the "Details" button all the way to the right of the domain name. In the details area that appears, look for the "Nameservers" option and click on the edit icon.
5
A menu will appear labeled "Edit Authoritative Nameservers". Leave this menu alone for now, and switch back to your tab or window with the Wix setup process opened.
6
Continue through the setup process on Wix by clicking "I logged in", then "I found my domain settings", then "I found the nameservers".
7
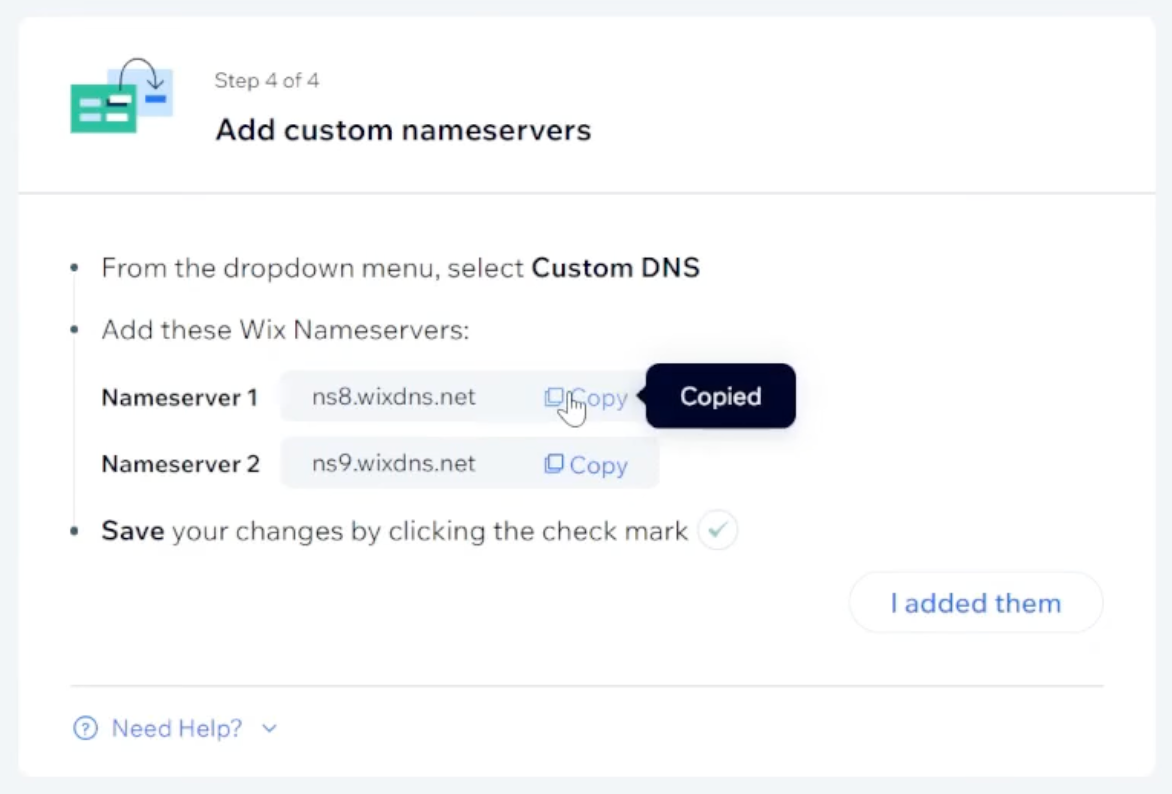
Wix will then display a set of DNS nameservers to you. We will replace your domain's current nameservers with these. Click on the "copy" button to copy the first nameserver to your clipboard.
8
Switch back to your tab/window with your Porkbun account pulled up. In the "Edit Authoritative Nameservers" menu that you opened earlier, erase everything that's currently inputted, and then paste the nameserver that you copied over from Wix.
9
Switch back to Wix, then copy the second nameserver value. Switch back over to Porkbun, and paste that value in the same field, but in a new line. Your exact nameservers may be different, but it should end up being formatted like this:
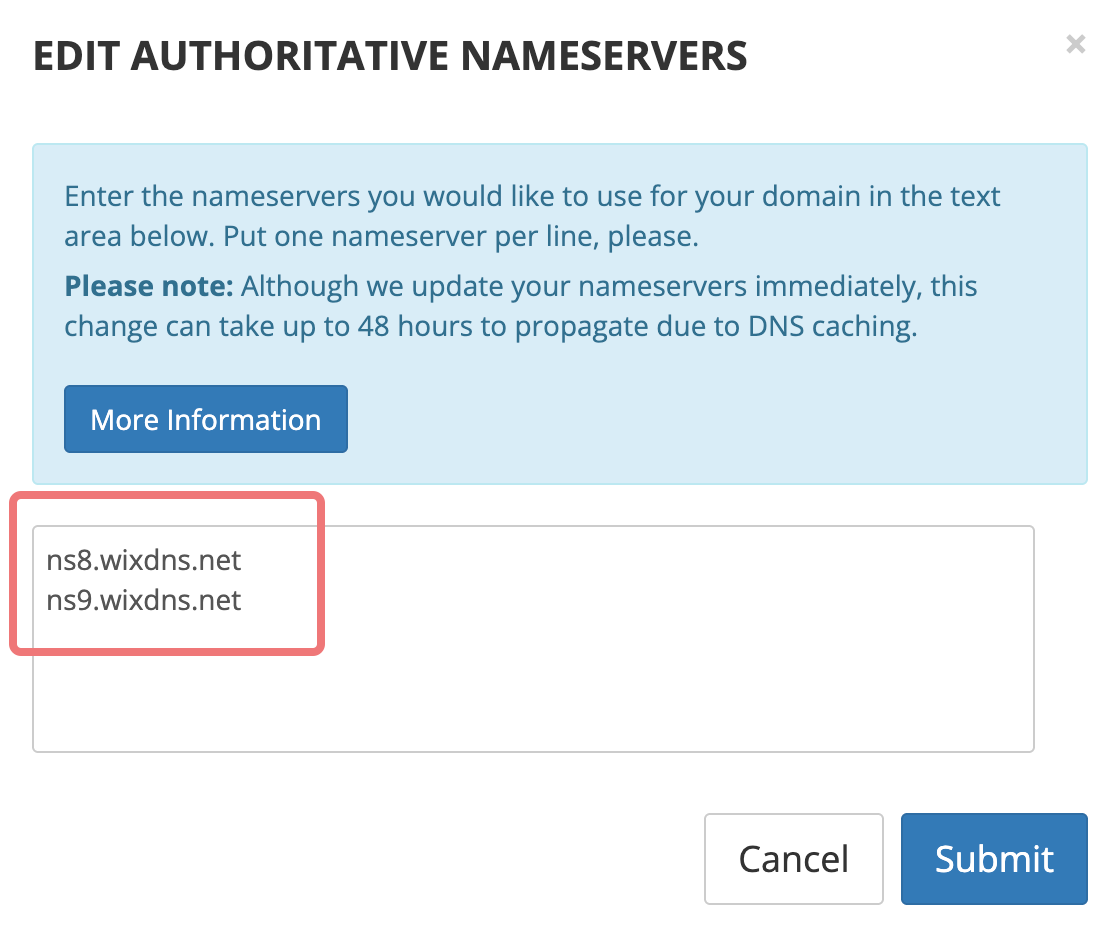
Once you have those nameservers pasted in, click on "Submit". After a moment, the menu will close and the Wix DNS nameservers will be applied to your domain.
10
Finally, switch back over to Wix one more time, and click on "I've replaced my nameservers". After a moment, you'll see a message indicating that Wix is in the process of checking your domain connection.
That's it! You've successfully connected your domain to Wix via their nameservers. Your site should connect and come online within 48 hours (usually much quicker). You can check back on the "Domains" page on Wix periodically to make sure there aren't any errors with the connection.
Method 3: Connect to Wix using DNS records
If you want to keep using Porkbun to manage your domain's DNS records, you'll need to connect your domain manually via DNS records. Here's how!
2
When prompted to connect your domain to the website on Wix, click on the option labeled "go to our manual setup".
On the next page, click on the link that allows you connect the domain by "pointing" specifically.
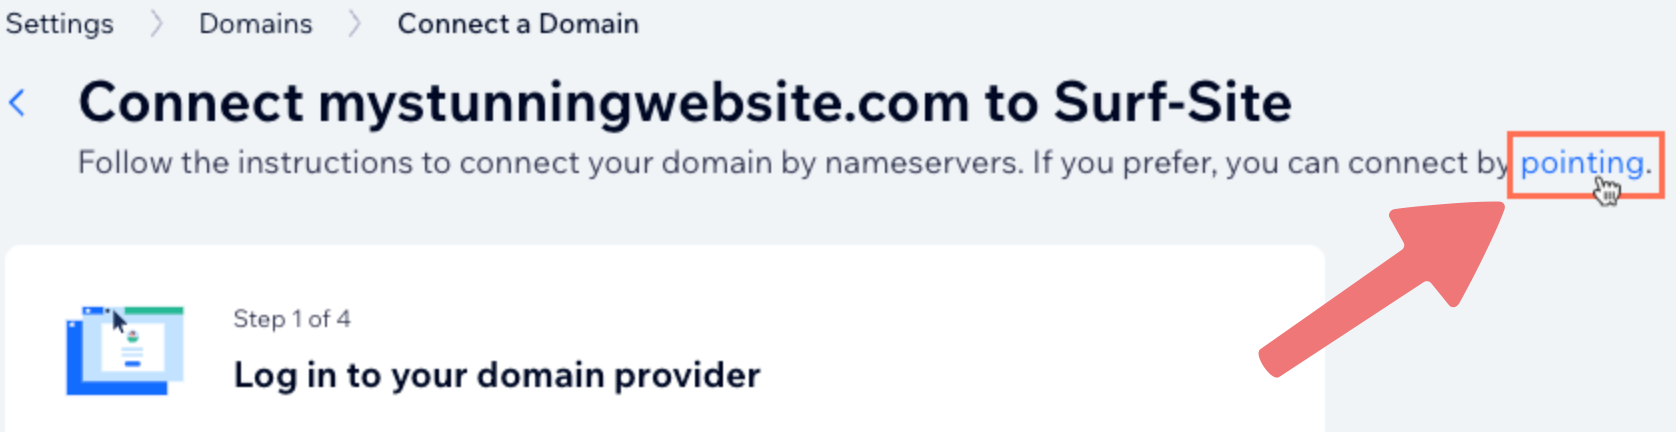
On the next page, click on the option labeled "Switch to Pointing" to confirm the decision. Wix will change the instructions accordingly.
3
In a new tab or window, log in to your Porkbun account. You should arrive at the Domain Management screen. If you're already logged in, click on ACCOUNT in the top-right corner and select Domain Management.
4
Locate the domain you're connecting to Wix. Click the "Details" button all the way to the right of the domain name. In the details area that appears, look for the "DNS Records" option and click on the edit icon.
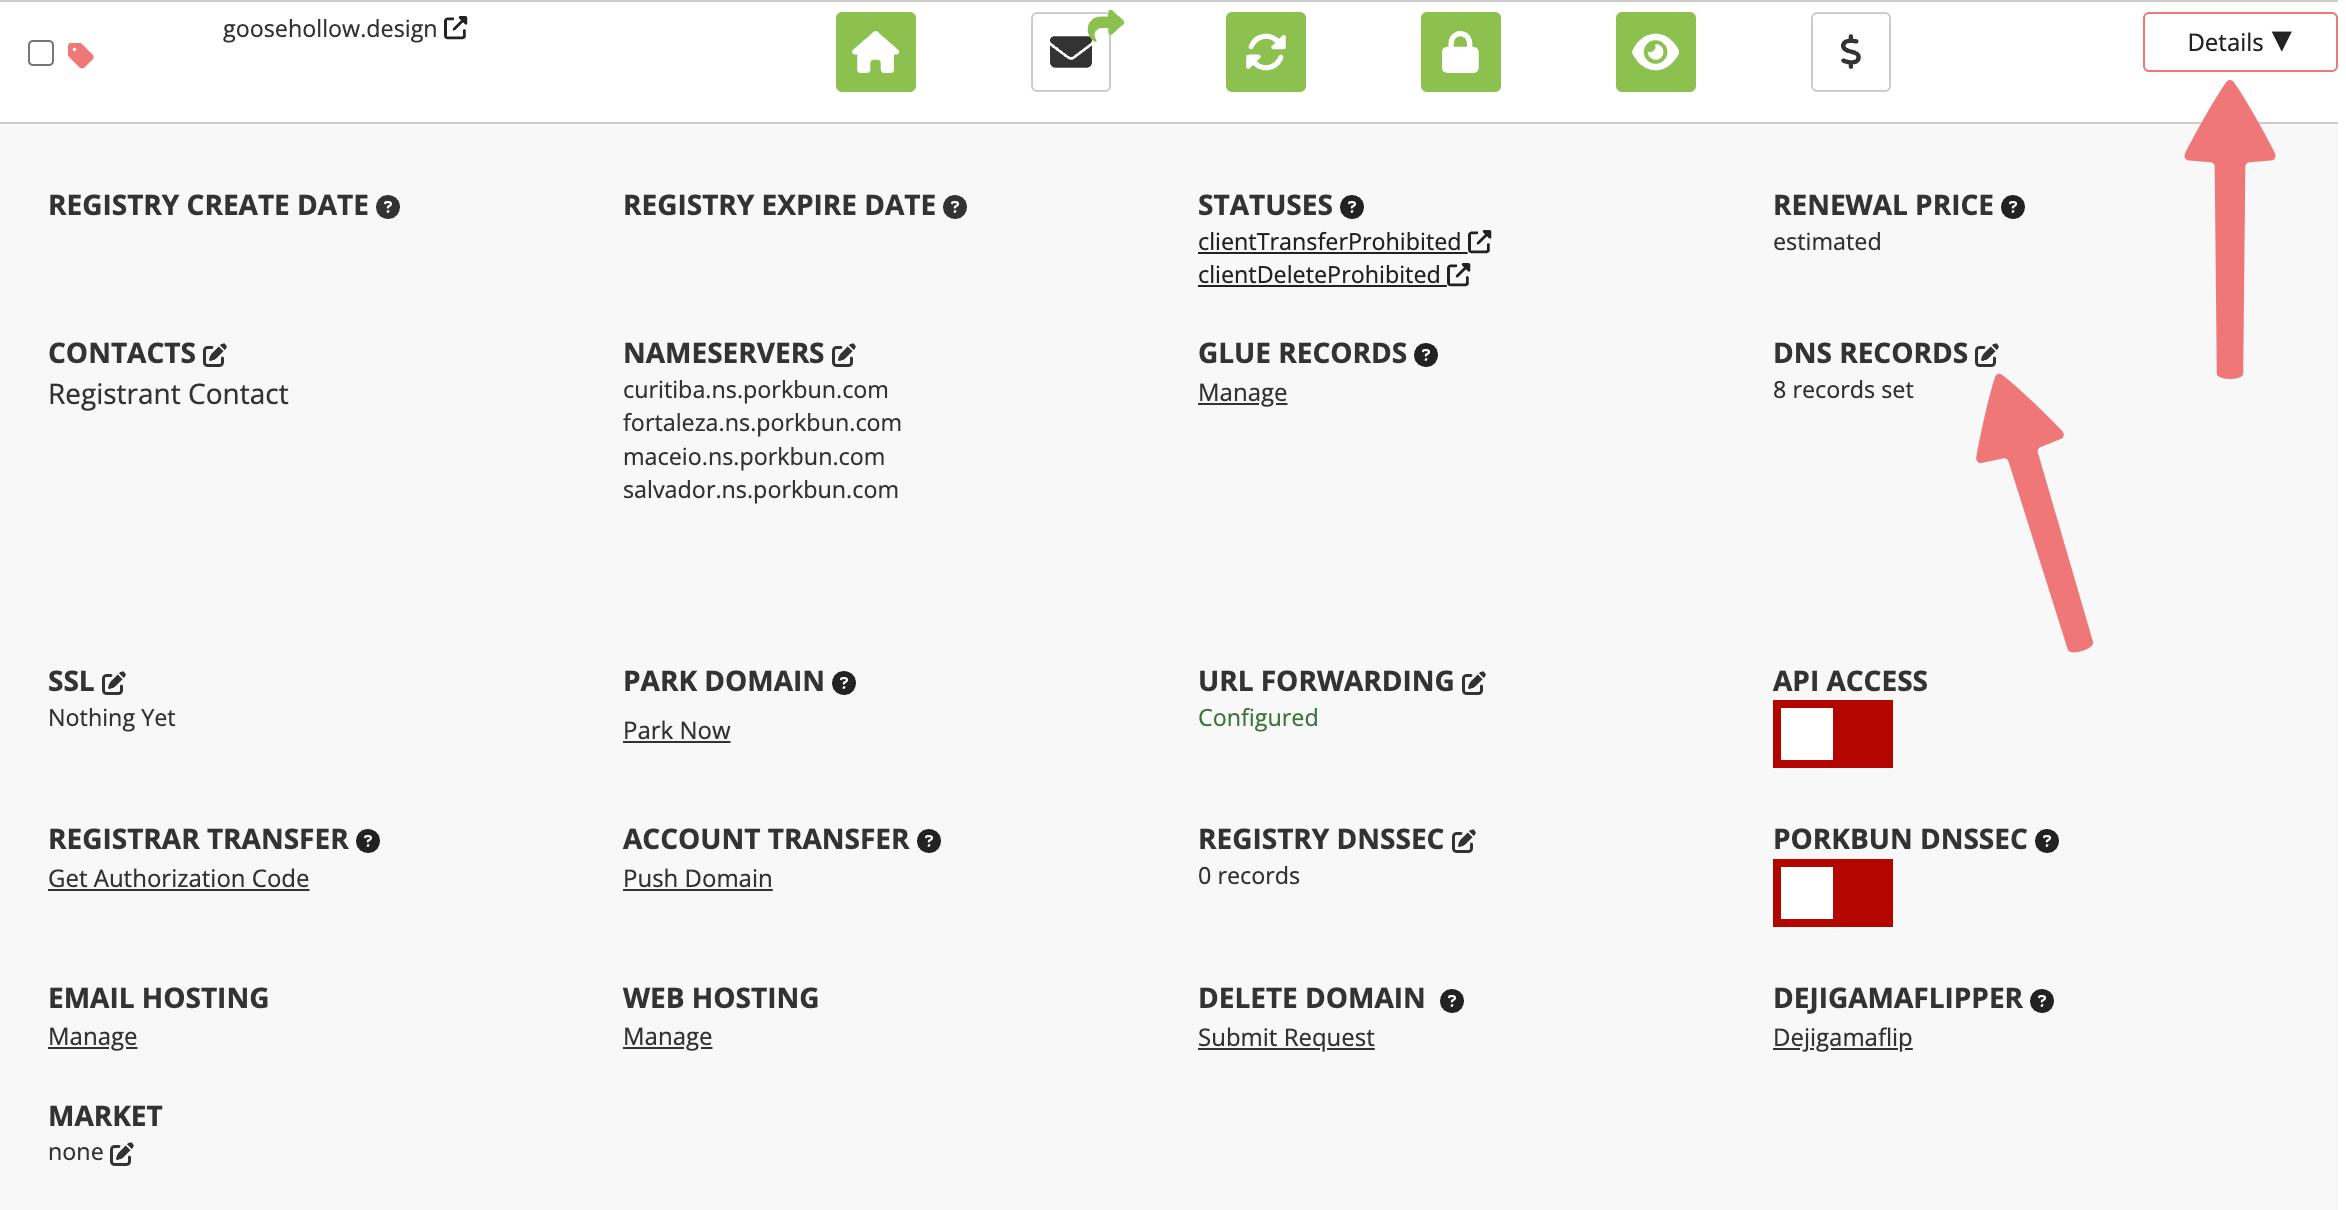
5
A menu will appear labeled "Manage DNS Records". Leave this menu alone for now, and switch back to your tab or window with the Wix setup process opened.
6
Continue through the setup process on Wix by clicking "I logged in", then "I found my domain settings", then "I found the records".
7
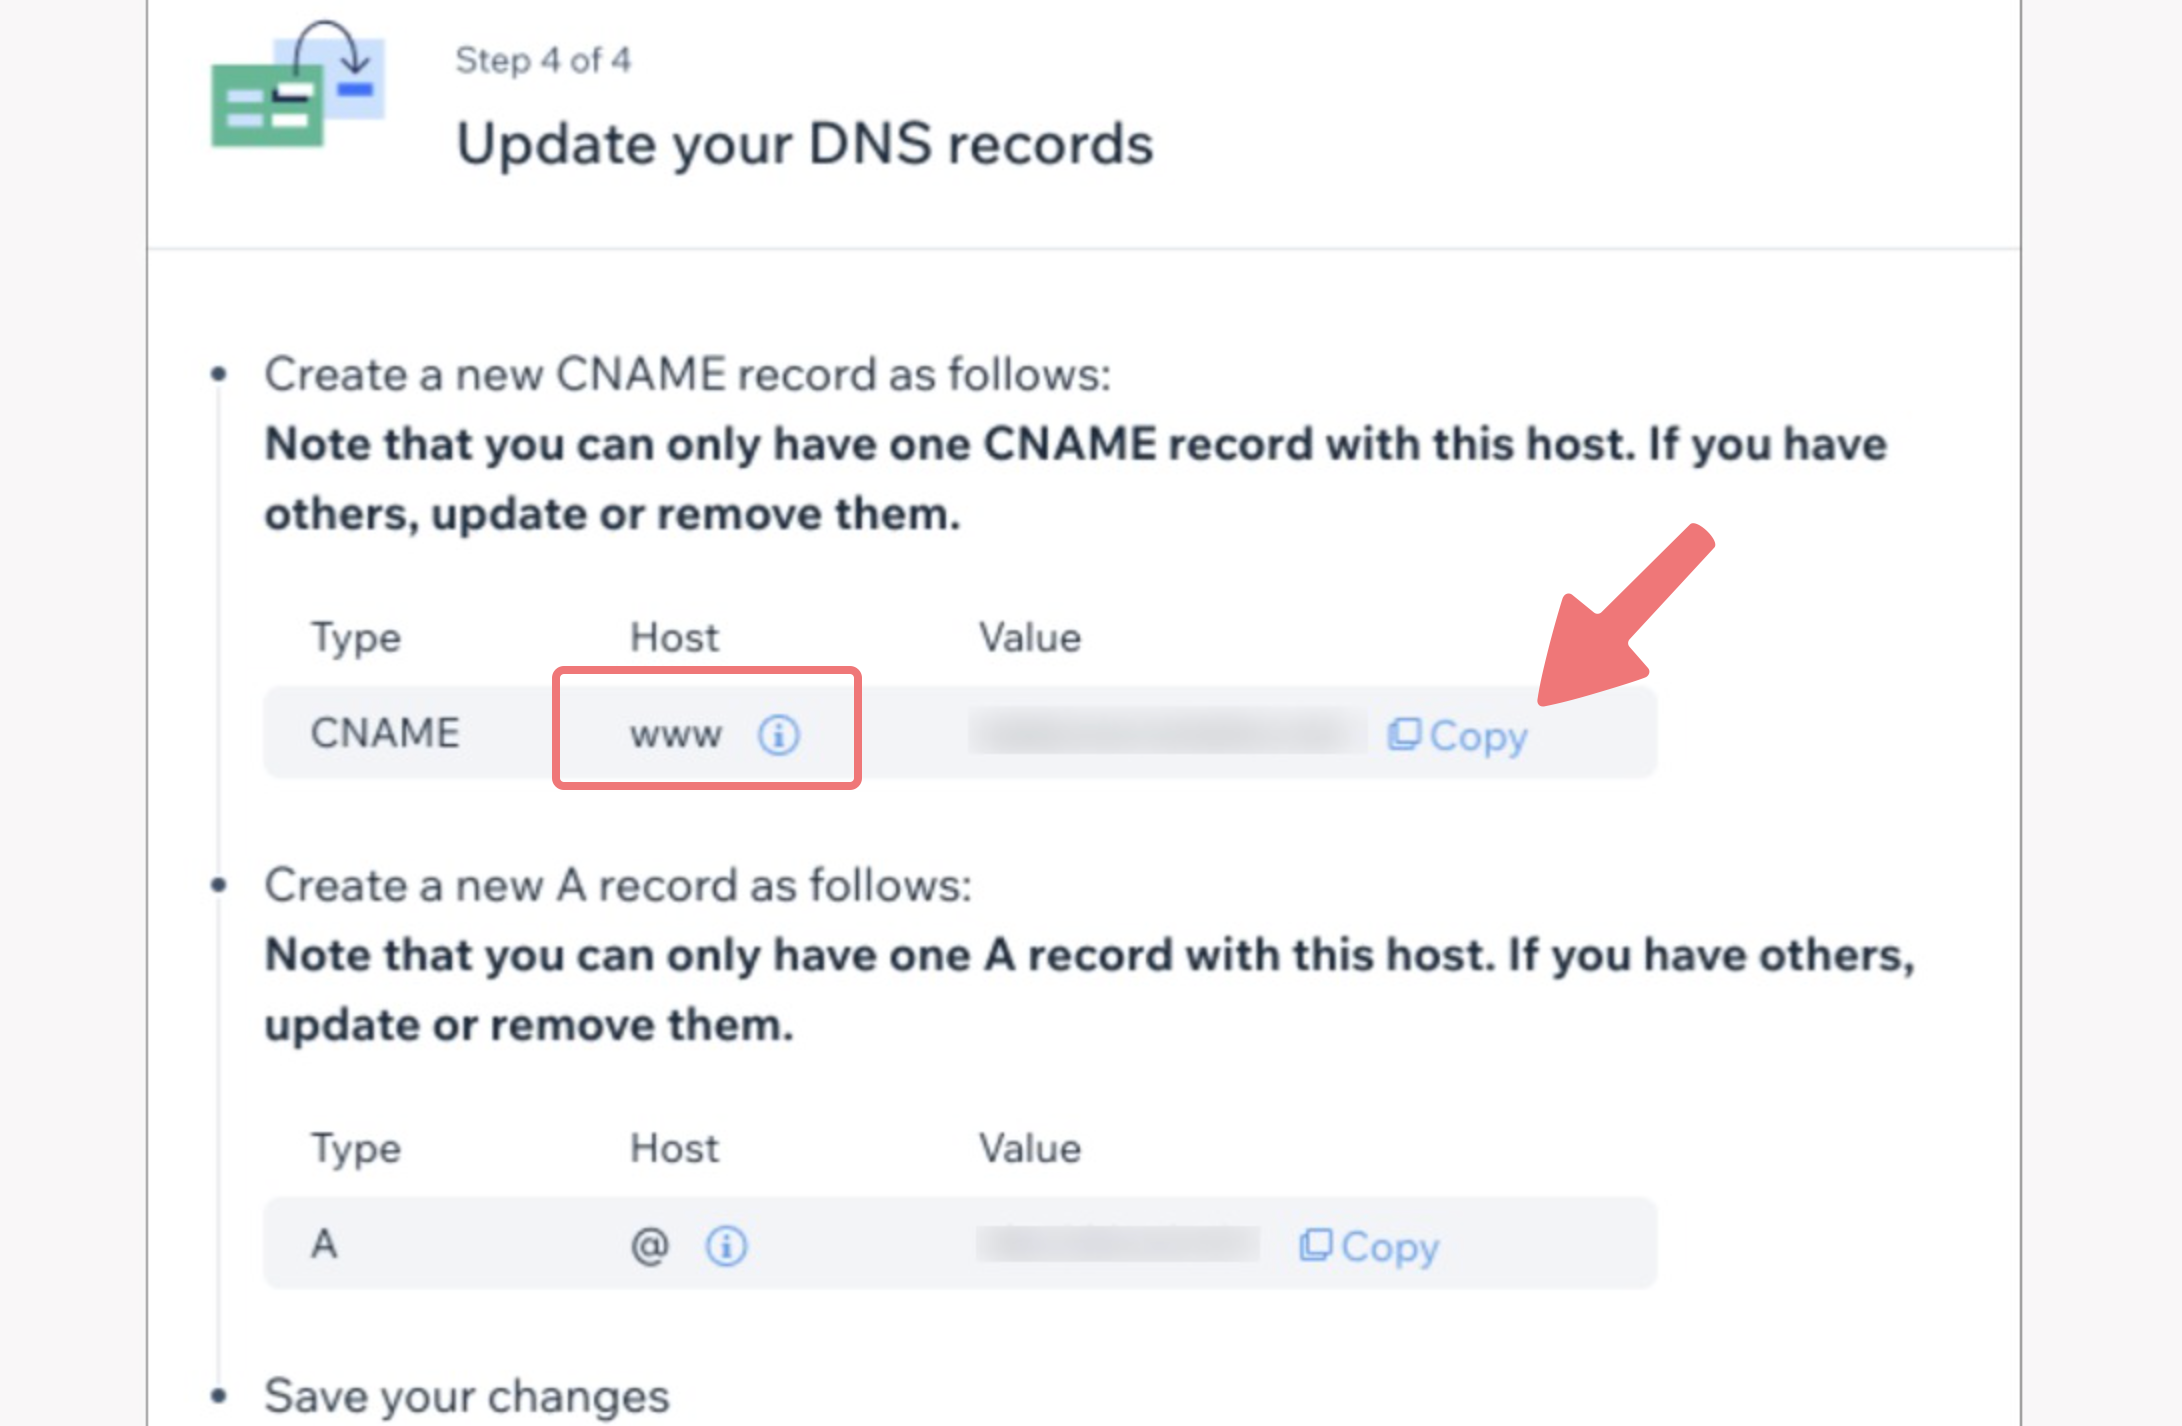
Wix will then display a set of DNS records to you. You will need to add these to your domain on Porkbun. Note that the first record has a "Type" of "CNAME", and the "Host" is set to "www".
Click on the "copy" button to copy the "Value" of the first record to your clipboard.
8
Switch back to your tab/window with your Porkbun account pulled up. In the "Manage DNS Records" menu that you opened earlier, create the CNAME record that Wix provided you.
Change the "Type" to CNAME, input "www" in the "Host" field, and then paste the "Value" you copied from Wix into the "Answer / Value" field on Porkbun. Your record should end up being formatted like this:
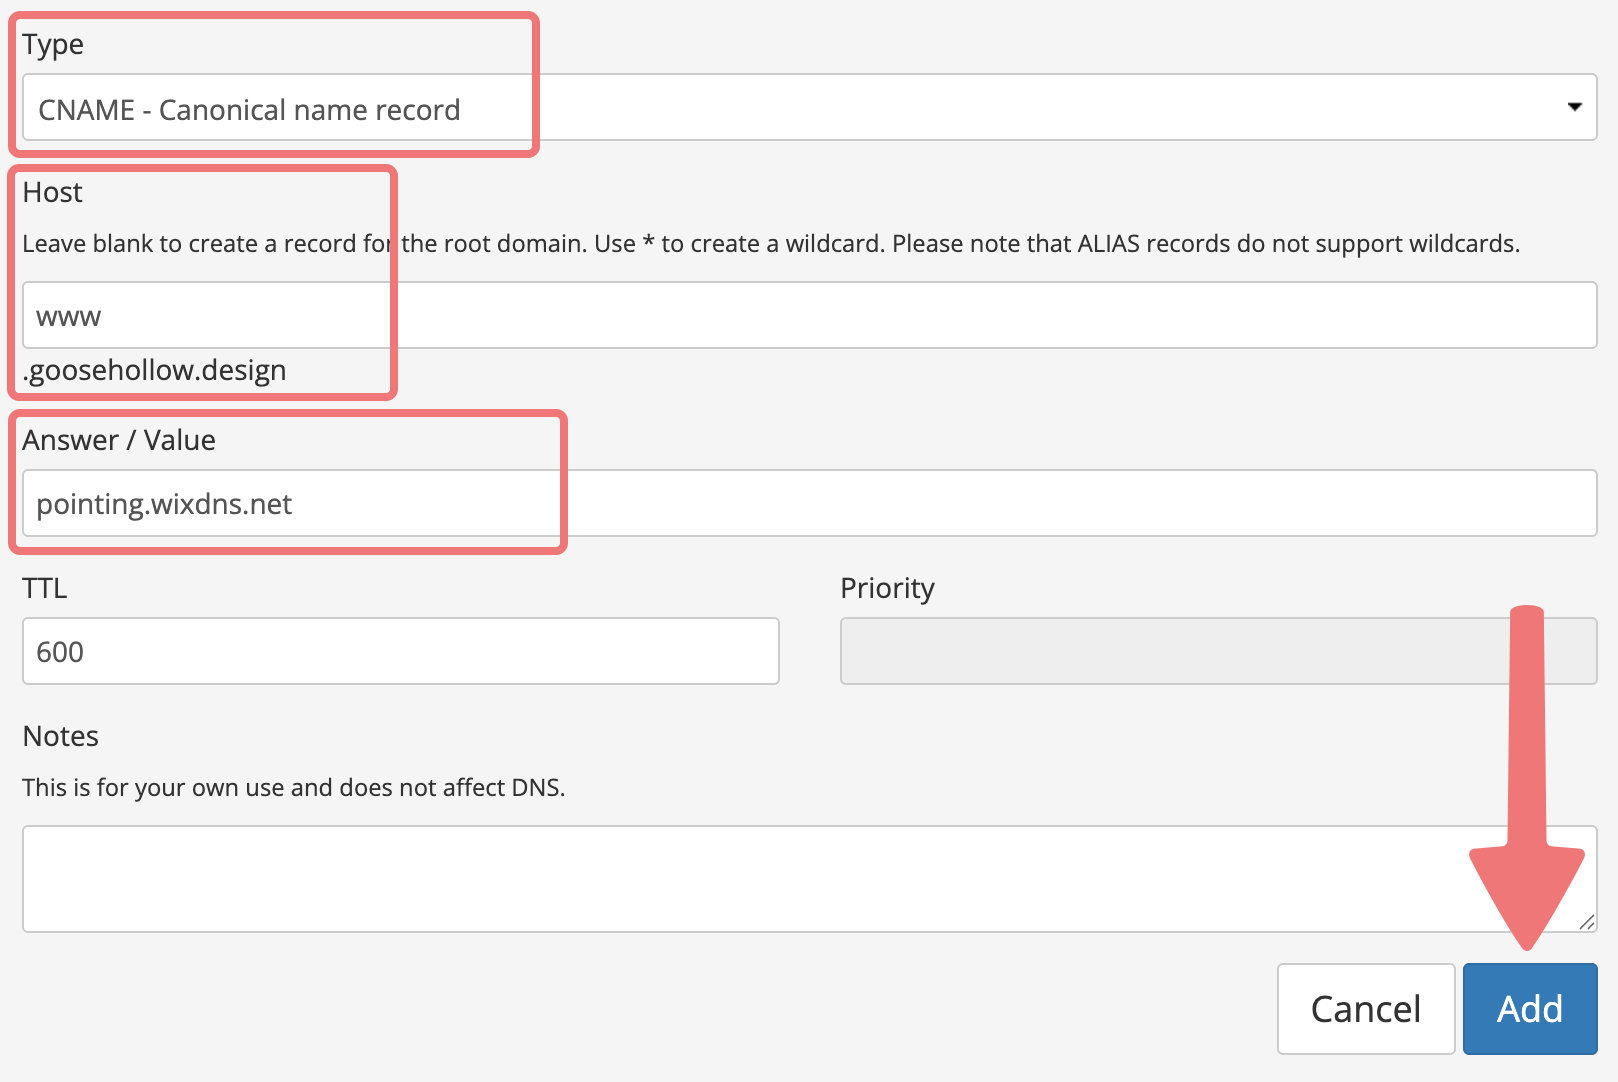
Click on "Add" to finish creating the record.
Note
If you see an error message stating "a record with that host already exists", you can follow this quick guide to resolve that issue.
9
Switch back to Wix and locate the second DNS record. The "Type" for this record will most likely be "A", and the "Host" field will contain an "@" symbol. Click on the "Copy" button to copy the value of the record, then switch back to Porkbun.
10
Create the second DNS record. Change the "Type" to "A - Address record". Leave the "Host" field blank. In the "Answer / Value" field, paste the value you copied over from Wix. Your record might use a different value than what's shown in this guide, but the record should end up being formatted like this:
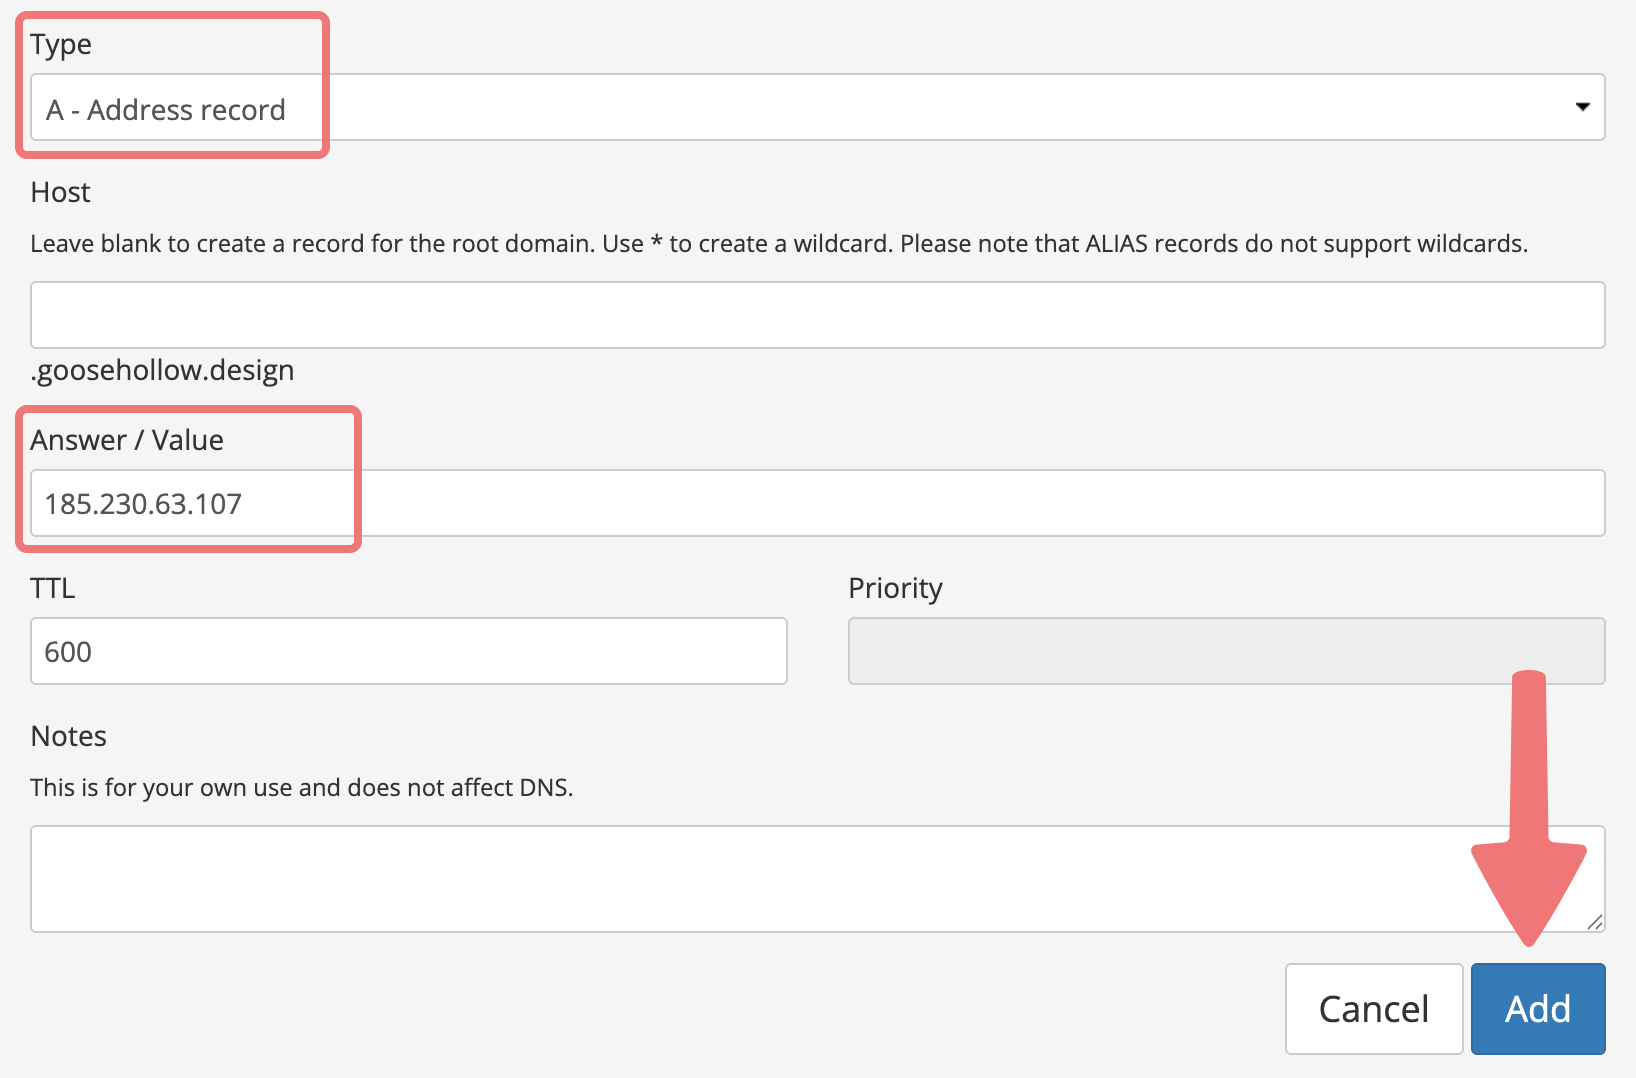
Click on "Add" to finish creating the DNS record.
11
Finally, switch back over to Wix one more time, and click on "I updated my records". After a moment, you'll see a message indicating that Wix is in the process of checking your domain connection.
That's it! You've successfully connected your domain to Wix via DNS records. Your site should connect and come online within 48 hours (usually much quicker). You can check back on the "Domains" page on Wix periodically to make sure there aren't any errors with the connection.
If you run into any issues connecting your domain to Wix, feel free to get in touch with our support team for assistance.


