How to connect your domain to Weebly
Want to link your domain to a website built through Weebly.com? We can do that!
Before we begin, you will need to add your domain to Weebly. This article from Weebly's website will show you how.
Note
If you're currently using Weebly's free plan, you will need to upgrade to a paid plan before they'll allow you to connect a custom domain to your website.
Following the steps in the article above, you’ll be shown two options for making the necessary DNS changes to your domain: one for doing it yourself, and one for emailing your domain host for assistance. Here's how to add the DNS records yourself on Porkbun.
Setting up your Weebly DNS records
1
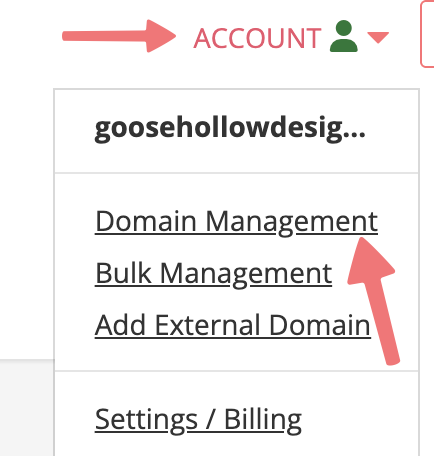
Log in. You should arrive at the Domain Management screen. If you're already logged in, click on ACCOUNT in the top-right corner and select "Domain Management" from the list.
2
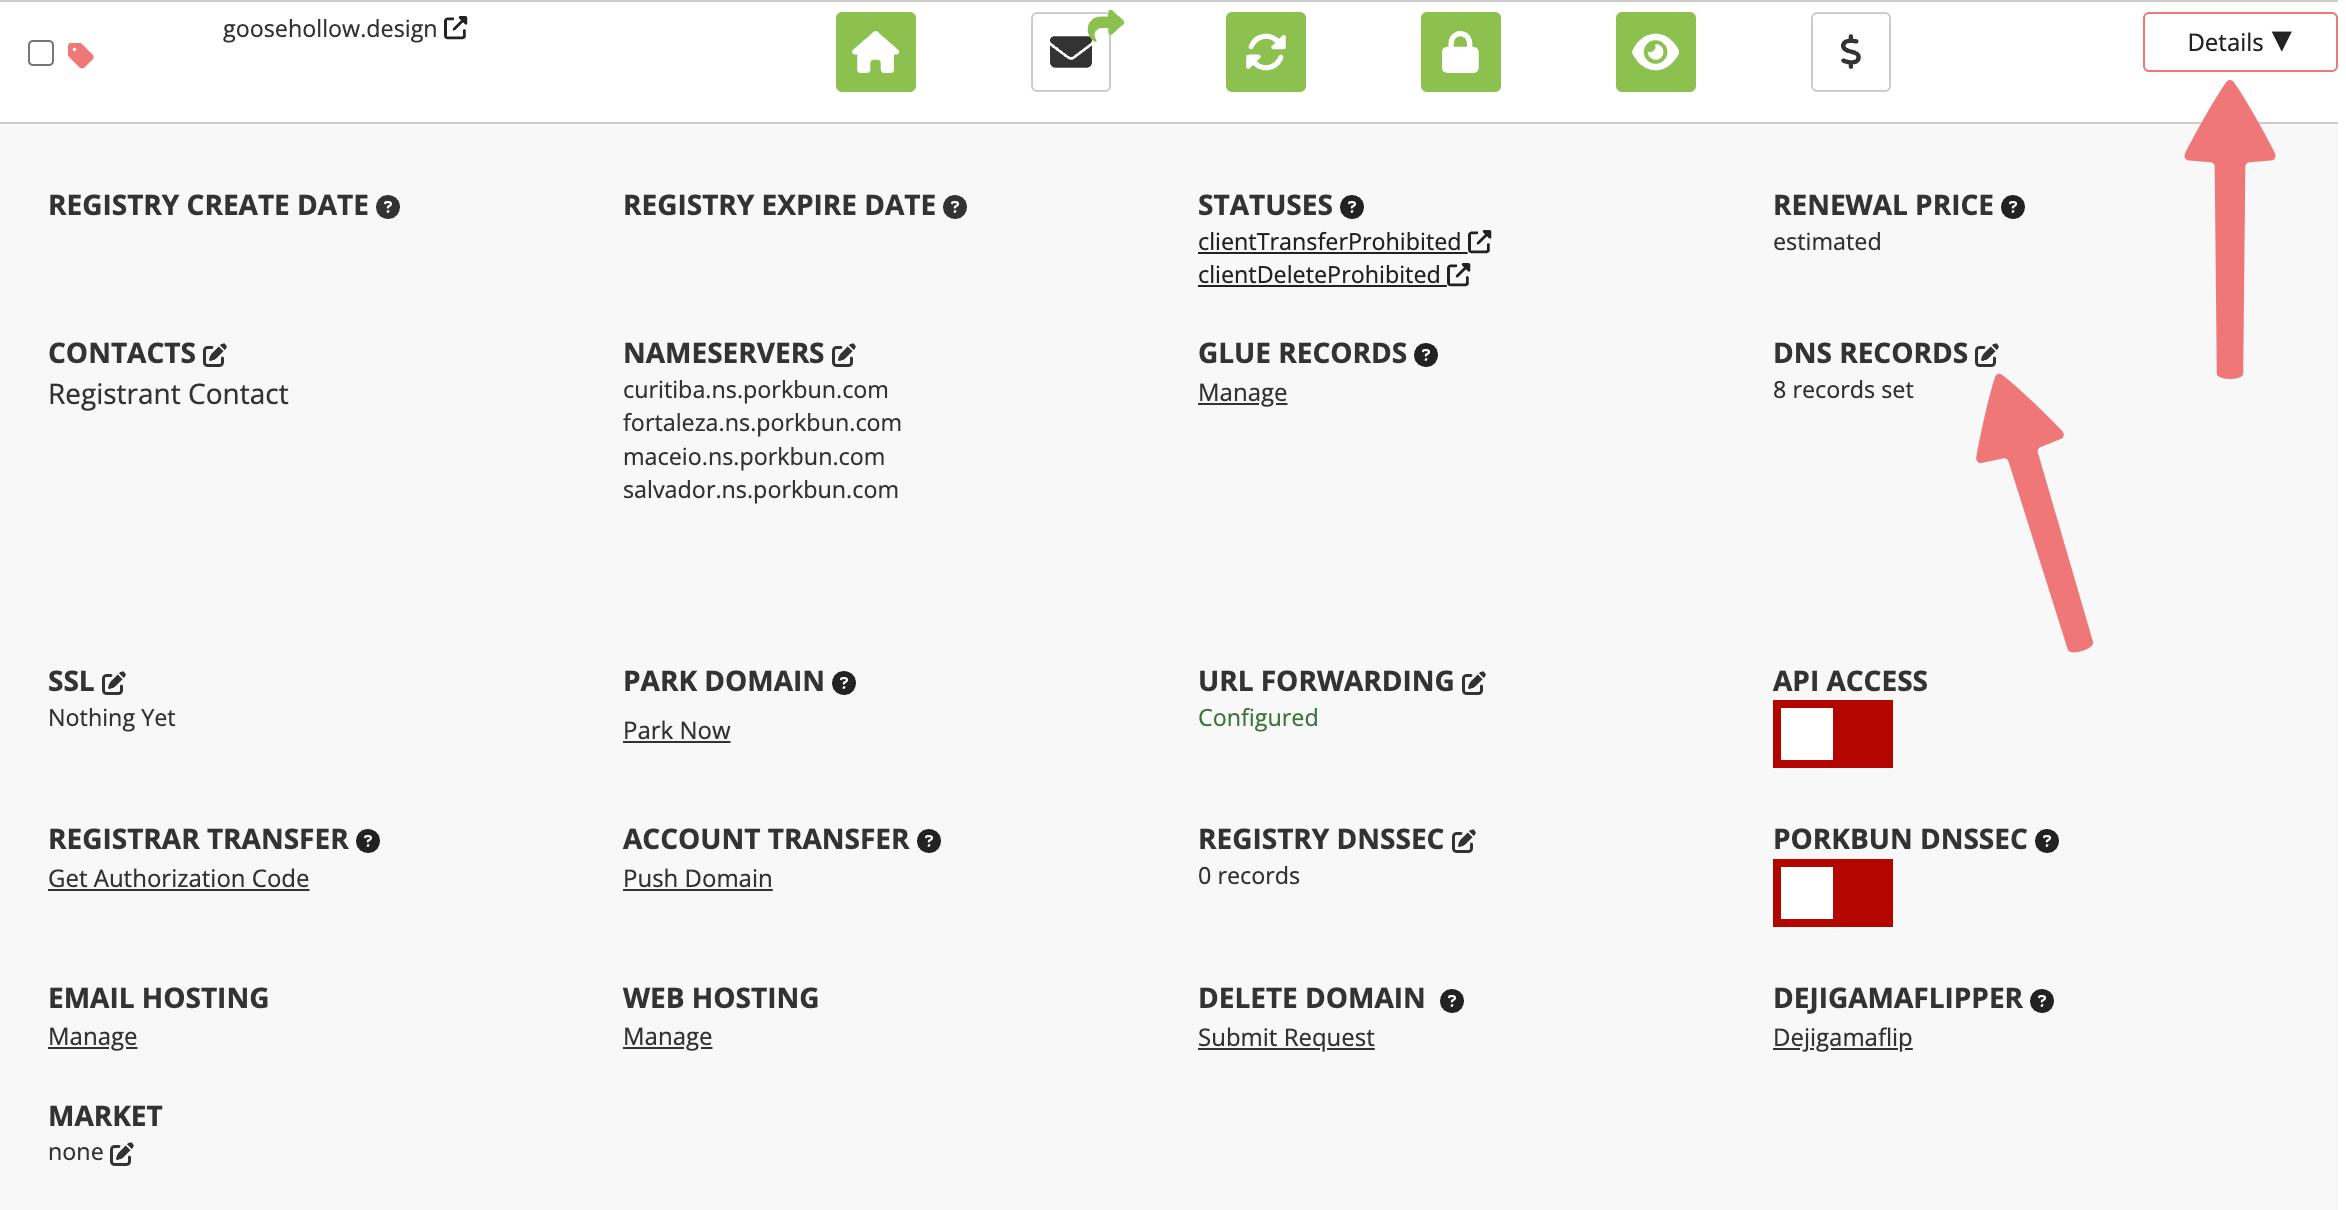
Locate the domain you're connecting to Weebly. Click on the "Details" button to the right of your domain name. In the domain details area that opens, look for the "DNS RECORDS" option and click on the edit icon.
3
The "Manage DNS Records" menu will open up. Here you can add the DNS records that were given to you by Weebly after following their guide (linked at the beginning of this article) and adding your custom domain to their system.
As with many other web hosting providers, Weebly will typically give you an A record, a CNAME record, and a TXT record used to verify your ownership of the domain. Start by adding the A record provided to you by Weebly. It should be formatted similarly to this:
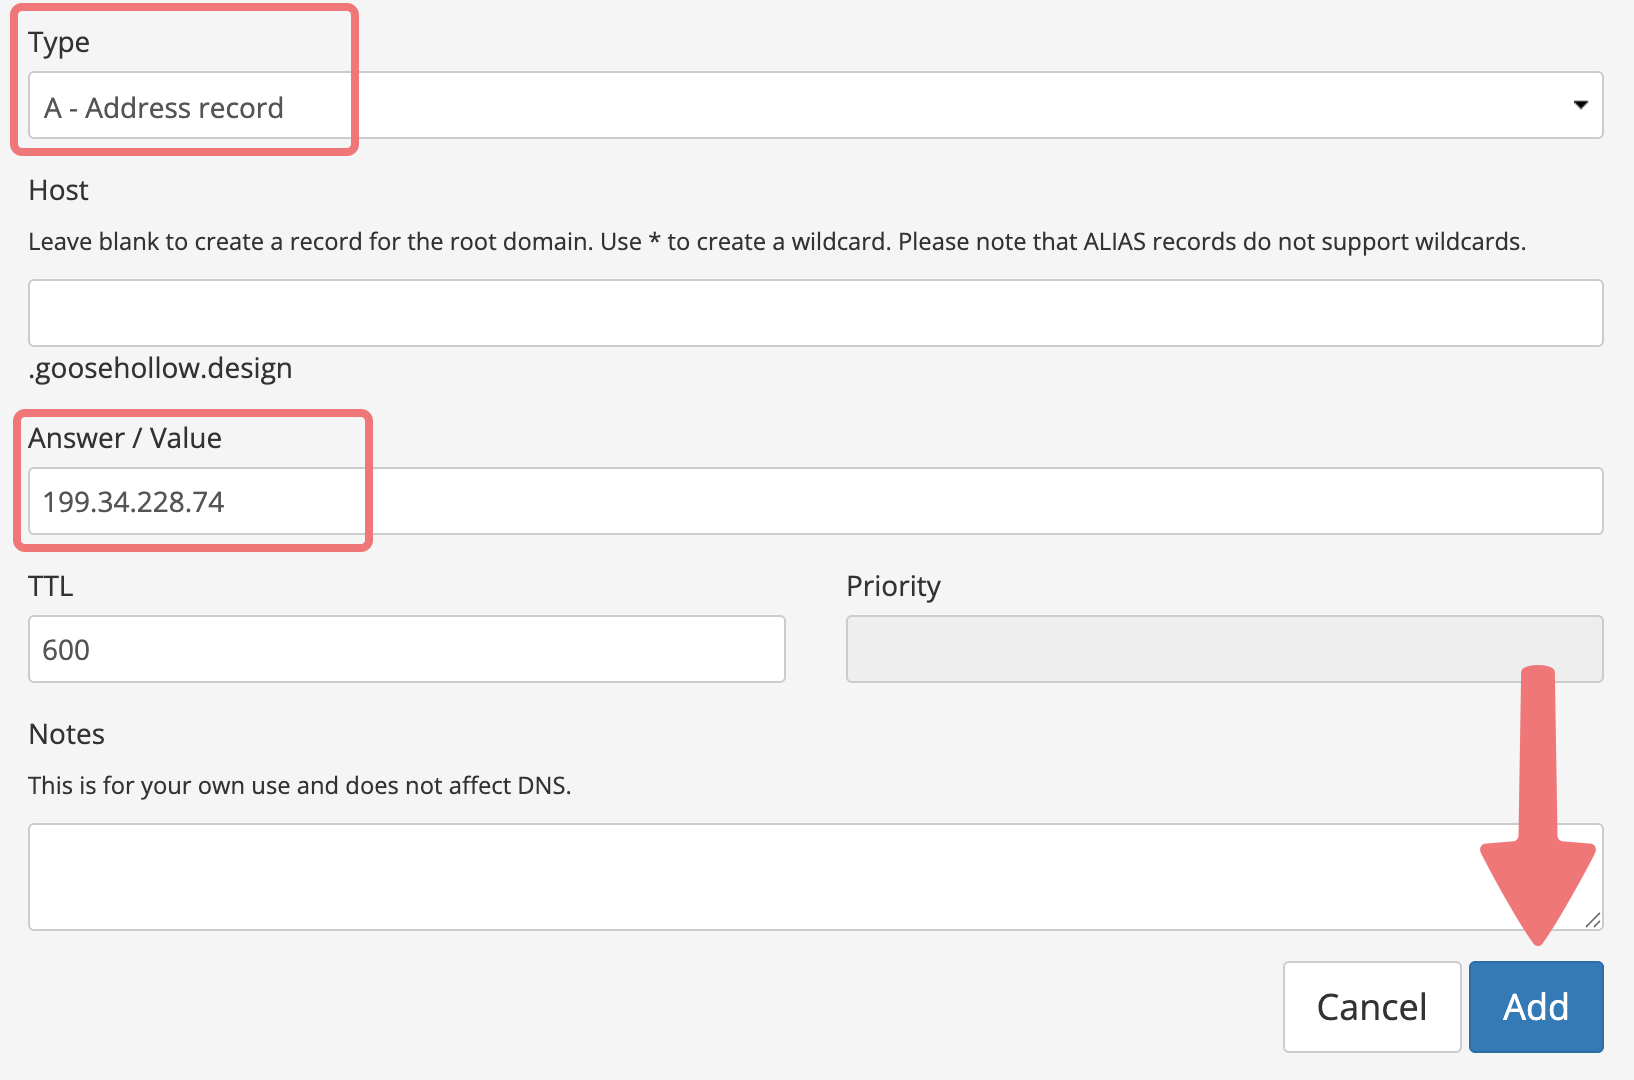
After entering the information for the A record, click on "Add" to create the DNS record for your domain.
Note
If you see an error message stating a CNAME or ALIAS record with that host name already exists, follow this guide to fix the error so you can finish connecting your domain to Weebly.
4
Next, you'll add the CNAME record that Weebly provides. This will make it so your website works properly whether or not you type "www" in front of it first. The record should be formatted to point to your "root" domain, like this:
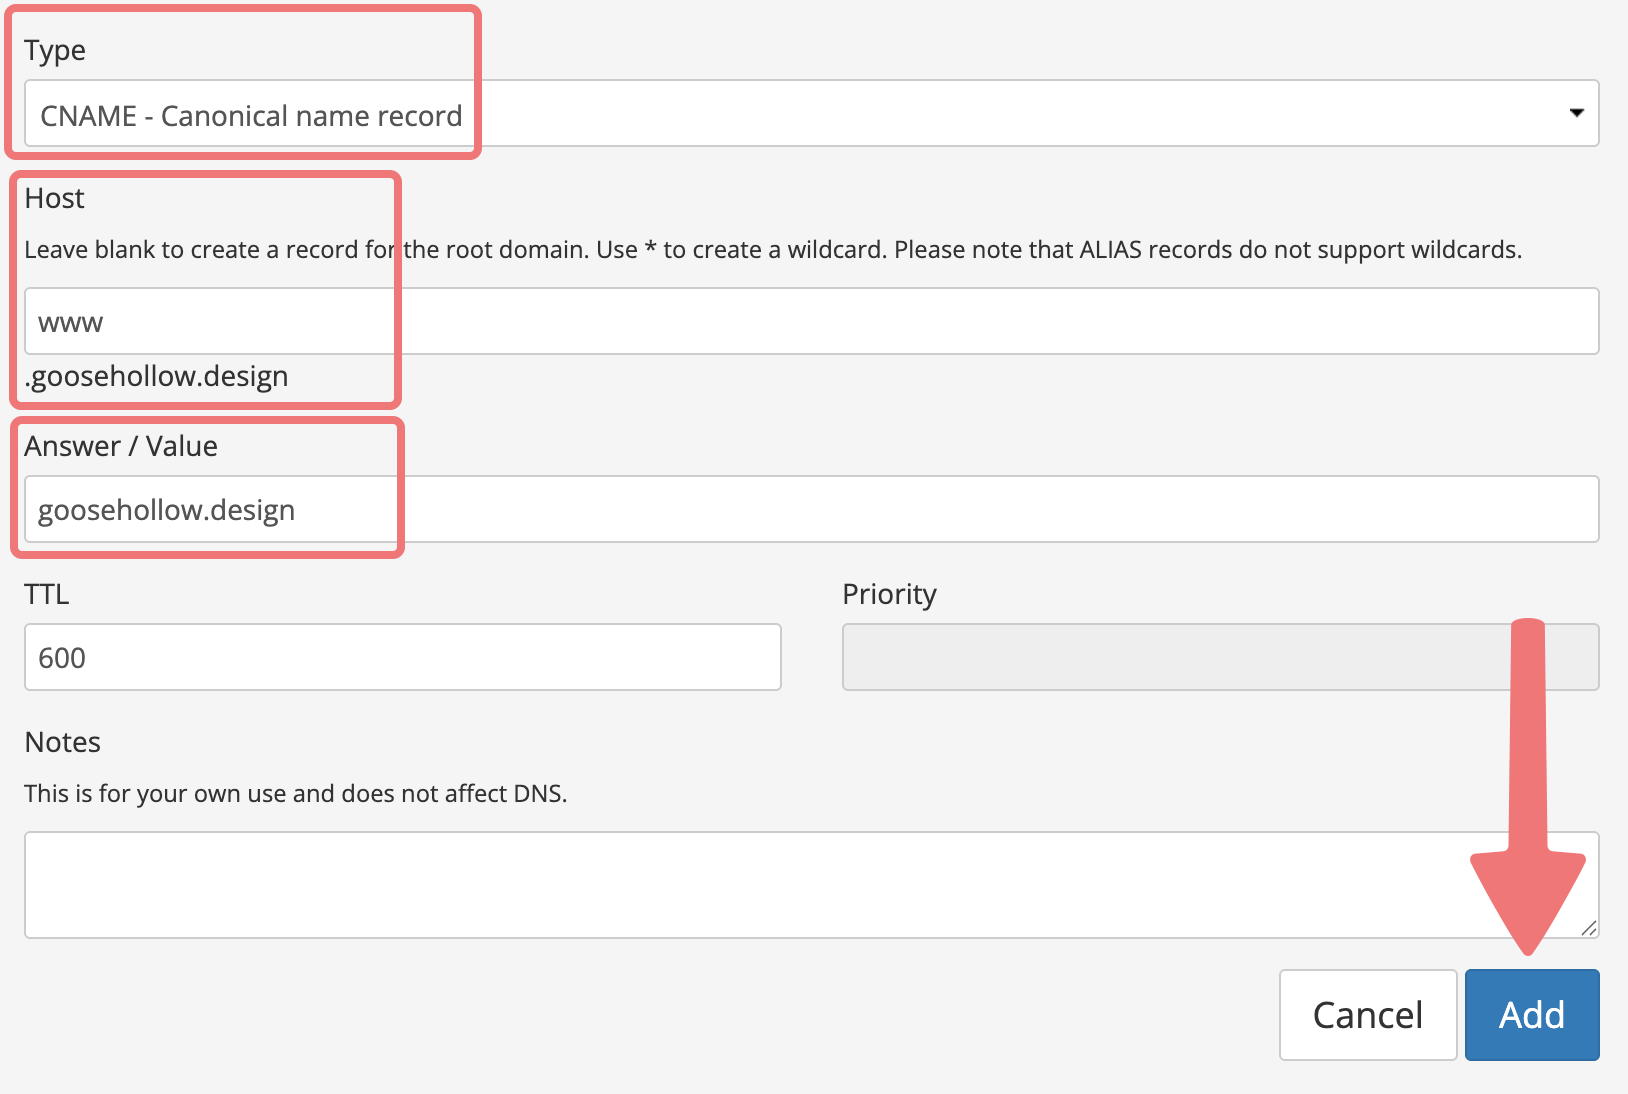
In the "Answer / Value" field, be sure to put your own domain name, rather than the example domain used above.
5
Finally, add the TXT record that Weebly gave you. This record is unique to your domain, and it's used by their system to verify that you own the domain so nobody else can make changes to it. It should look something like this:
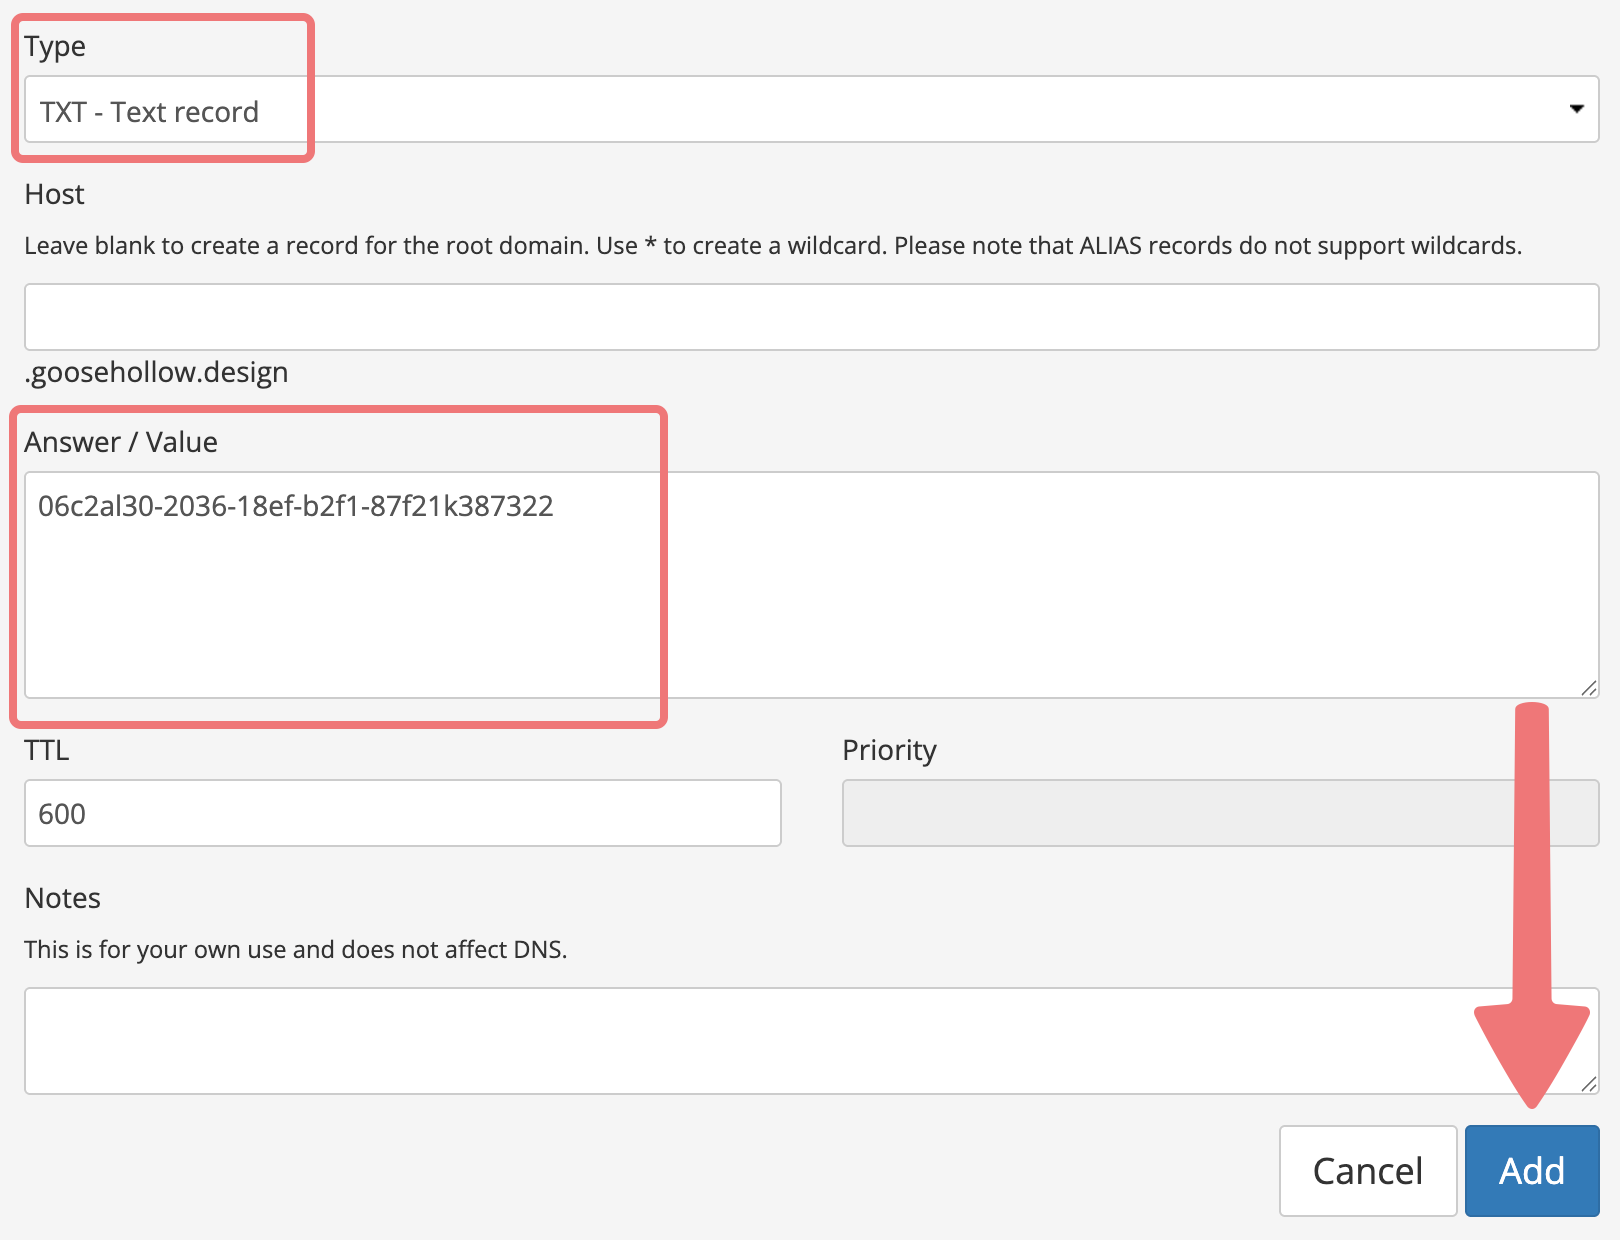
Be sure to click the "Add" button to finish creating the record. You can scroll down to the "Current Records" section in the same menu to make sure everything looks correct.
That's it! You've created the required DNS records to connect your domain to your Weebly website. Be sure to publish the website one more time once you've completed these steps. After publishing the site and waiting a bit of time for everything to propagate, your website will come online. Congrats!
Feel free to reach out to our support team if you need any assistance with this process.


