How to connect your domain to Tumblr
Want to link your Porkbun domain to your Tumblr? We can do that!
You will need to add an A record and a CNAME record for your domain to link up to Tumblr.
Let's start with your A record.
Setting up your domain's A records
- 1
-
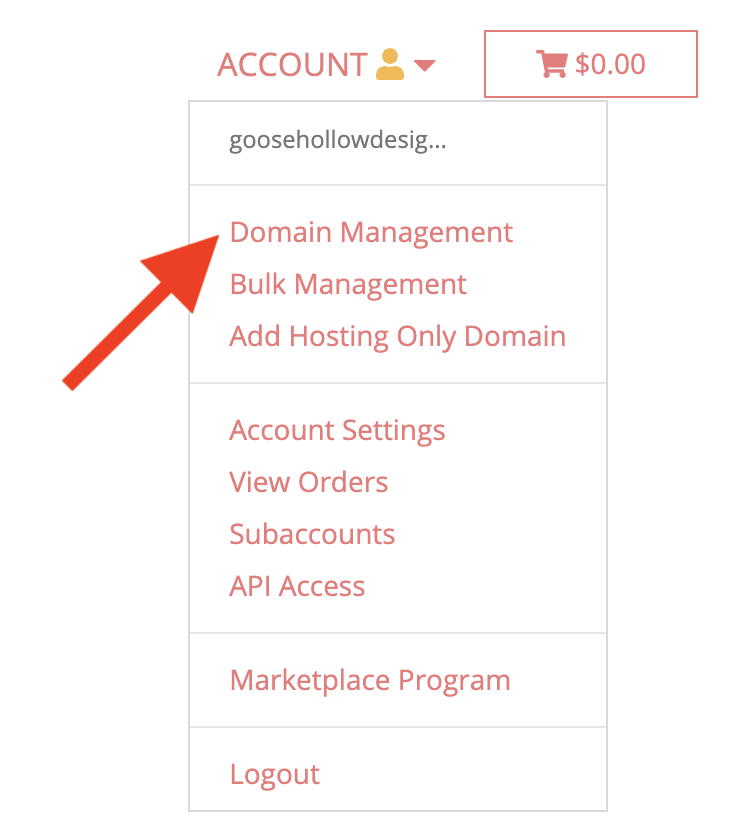
Log in. You should arrive at the Domain Management screen. If you're already logged in, click on ACCOUNT in the top-right corner and select Domain Management.
- 2
-
Click the drop-down list to the far right of your domain. Then click the "Edit" option next to DNS records.

- 3
-
On the Manage DNS Records screen, scroll down and locate any of Porkbun's default ALIAS or CNAME records that are currently pointing at our parking Server. Click the trash can icons to the right of the bad records to remove them.

- 4
- Add a new A record. Scroll to the top of the Manage DNS Records screen, and enter the following information.
-
Type: is set to "A - Address record"
- Host: is left blank
-
Answer: is set to "66.6.44.4"

- ...then click add.


Setting up your domain's CNAME record
- 1
- Return to the Manage DNS Screen.
- 2
- Scroll up to the top to add another record. The second record will have the following fields:
- Type: is set to "CNAME - Canonical name record"
- Host: is set to "www"
-
Answer: is set to "domains.tumblr.com"

- Once those fields are entered, hit add.
- 3
-
Click the X icon in the top right of the popup box to close the "Manage DNS Records" window.


That's it! You have connected your domain to Tumblr. It can take up to 48 hours for these changes to go through.
To complete the process, you will also want to submit your domain on Tumblr. From the Tumblr Help Center:
- Click "Settings" under the account menu at the top of the dashboard, then choose the blog you’d like to update.
- Click the pencil to the right of the username section (Tumblr URL section for secondary blogs) and enable "Use a custom domain."
- Enter your domain (e.g., mywebsite.com) or subdomain (e.g., blog.mywebsite.com), then click “Test your domain.”
- Correct any problems if the test finds any, and click “Test your domain” until the test is successful.
- Hit “Save.”