How to cancel Cloud for WordPress
If you've decided on another hosting option, and need to cancel Cloud for WordPress, this guide is for you! The following steps will walk you through canceling your Cloud for WordPress hosting plan.
- 1
-
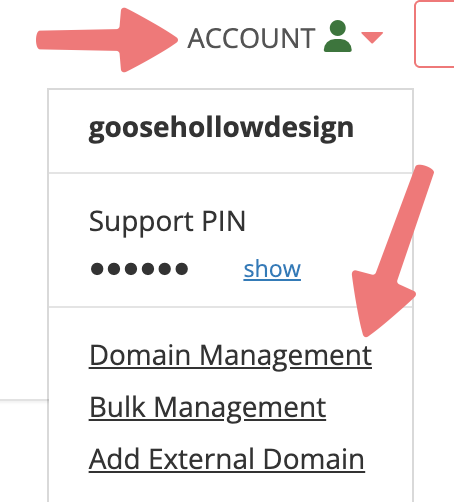
Log in. This should take you to the Domain Management screen. If you're already logged in, click on ACCOUNT in the top right, and select Domain Management.
- 2
-
Locate the domain with the hosting plan you're cancelling. To the right of the domain is a block of icons. Click the WordPress icon that is the first option in that list, under the "WEBSITE" column.

- 3
-
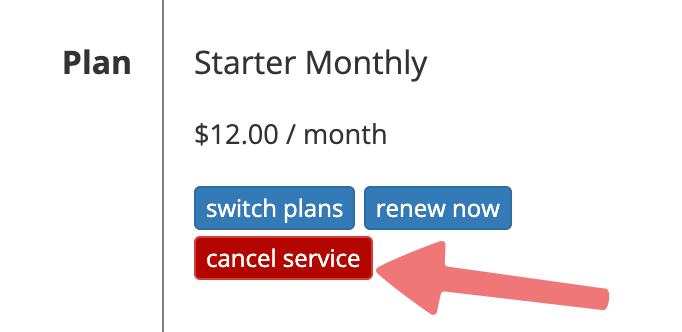
On the Cloud for WordPress hosting page, scroll down to the Plan section and click the "cancel service" button on the right-hand side.
- 4
-
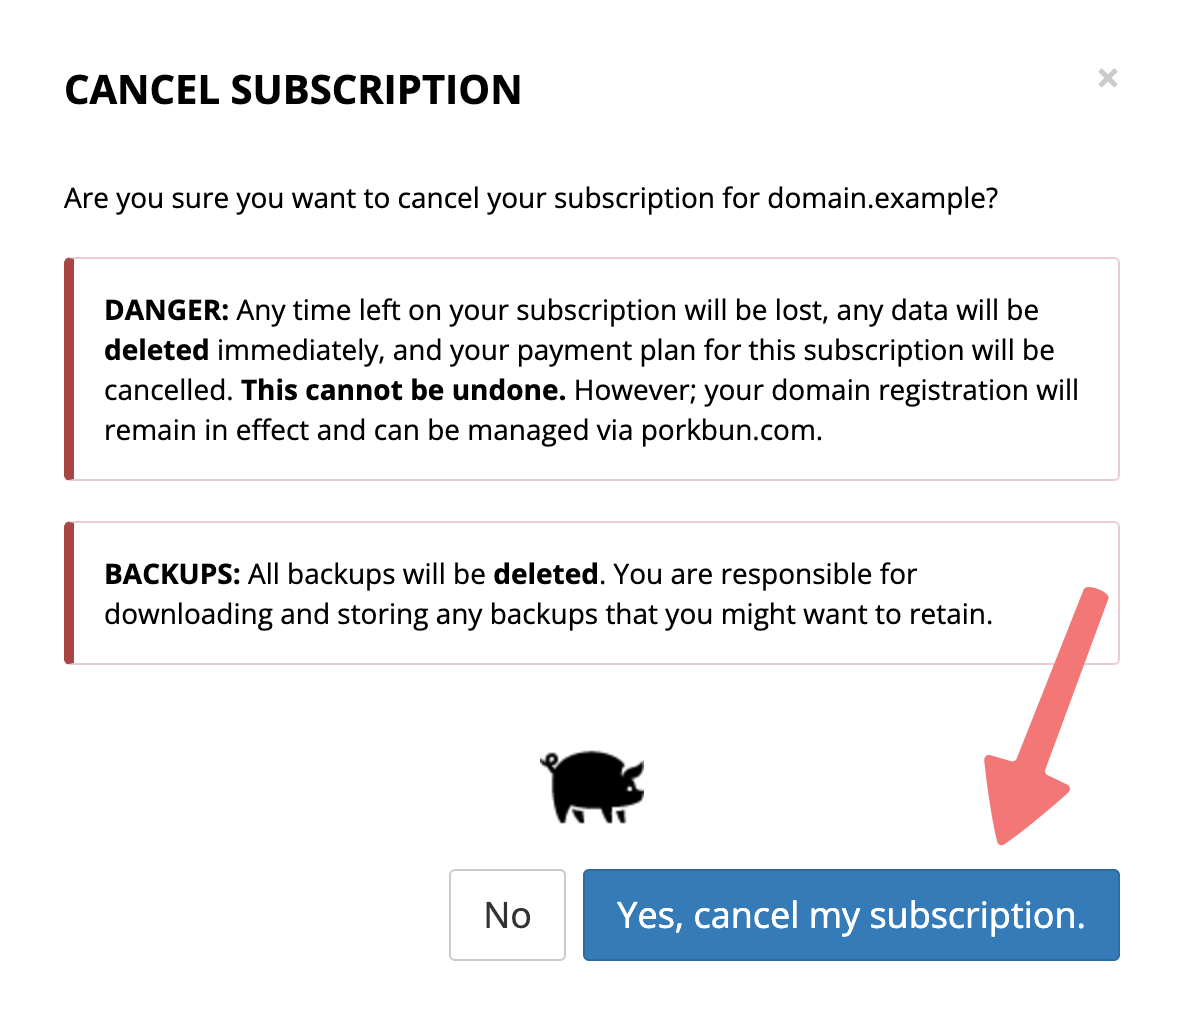
A window will appear asking you if you would like to cancel your subscription. Click on the "Yes, cancel my subscription" button to confirm.
That's all! Cloud for WordPress should now be removed from your domain. If you return to Domain Management, the "WEBSITE" icon next to your domain should now be replaced with a house icon, which confirms that you don't have a hosting plan attached to the domain anymore.
You can now set up a different web hosting plan from Porkbun by clicking that house icon again, or you can configure your domain to point to a different web hosting provider instead.