How to Add DNS Records on Porkbun
Are you ready to start using your Porkbun domain name with external services (web hosting, email hosting, etc.) and need to add DNS records? If so, you’re in exactly the right place! We’ll start by walking through the basic steps of adding DNS records before comparing the different requirements of the various record types.
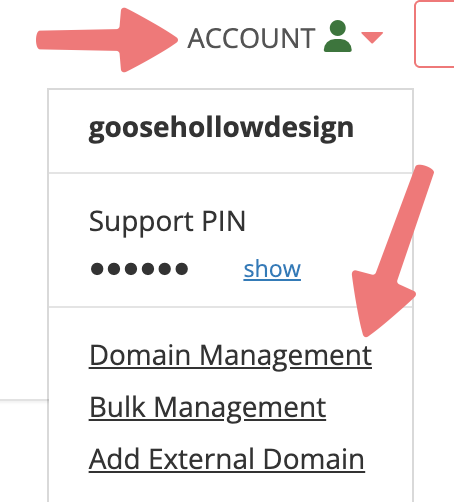
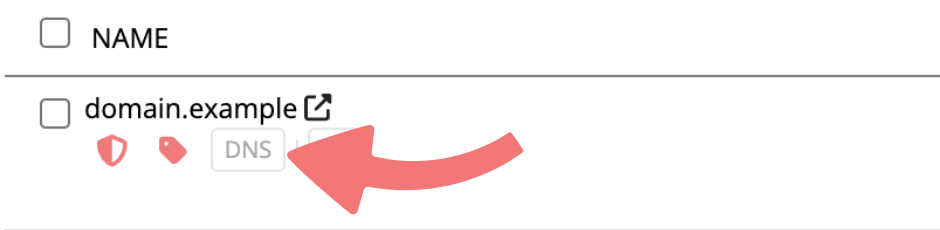
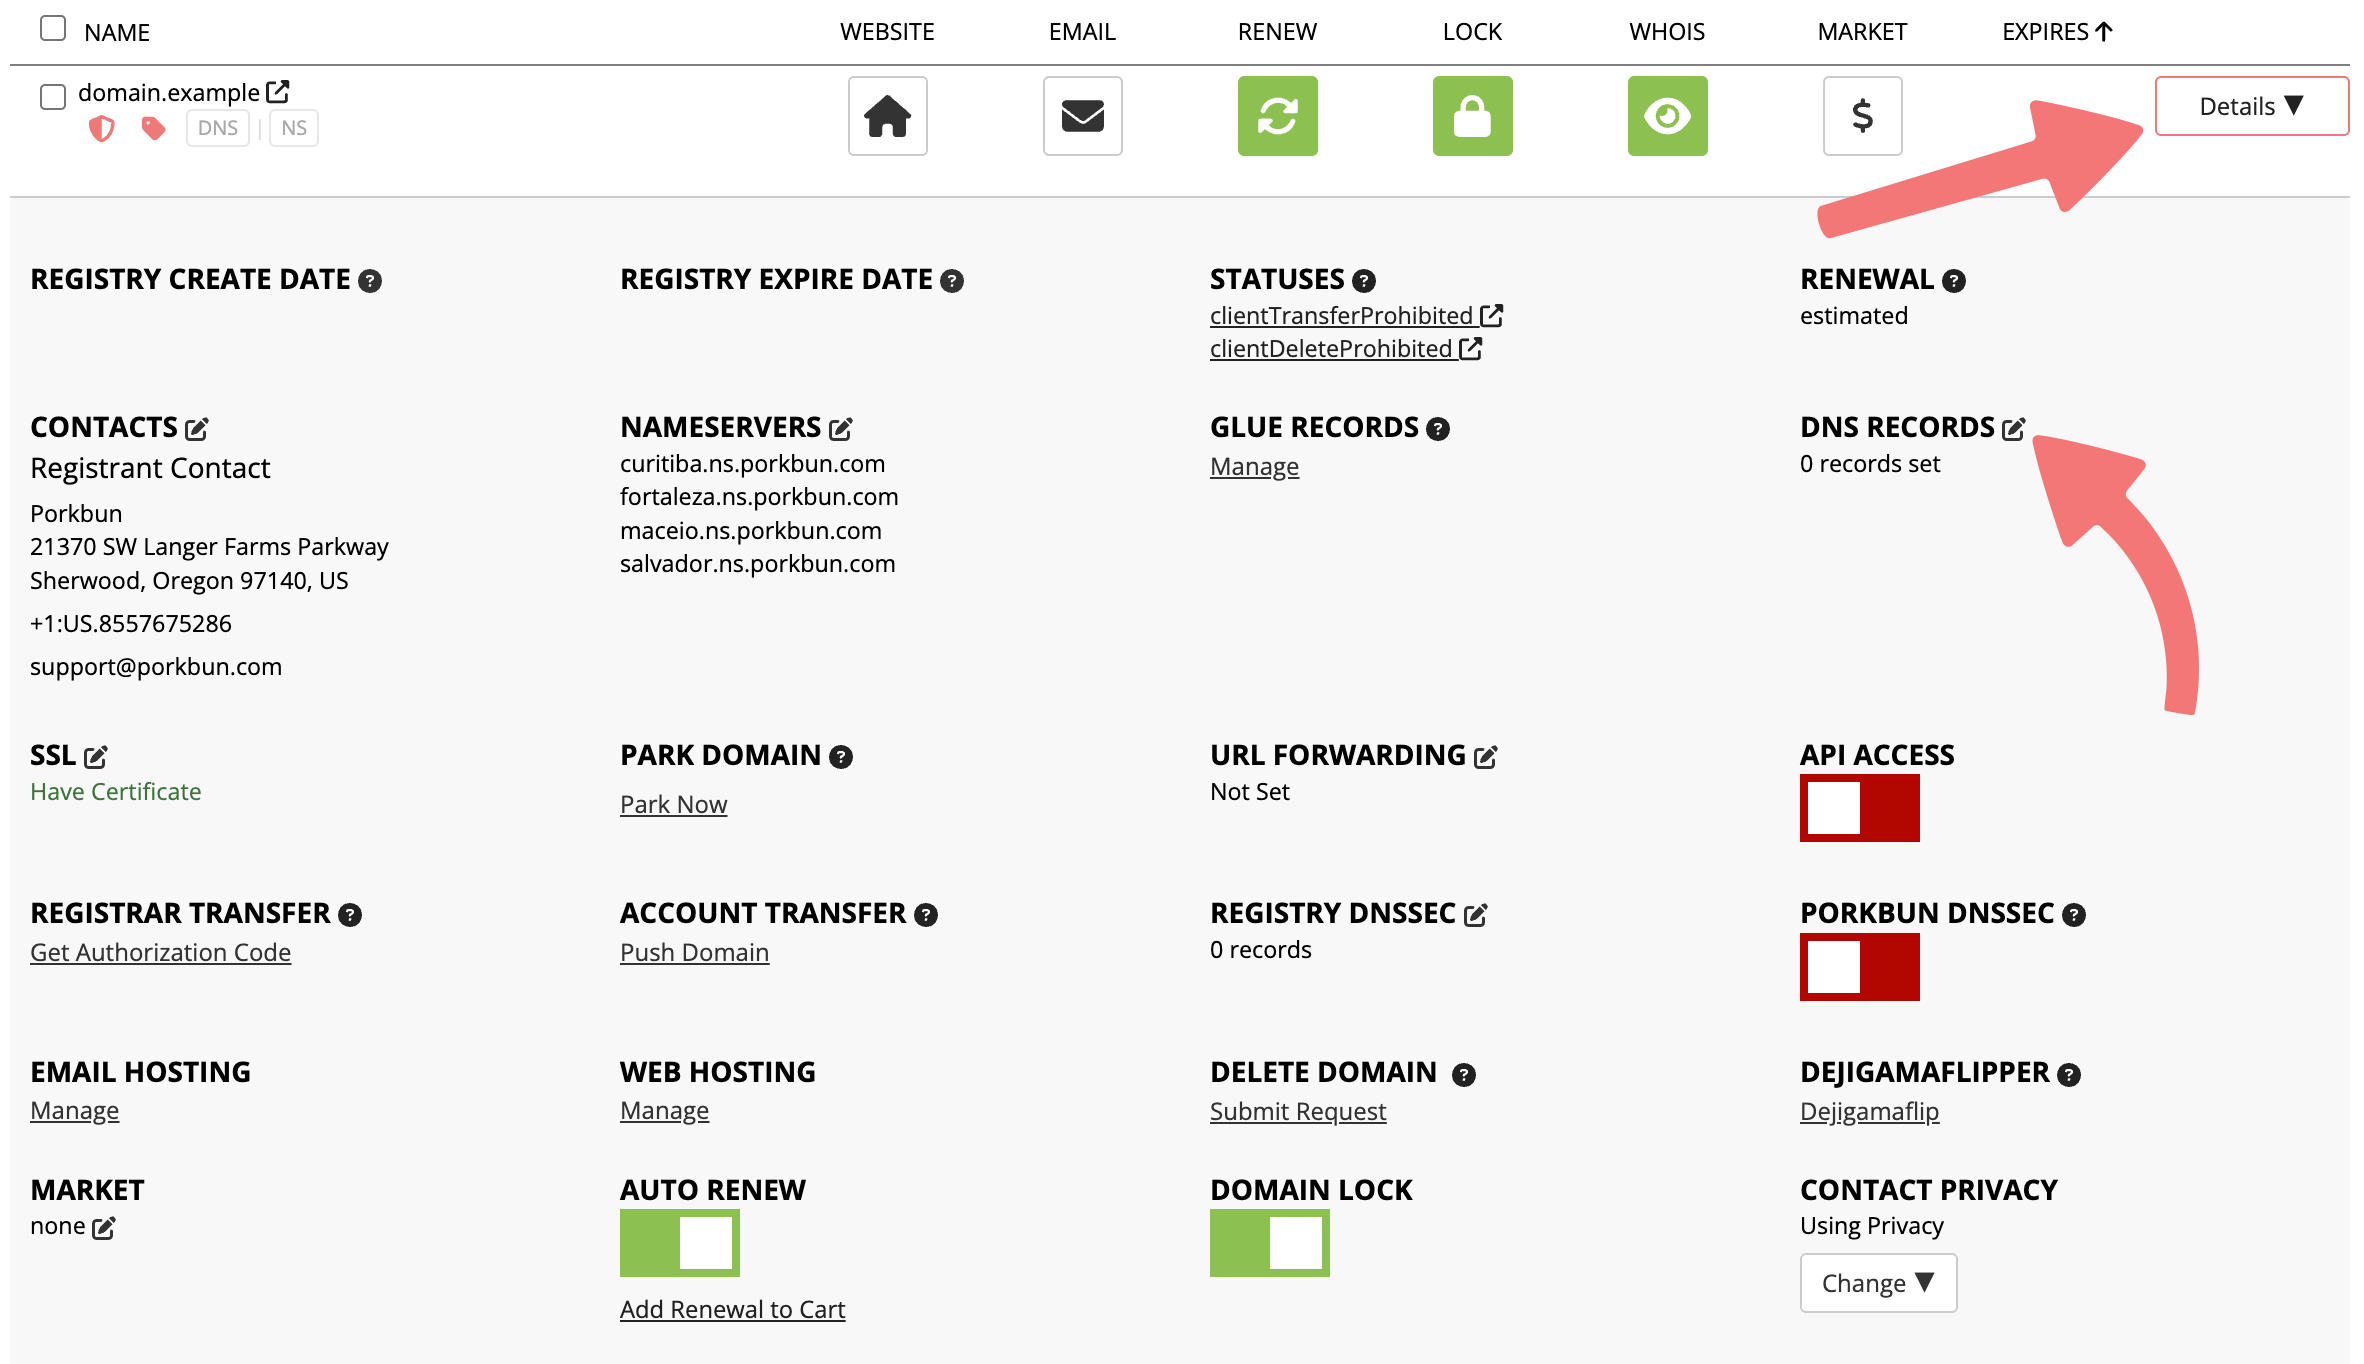
Adding a DNS Record
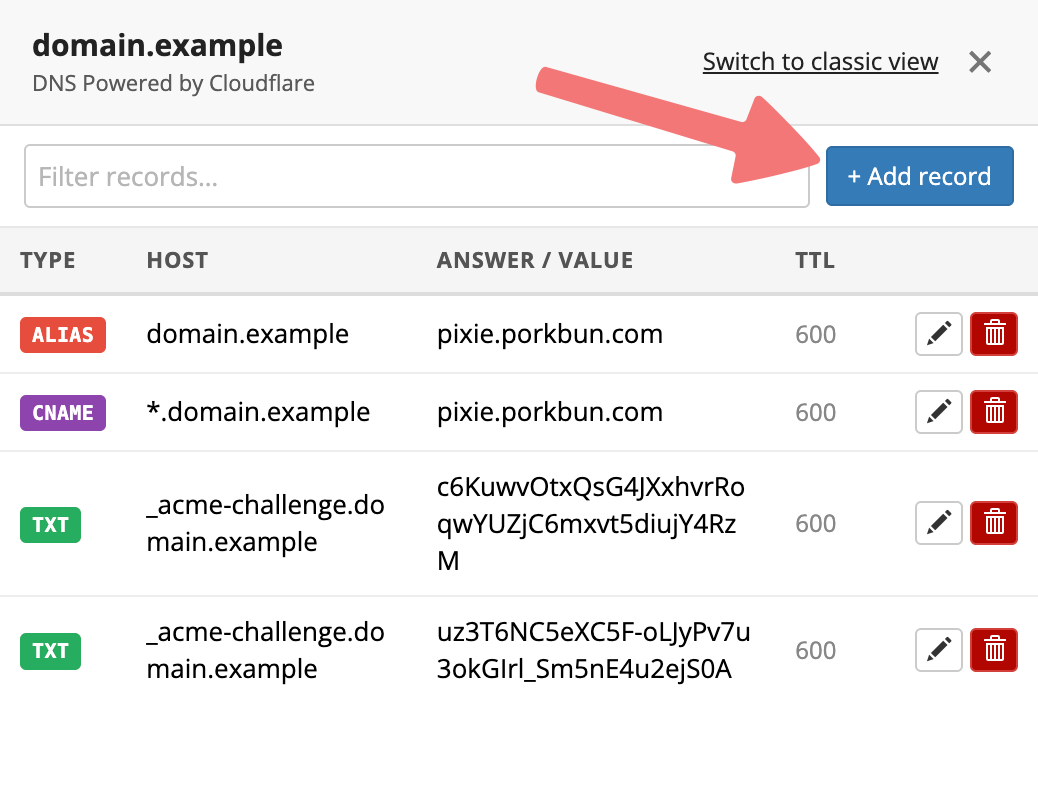
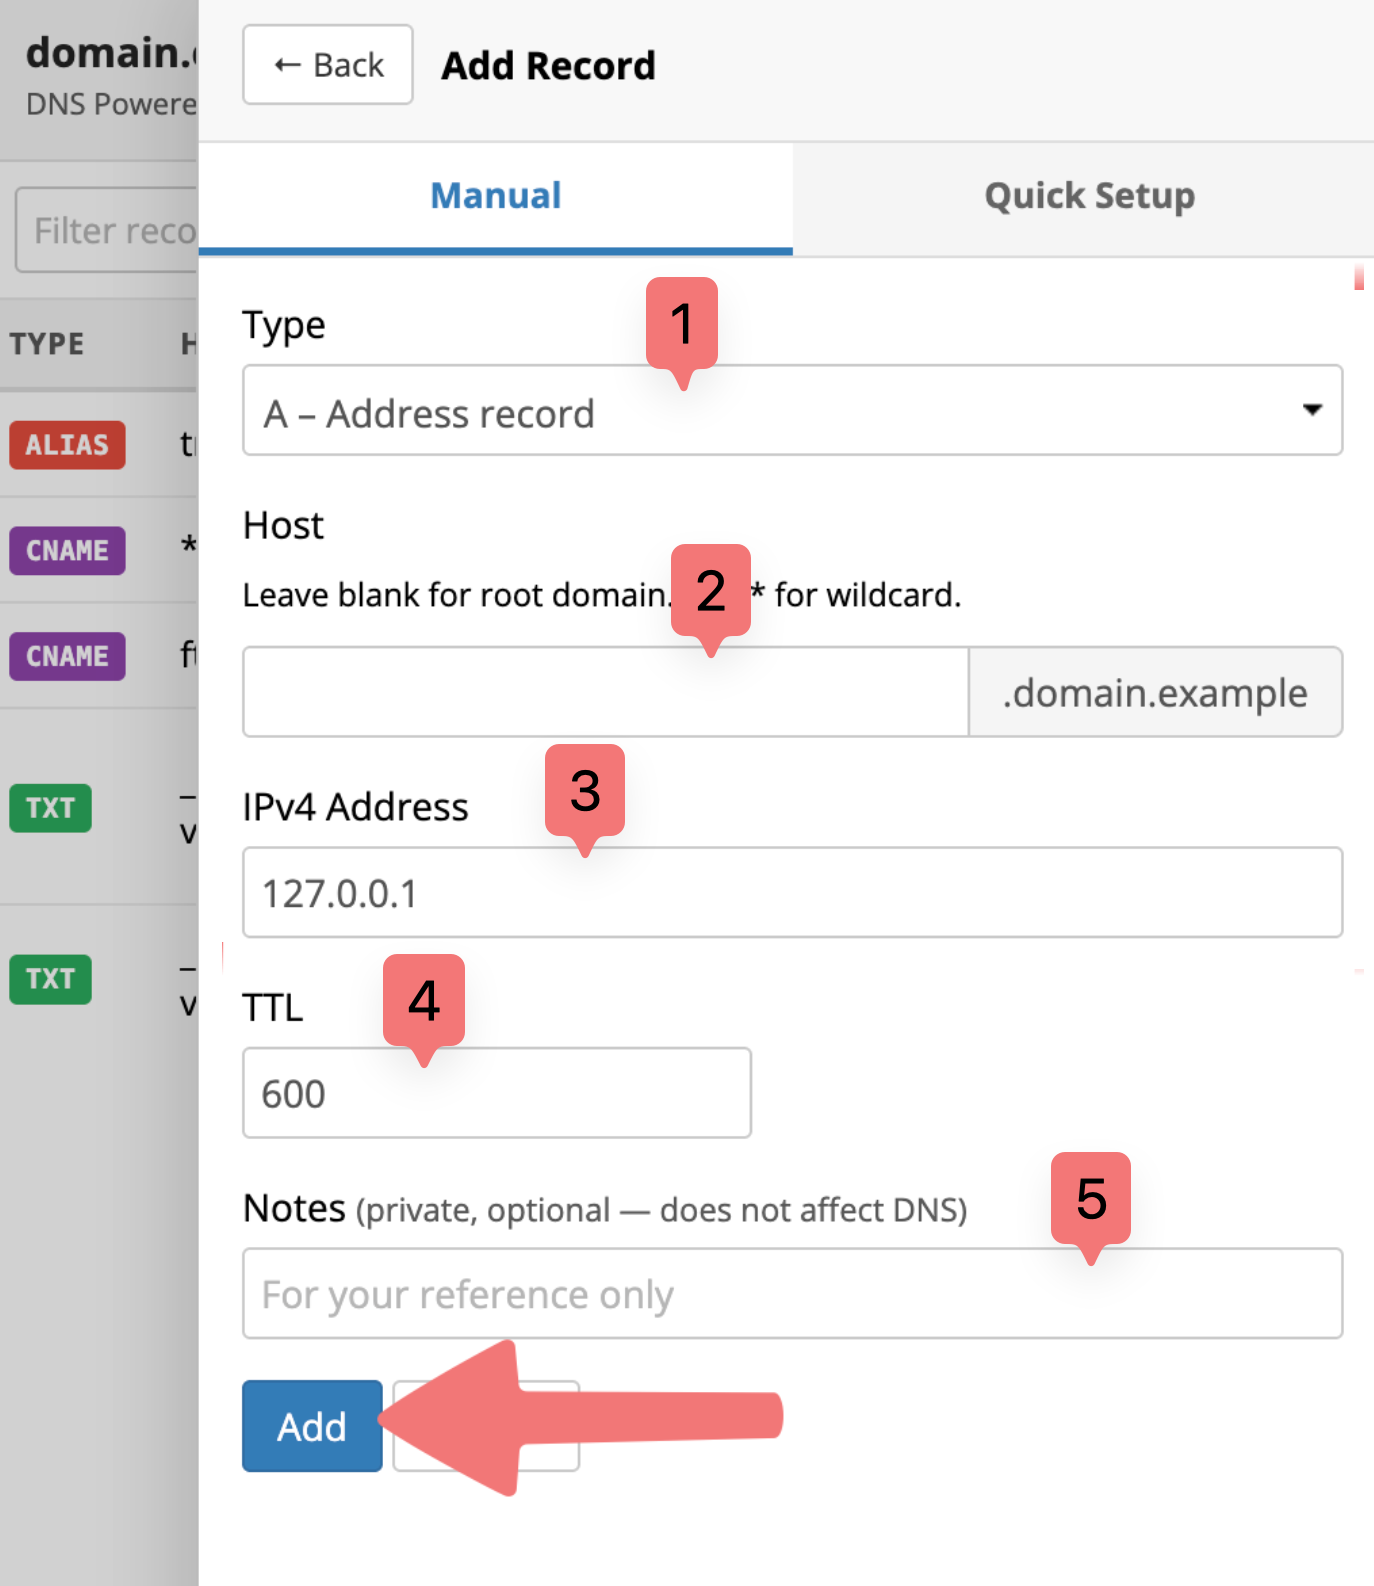
Here's what the fields mean on this menu:
- 1. Type: The type of DNS record you're adding. There are a lot of different types of DNS records you can add, depending on the service you're connecting to your domain. The DNS record types you'll see most commonly are A, CNAME, MX, and TXT.
- 2. Host: The "host name" or "subdomain" for the record you are adding. If you're adding DNS records to your "root domain" (such as example.com), you will leave this field blank. If you are adding records to a "subdomain" (such as www.example.com or mail.example.com), this is where you will enter that subdomain name.
- 3. Answer/Value/IPv4 Address: The actual value (also referred to as "target" or "destination") that your DNS record is pointing to. This field will always be required, but the information you enter in this field will change depending on the type of record you're adding.
- 4. TTL: The "Time To Live" of your DNS record. This is the number of seconds that will pass before the DNS system checks your domain to see if your record still exists or has been changed. You can usually leave this field set to the default value unless otherwise instructed.
- 5. Notes: This field is completely optional, and will allow you to create internal notes that you can use to keep track of your DNS records and what they do. Any notes you create will only be viewable in your own DNS records menu, and they have no effect on the functionality of the record.
Tip
If you're adding an MX record for email services (or an SRV record), you'll see an additional field labeled "Priority". Just be sure to set the Priority to whatever value your provider gives you during setup.
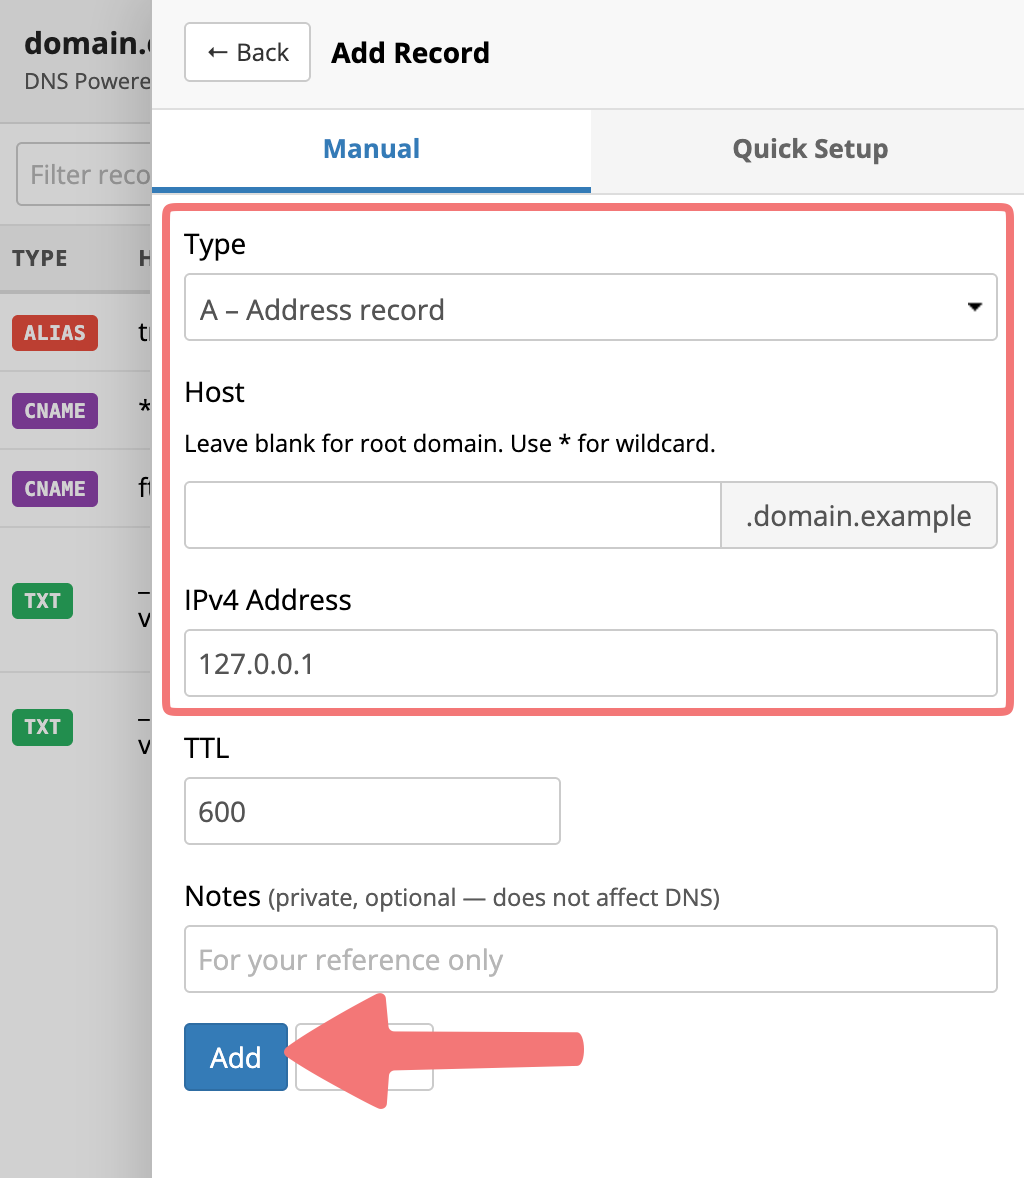
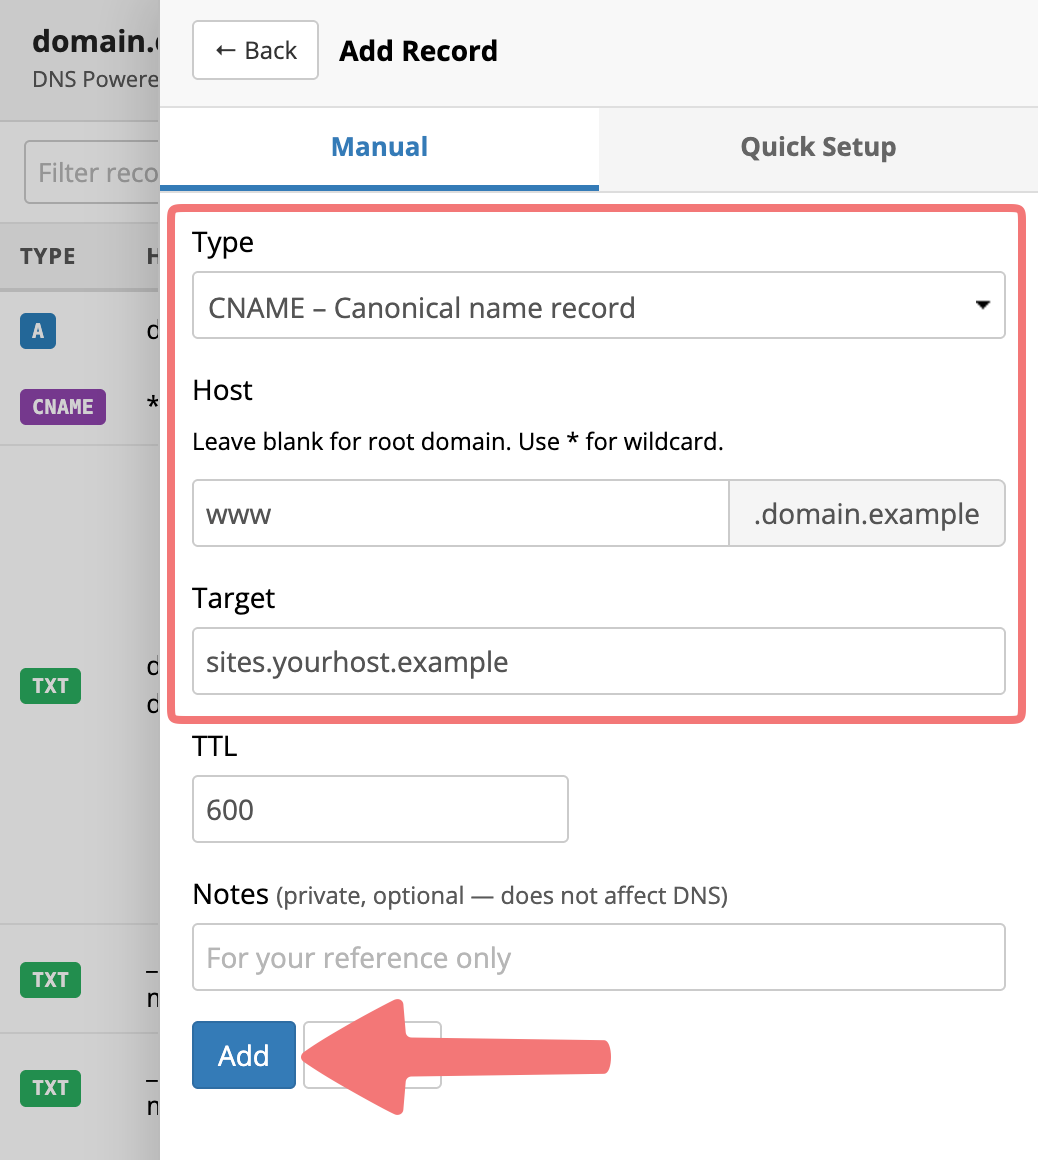
Leave the other fields blank unless instructed otherwise, and leave a note if you want to keep track of what your record does. Once you've inputted the required information, click on "Add" to add the DNS record to your domain.
Note
If you run into any error messages when adding a DNS record, there are a few possible causes. You can review this guide for more information on how to fix the most common error.
Tip
If you want to make sure your new DNS records are propagating through the internet and responding correctly, you can use an online tool such as dnschecker.org to look for the records you added.
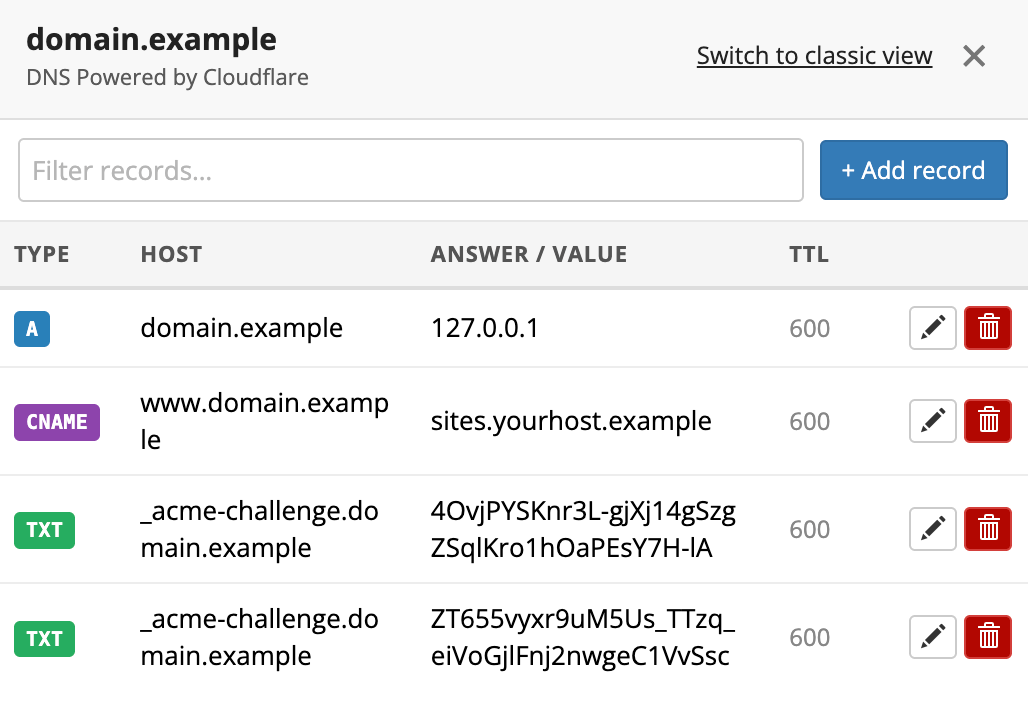
Congratulations! You've learned how to add DNS records to your domain, and now you'll be able to configure your domain for any service that provides you with DNS records. If you need more specific information or guides for common providers, feel free to look through our section of guides on connecting domains.
Requirements for different record types
Here are the various technical requirements for different types of DNS records you can add!
- A (address) records must have an answer that is an IPv4 address, but have no other unique requirements.
- MX records are used to define the service you will use for receiving email on your domain. Answers for MX records can be a either a fully qualified domain name or an IPv4 address.
- CNAME records are a type of record that acts as a passthrough for all other record types. Because of this, the Host value of a CNAME record cannot be left empty and must be unique and cannot be shared with other records for the domain. The Answer for a CNAME record must be a fully qualified domain name.
- ALIAS records function similarly to CNAME records letting you point to a host name. Unlike CNAME records that pass through all record types, ALIAS records only pass through A and AAAA records for web hosting. This allows them to be used on the root domain and alongside other DNS records for the same domain, but also means they are not fully interchangeable with CNAME records which pass through all record types.
- TXT (text) records are typically used to verify ownership of your domain when connecting it to an outside service. They do not have any functionality other than to be readable and therefore do not have any requirements for what can be set for the Host or Answer.
- NS records are used to set the authoritative nameservers for subdomains. The Answer for NS records needs to be a fully qualified domain or IPv4 address.
- AAAA records are another type of address record. Unlike an A record, AAAA records require that the answer is an IPv6 address, but otherwise function the same.
- SRV records are used for pointing services other than web and email, such as game servers and telephony services. SRV records require specific formatting that you can read in our SRV record guide.
Note
If you're trying to change the DNS nameservers for your domain, you will do so in a different menu on Porkbun. Check out this guide for more information.
Feel free to contact our support team if you need any further assistance managing your domain's DNS records.