How to connect your domain to Azure Static Web Apps
If you've built a static web app on Microsoft Azure, you can connect the app to your domain on Porkbun via DNS records. This will make it so every time you push a change to your site, it automatically reflects on your custom domain. Let's get started!
Note
This guide is specifically for Azure Static Web Apps. If you're using a different Azure solution, find the respective documentation on Microsoft's website and follow their guides to connect your domain.
1
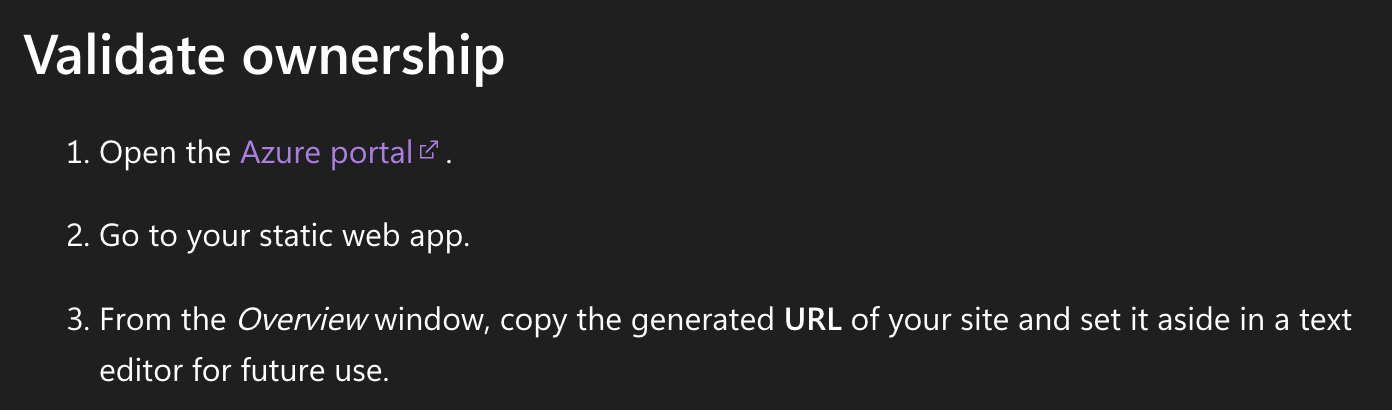
First you'll need to add your custom domain to your Azure account in the Azure portal. There are a few ways this can be configured, but if you want to connect your root or "apex" domain to the app, that can be done easily on Porkbun by adding an ALIAS record. Follow this guide from Azure's site to get your domain added.
Be sure to take note of the generated URL that Microsoft provides in the "Overview" window (per step 3 from the guide linked above). We will be using that URL later in this guide.
2
After you add your domain to Azure, you will be prompted to validate that you own the domain by adding a TXT record to the domain's DNS records. Generate the TXT validation record on Azure, then copy the value of that record to your clipboard.
3
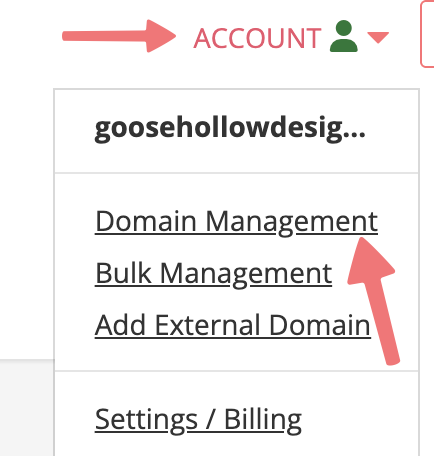
In a separate tab/window, log in to your Porkbun account. You should arrive at the Domain Management screen. If you're already logged in, click on ACCOUNT in the top-right corner and select Domain Management.
4
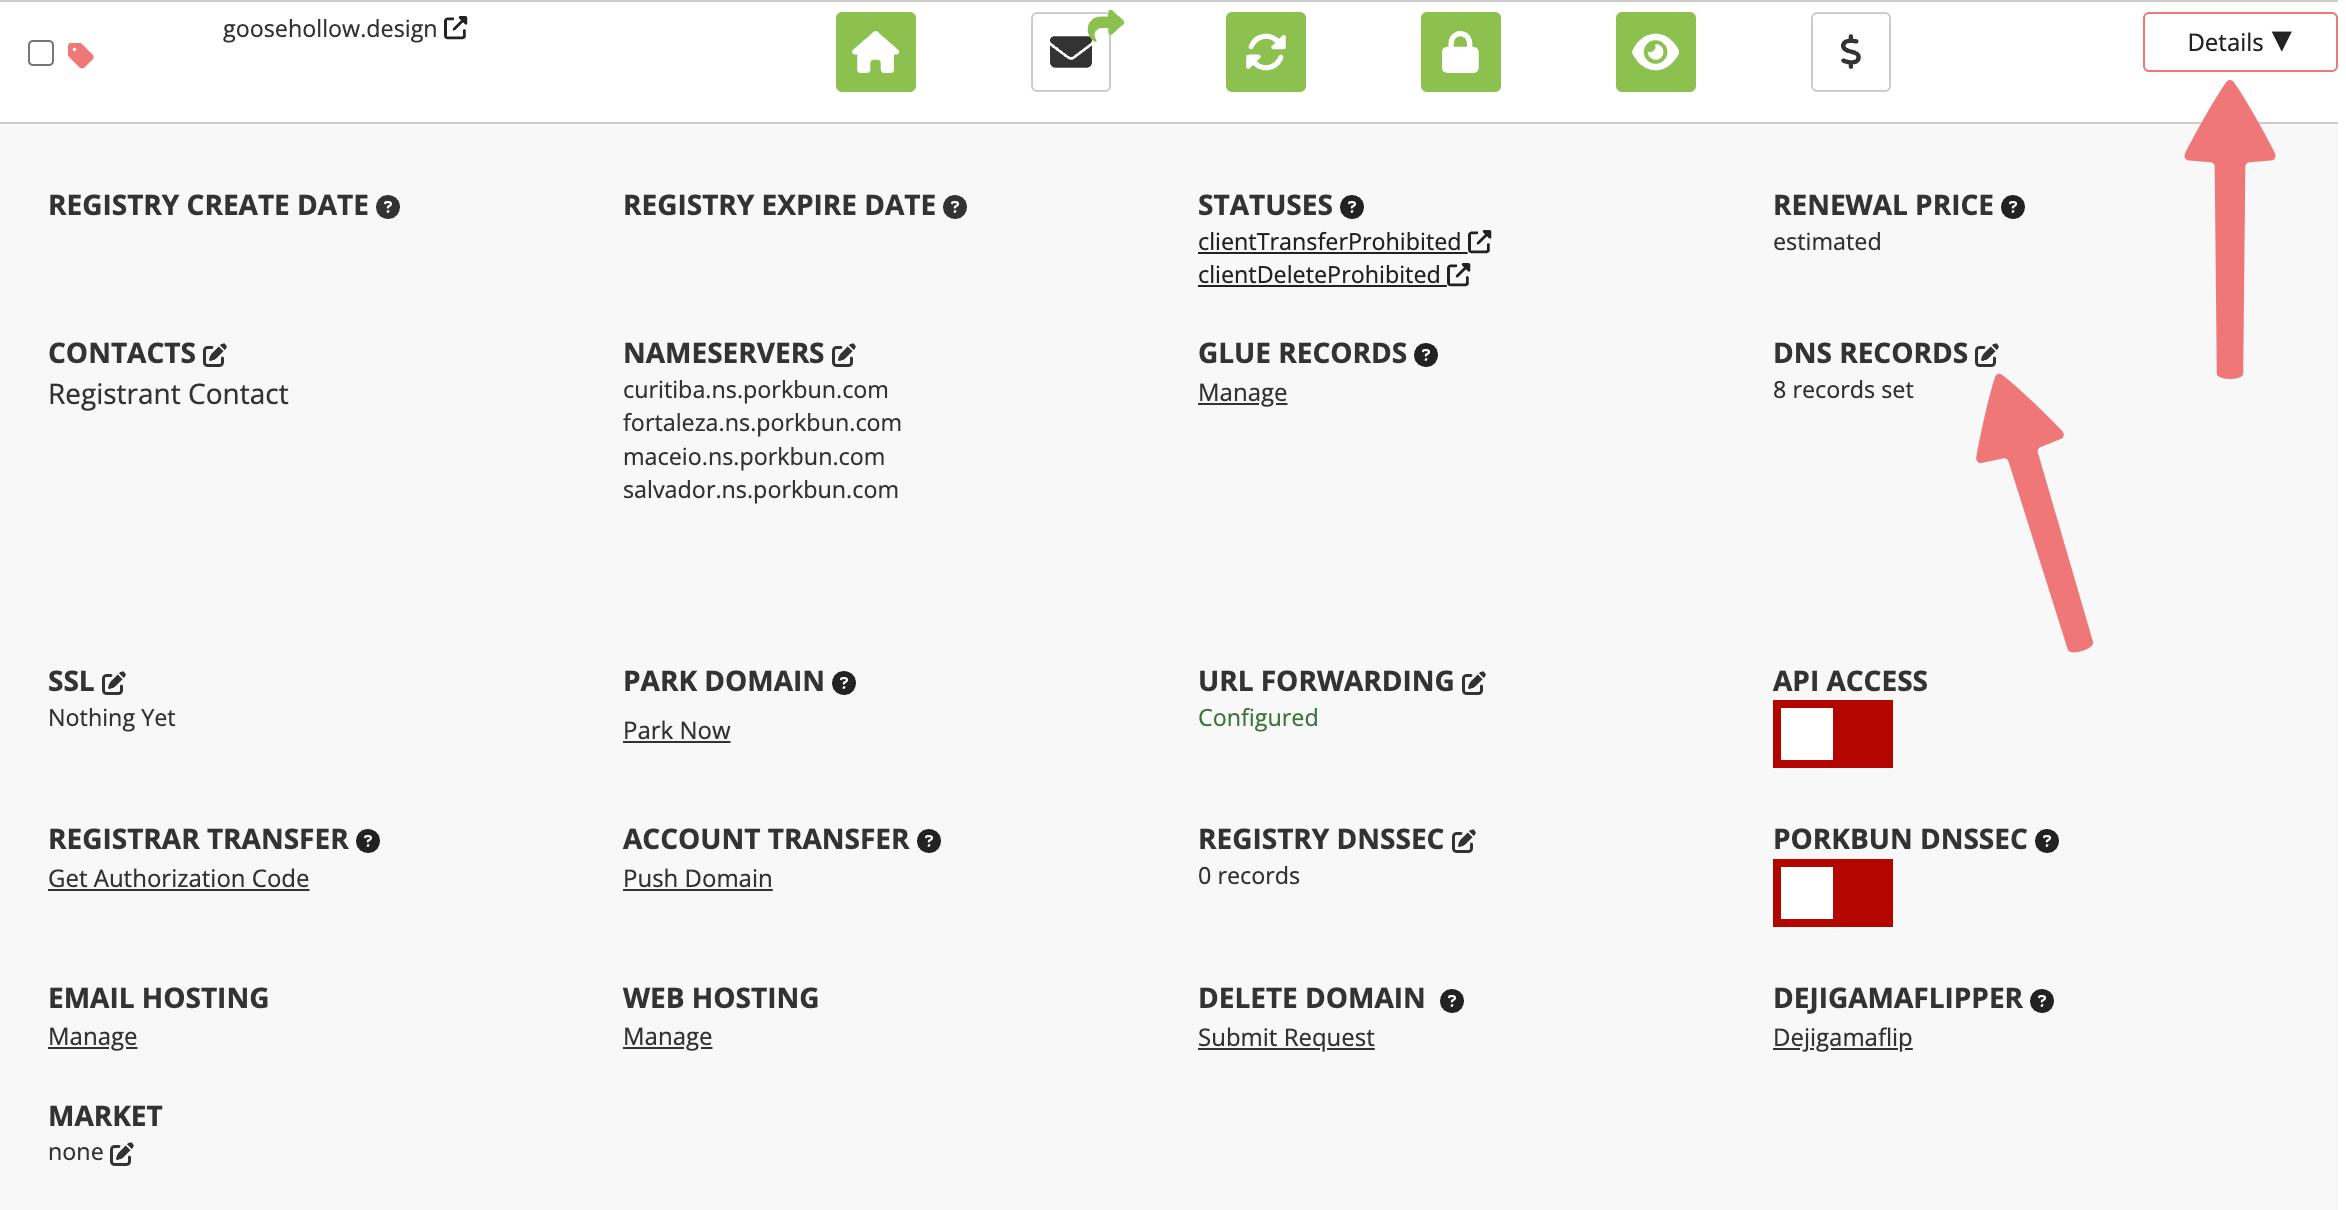
Locate the domain you're connecting to your Azure app. Click the "Details" button all the way to the right of the domain name. In the details area that appears, look for the "DNS Records" option and click on the edit icon.
5
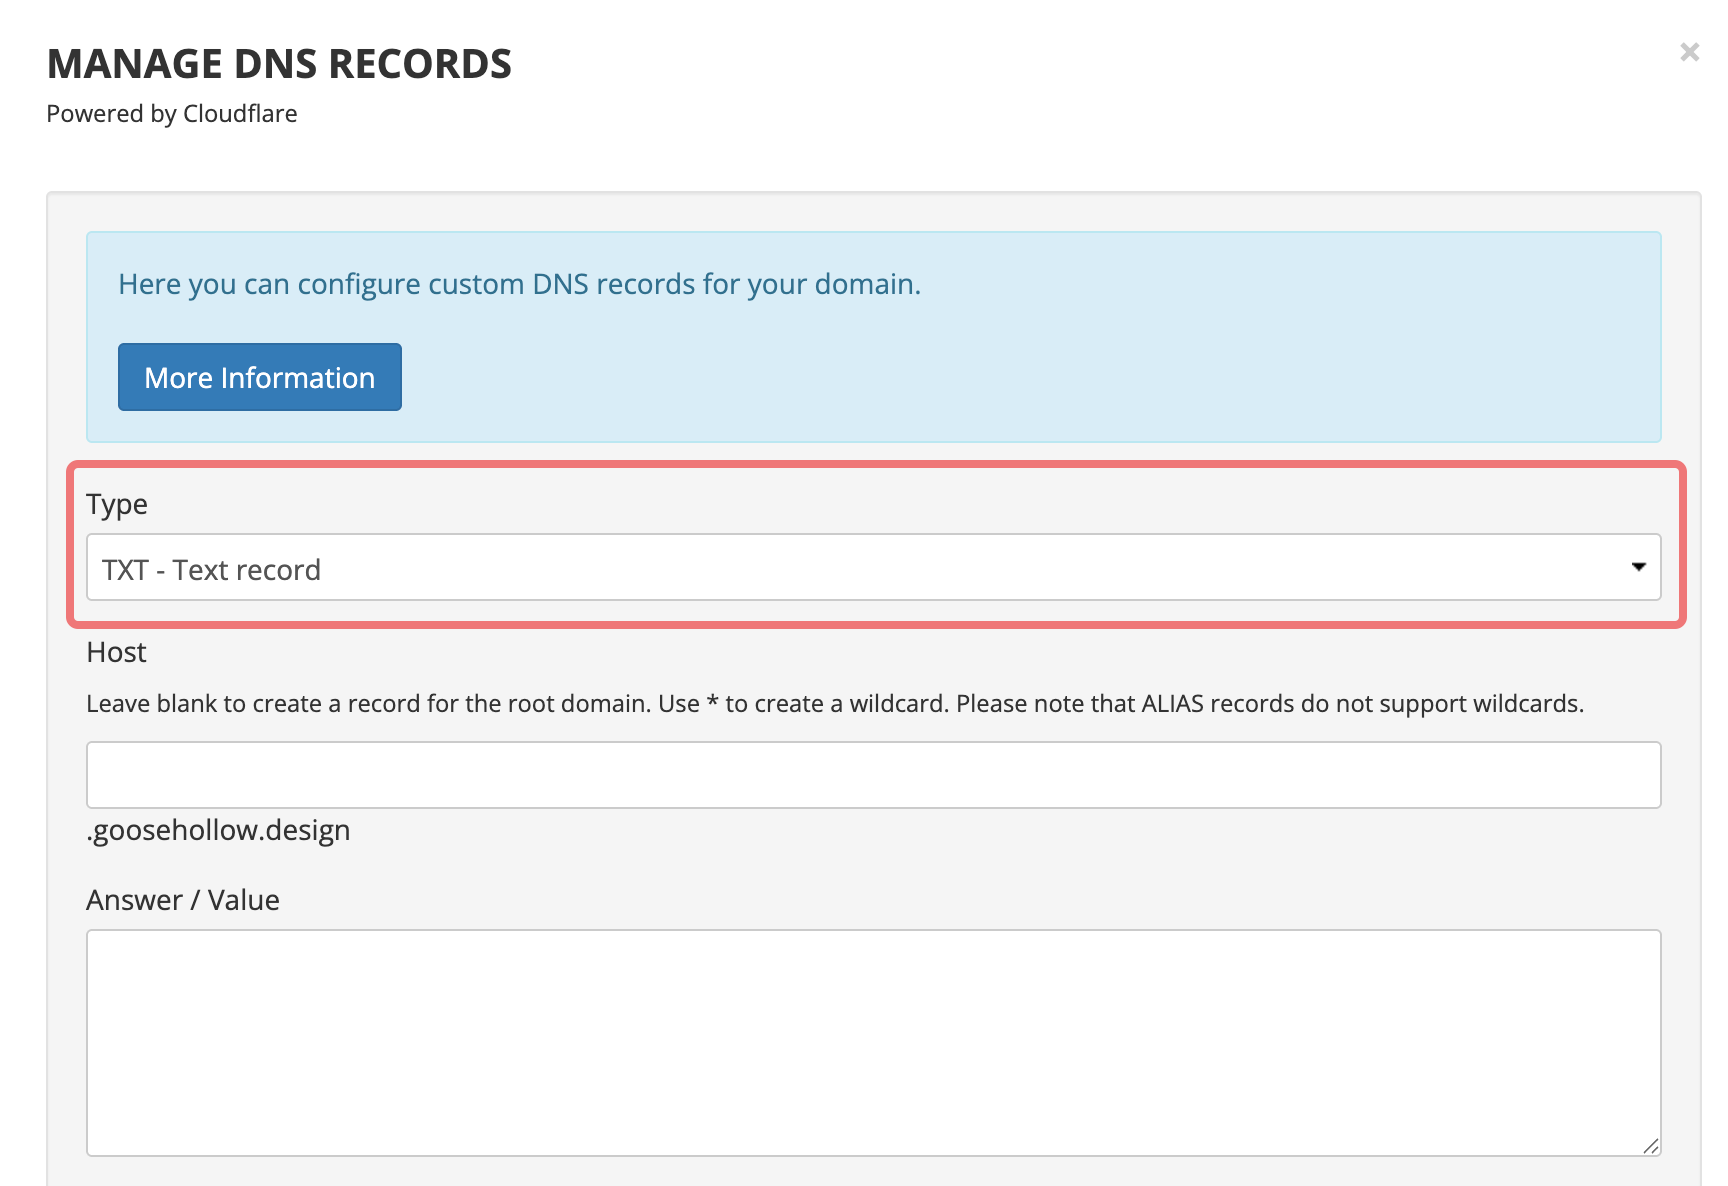
The "Manage DNS Records" menu will appear. Here we can add the records required to validate and connect your domain to Azure. Click on the "Type" option to open the dropdown menu, then select "TXT - Text record".
6
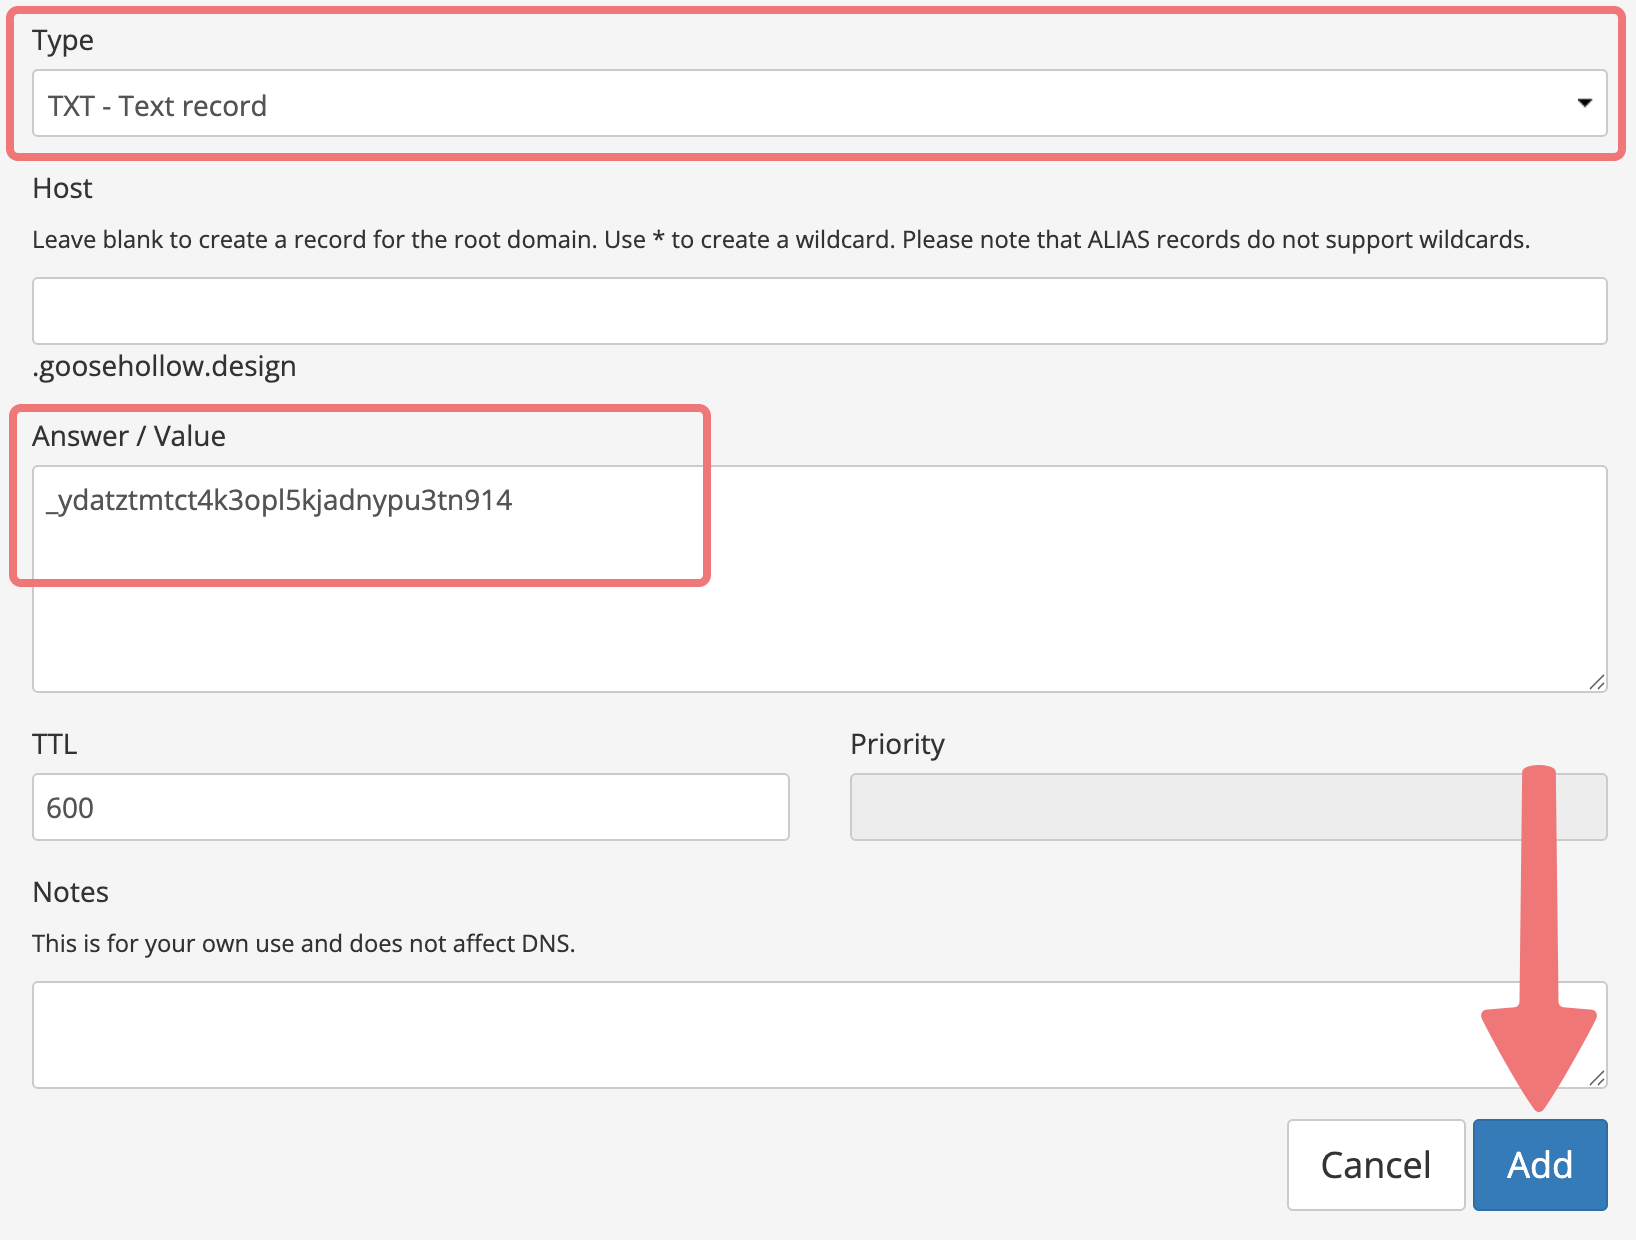
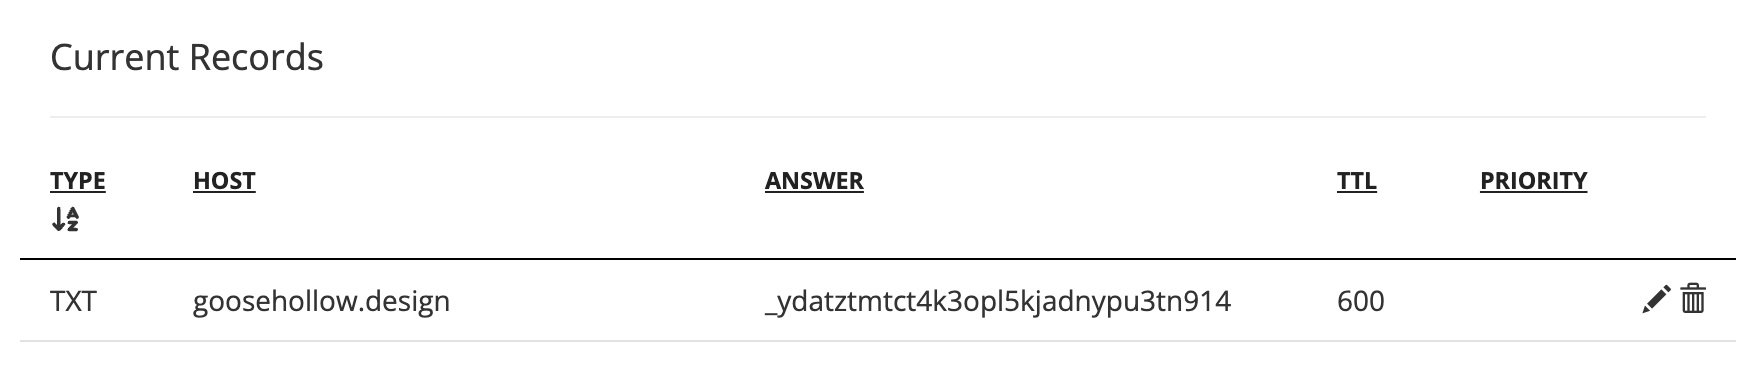
Leave the "Host" field blank (even if Microsoft prompts you to use the "@" symbol). This will connect your root domain to the app. In the "Answer / Value" field, paste the generated validation code that you copied from Azure previously. After pasting the code, click the "Add" button to finish creating the record.
If you scroll to the bottom section of the menu labeled "Current Records", you should see the TXT record you added to your domain.
7
Next, we'll be adding an ALIAS record to the domain in order to connect the root domain to your app. The value of this ALIAS record will be what was shown to you as the "generated URL" for your app on Azure. If you haven't taken note of this URL yet, you can find it in the "Overview" window on your Azure portal per Microsoft's guide:
8
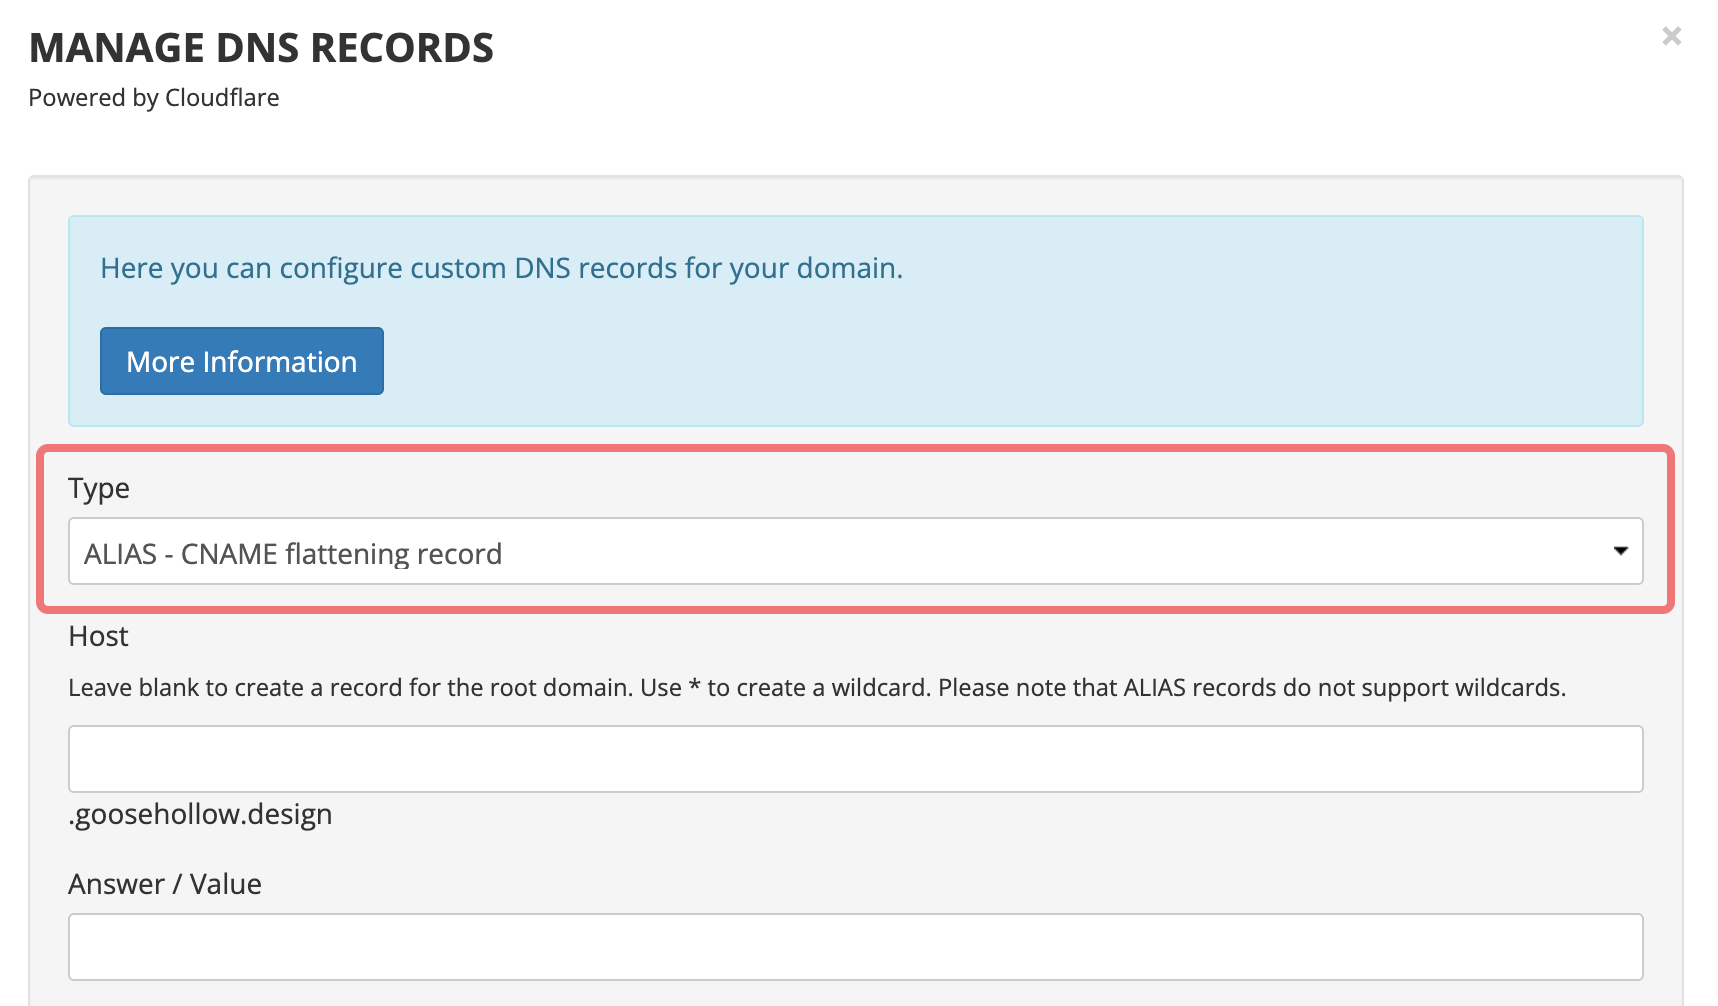
On the same "Manage DNS Records" menu on Porkbun, scroll back up to the top and change the "Type" option to "ALIAS - CNAME flattening record".
9
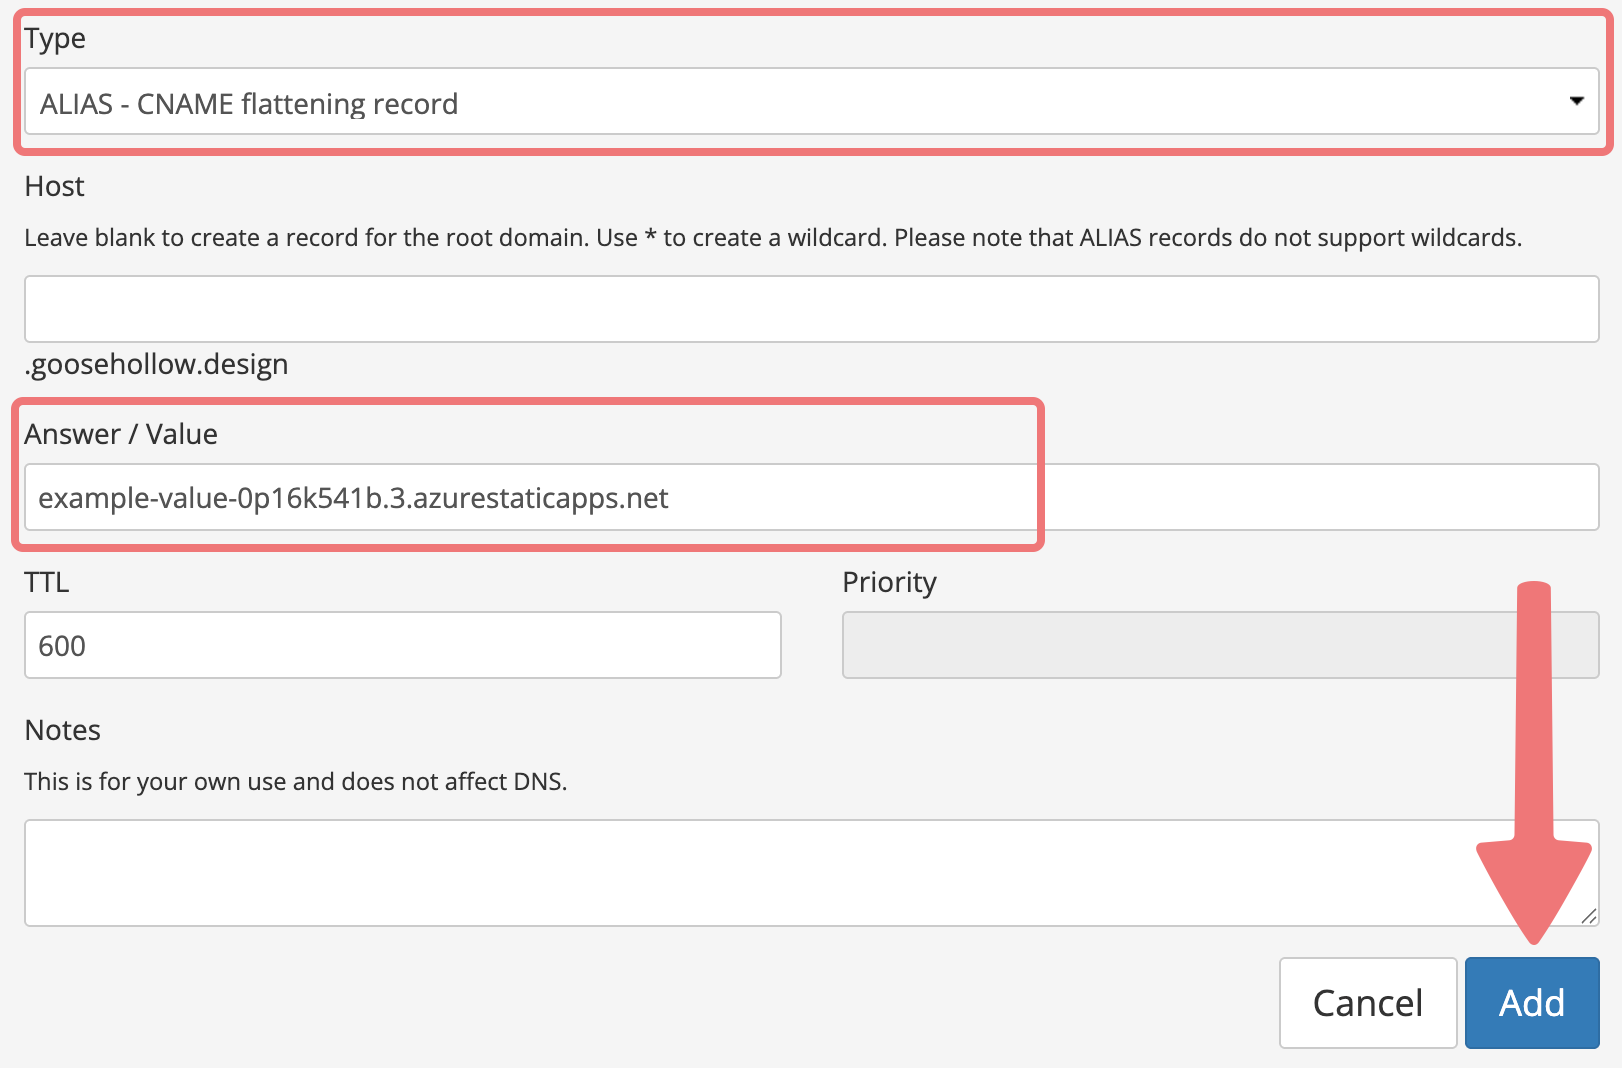
Once again, leave the Host field blank since we're connecting your root domain. In the "Answer / Value" field, paste the generated URL for your app that you copied from Azure. Once that's pasted in, click on the "Add" button to create the record.
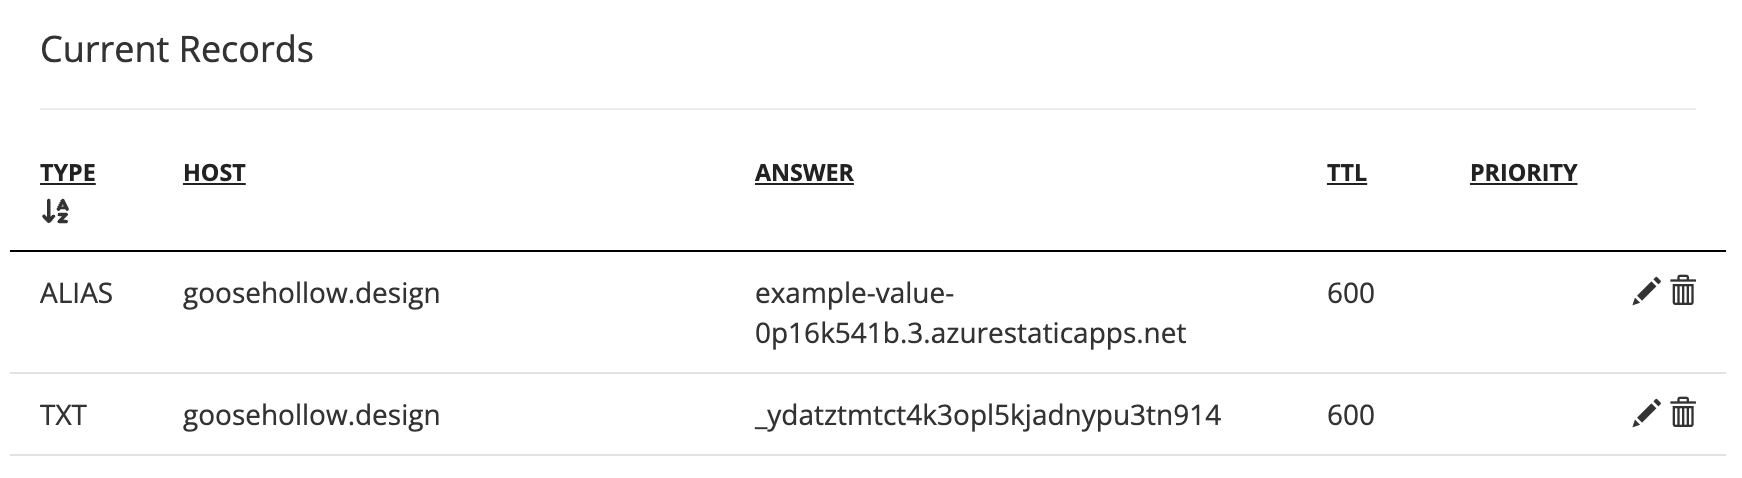
You can scroll back down to the "Current Records" section at the bottom of the menu, where you should see both of the records you've added to your domain.
That's it! Those new records will propagate within 10-15 minutes, and assuming everything is validated properly on Microsoft's side, your custom domain should connect to the app successfully and begin showing up online.
If you want to connect the "www" subdomain to your app as well, there are a few ways you can do that. You can add the "www" version of your website as its own custom domain in Azure, or you can simply set up a URL forward on Porkbun that makes it so all requests to the "www" subdomain are forwarded to your root domain, where your app is already connected.
Please feel free to get in touch with our support team if you run into any issues connecting your domain to your Static Web App on Azure.


