How to configure a spam filter in Webmail
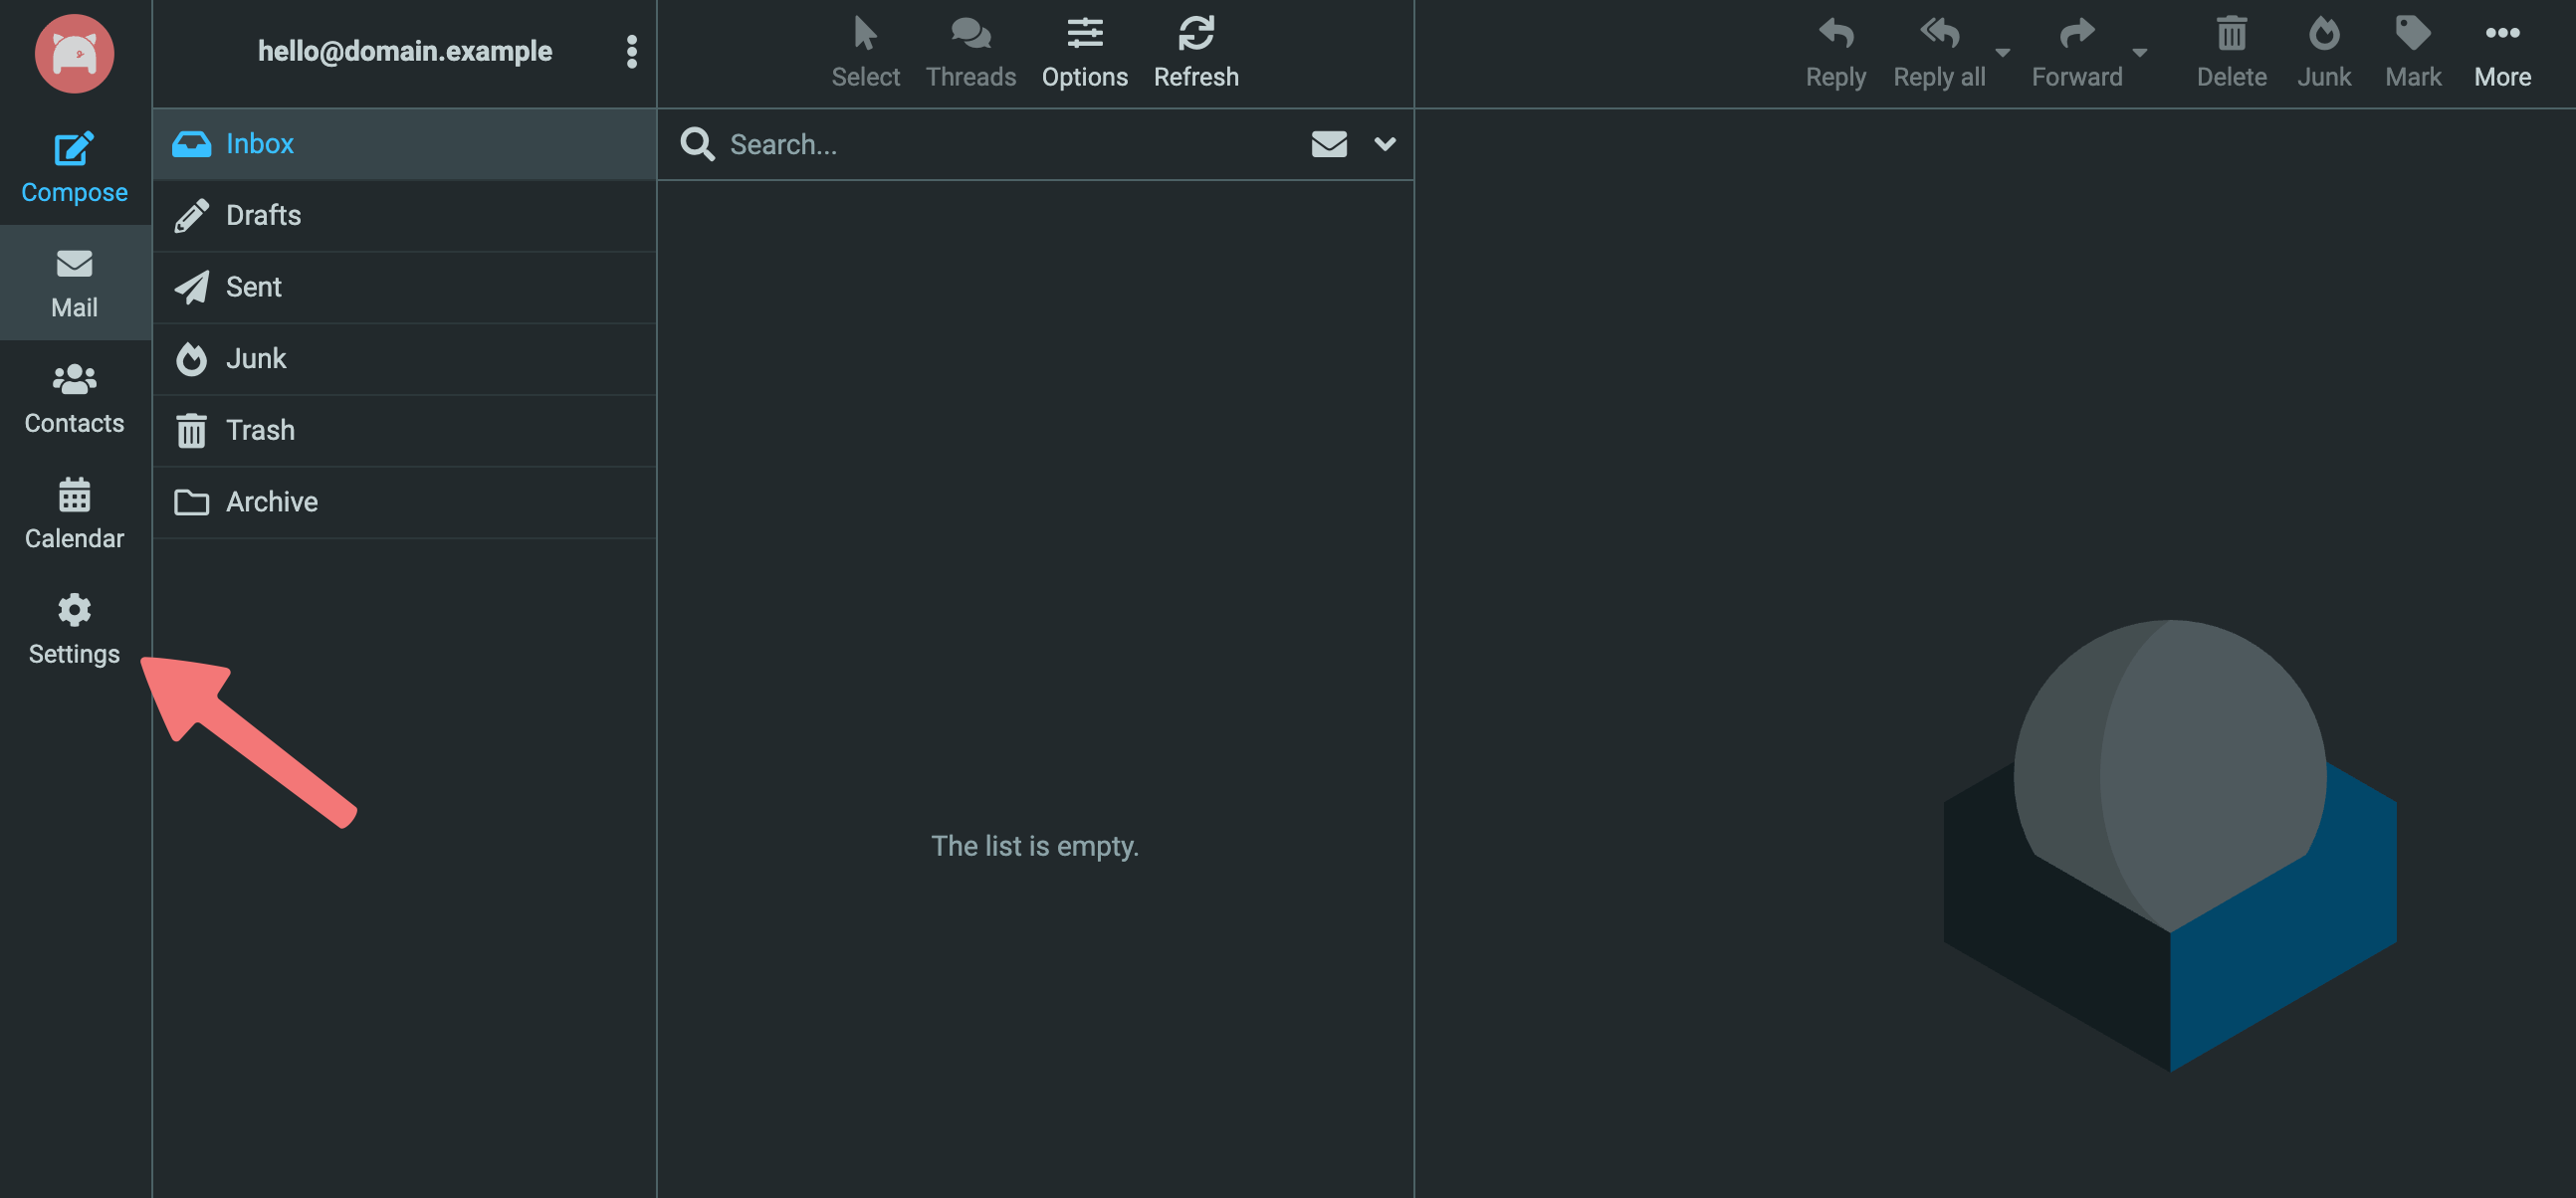
Porkbun's email hosting service already comes equipped with a comprehensive spam filter that mitigates the majority of spam emails. However, if you want to add your own rules to Webmail to fine-tune the spam filtering even further, you can do that! We'll show you how.
- Scope: Matching all of the following rules
- Rules: Click on "Subject" then choose "..." from the dropdown menu. In the "Header name" field, type "X-Spam-Status". Click on "contains" and change it to "count is greater than or equal to". In the next field, enter "15".
- Actions: Leave "Move message to" selected, and in the next field choose the Junk folder from the dropdown menu.
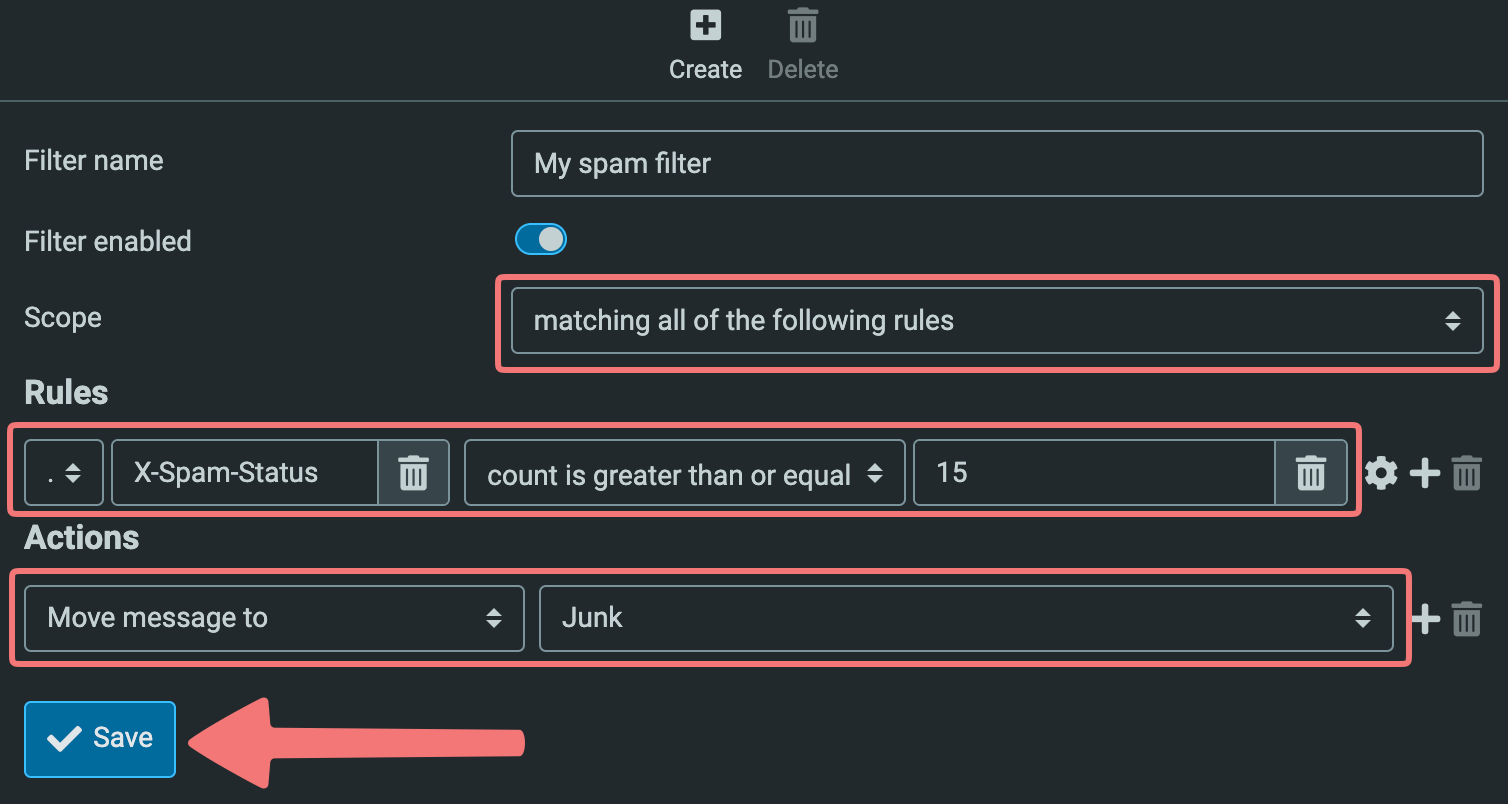
That's it! The filter will be saved and immediately applied to your email address. You can always return to the same menu to adjust the filter or add new ones.
If you need any assistance managing filters or with your email hosting service in general, feel free to reach out to our support team.