How to transfer a domain to Porkbun with little to no DNS downtime
If you're transferring your domain to Porkbun and are worried about downtime or disruption in service, you're in the right place! There are a couple of solutions, and we'll go over them in this guide. This process can seem intimidating at first, but we'll make it easy on you. Read on!
Do I even need to do this?
That's the right question to ask first! In some situations, you don't need to do any extra steps, and your domain will transfer over and continue working normally. This is because when you transfer a domain to Porkbun, the currently assigned nameservers will automatically transfer over with the domain name itself.
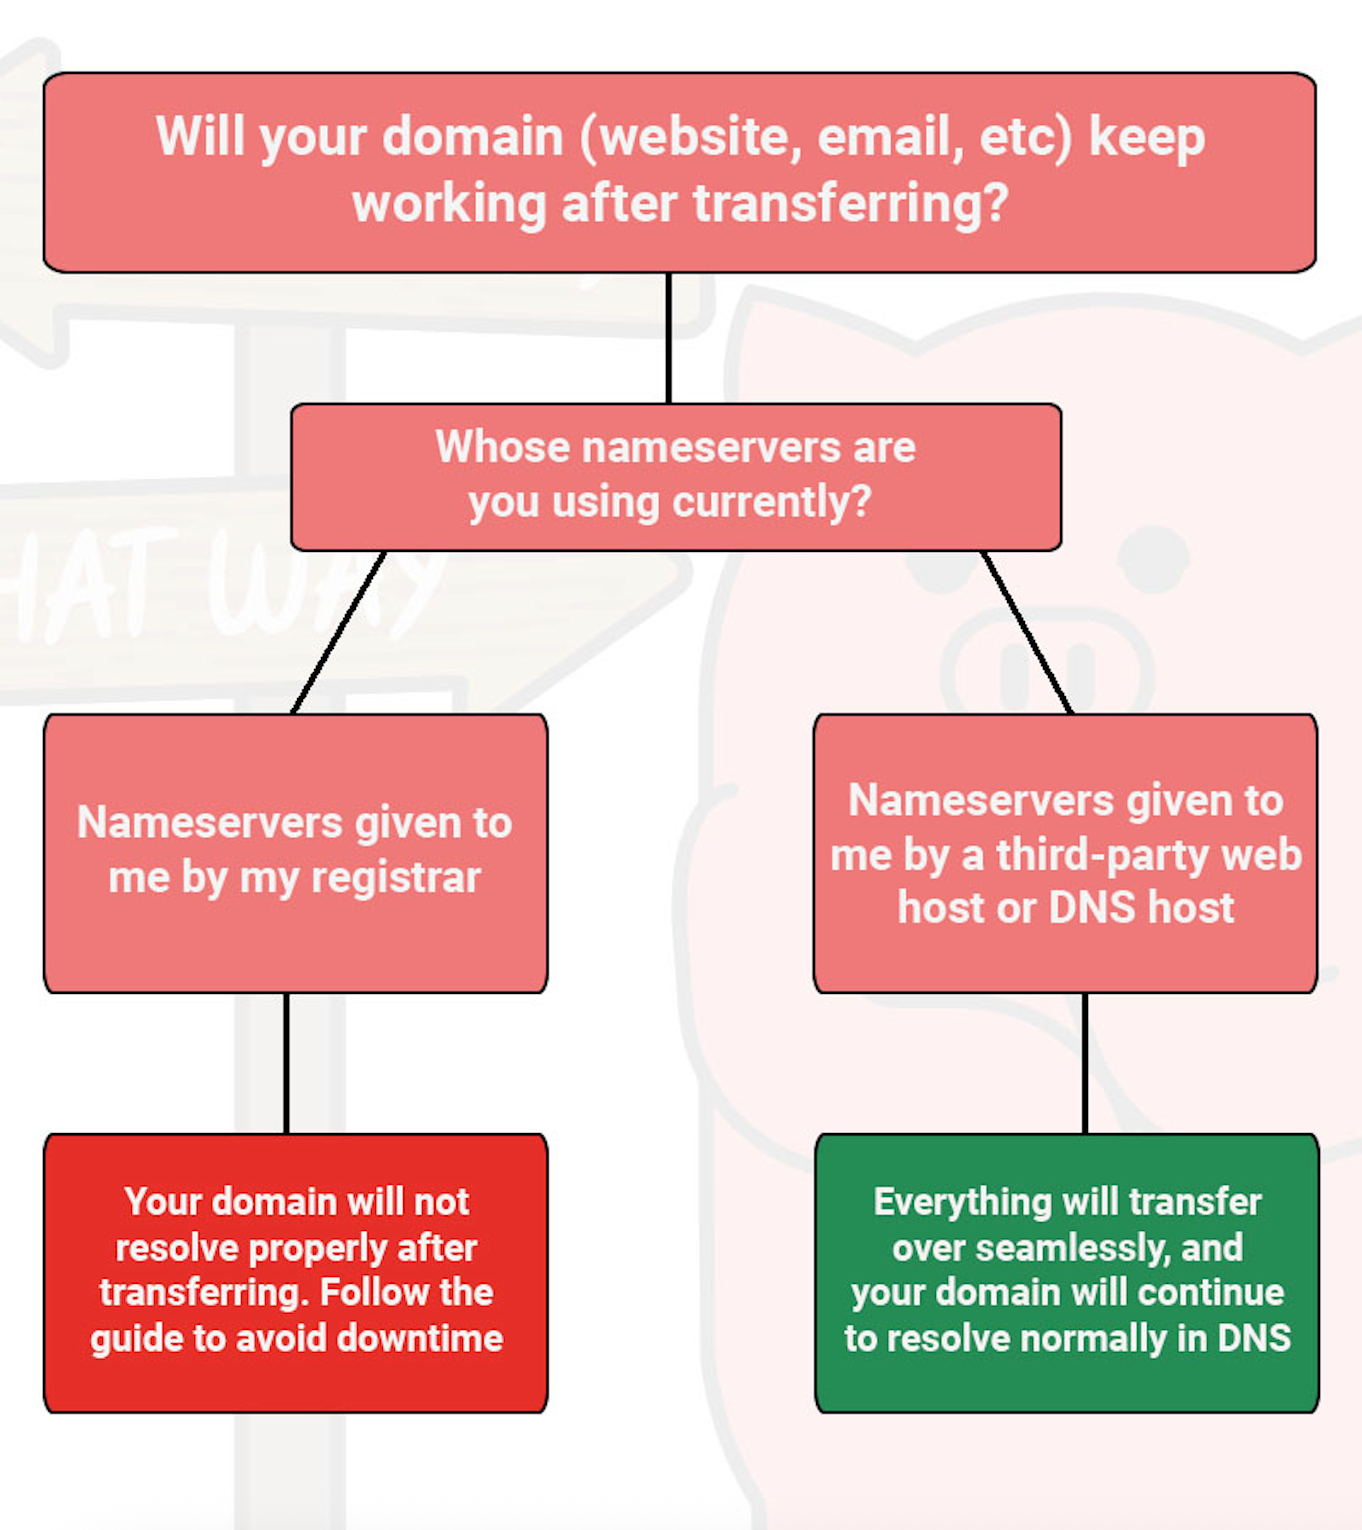
If you are using nameservers that will continue to work after the transfer (such as nameservers given by your web hosting provider or a third-party DNS provider), you can transfer your domain to Porkbun — everything will continue working normally, and the DNS will remain intact.
If you are instead using nameservers that will NOT continue to work after the transfer (such as nameservers provided by your current domain registrar), then your DNS will be affected. In that case, follow this guide to move everything over without downtime.
You can use this chart to determine whether or not you need to follow the rest of this guide.
If you're unsure about your particular domain's nameservers, you can always ask your current registrar (or Porkbun's support team) for clarification. The rest of this guide will show you how to transfer your domain without downtime. Let's get started!
Method 1: Rebuild the DNS zone on Porkbun before transferring (recommended)
Note
Our transfer guides will instruct you to unlock your domain. Ignore that step for now, and make sure your domain is locked before purchasing the transfer.
Warning
If you have any DNSSEC records added to your domain, we recommend deleting them before transferring the domain. This will prevent DNS resolution issues, and after the transfer you can always turn Porkbun's DNSSEC on or add your own DNSSEC record.
- curitiba.ns.porkbun.com
- fortaleza.ns.porkbun.com
- maceio.ns.porkbun.com
- salvador.ns.porkbun.com
Success! You've set up the DNS zone for your domain on Porkbun ahead of time, and it will now transfer over without things going offline since we're already managing the DNS.
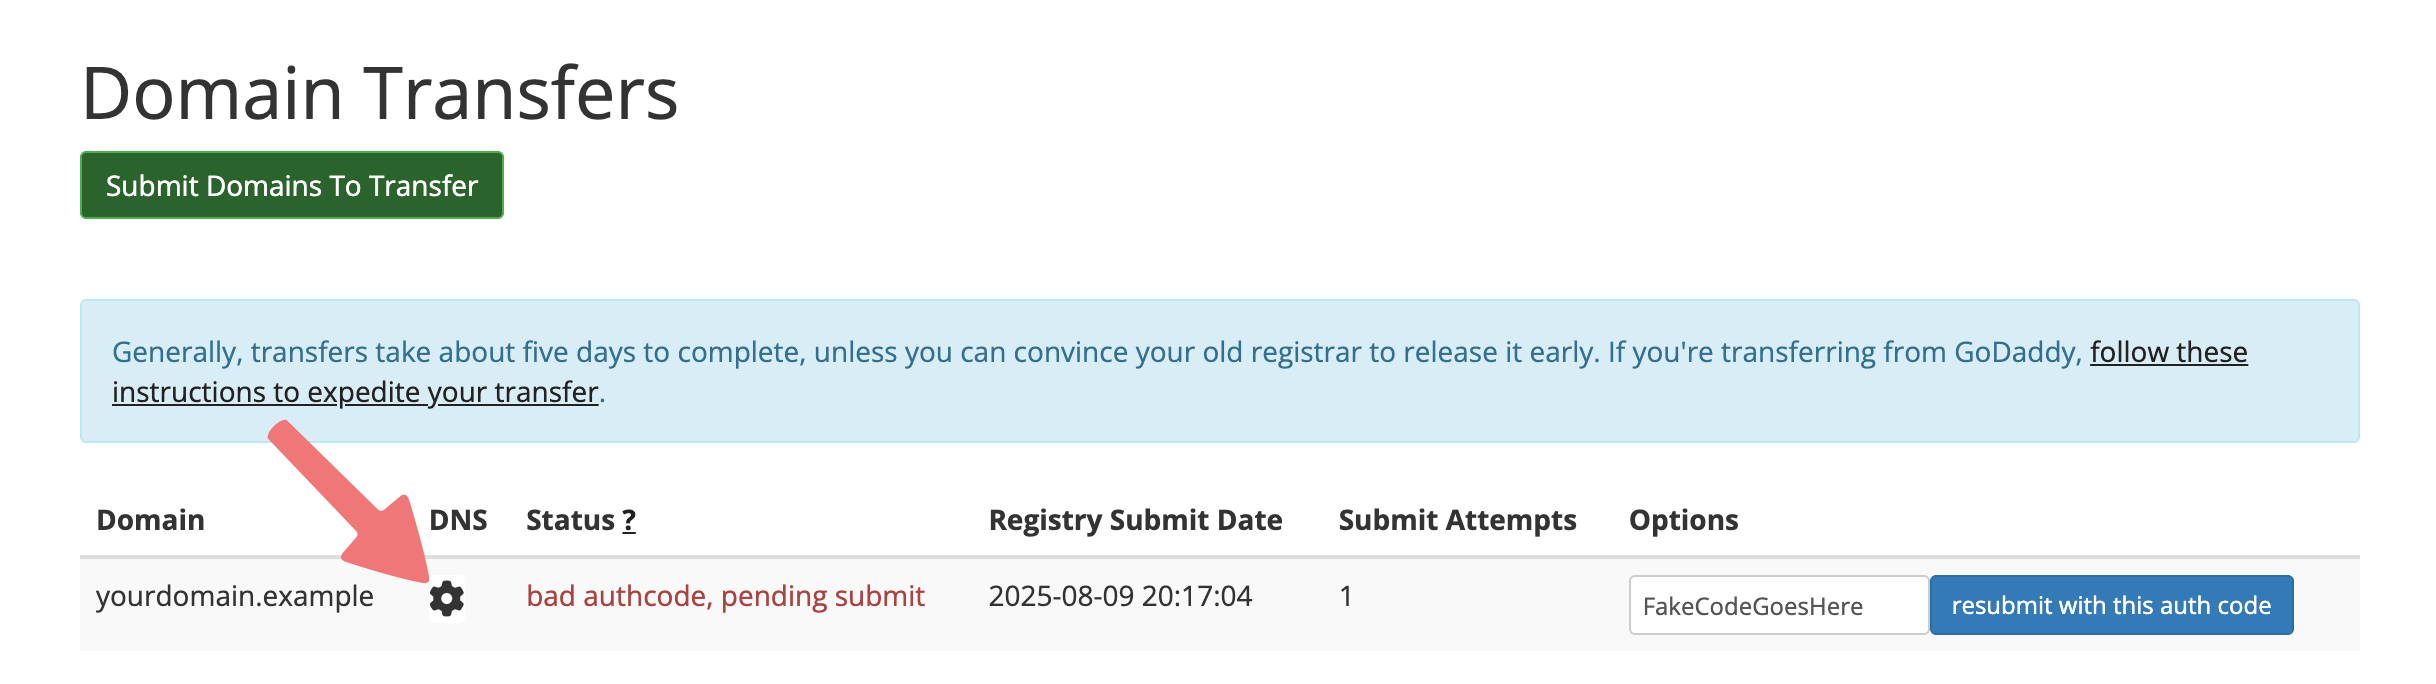
Domain transfers typically take about 5-6 days to complete, unless your current registrar can expedite that process for you. We recommend reaching out to them directly to ask for help with speeding up your transfer.
Take a break. Sip from the trough. Roll around in some mud. Go ahead, you deserve it!

Method 2: Add your domain as an external domain
This method works similarly to the first one. We have a dedicated guide that explains how to add an external domain to your account. Once you've done that, you can set up the DNS zone for the domain prior to the transfer, then everything will safely move over without any downtime. We typically recommend the first method to keep things simplified, but this one works too, especially if you don't want to purchase the transfer quite yet.
Feel free to reach out to our Support team if you need any assistance.