How to connect your domain to WordPress.com
Want to link your domain to a website hosted on WordPress.com? We'll show you how!
If you haven't purchased a hosting plan with WordPress.com yet, you can do so from the WordPress.com pricing page.
Note
This guide is for connecting your domain to an externally purchased WordPress.com hosting plan. If you're interested in setting up Porkbun's Cloud for WordPress hosting on your domain instead, follow this guide for instructions.
1
The first step is to "map" or add your domain to your WordPress.com hosting account. You can follow step 1 from their setup guide to see how that's done.
2
After adding your domain to your WordPress.com account, you may be prompted to allow for an "automatic" connection to your domain. If so, you can choose that option which will make this process a lot quicker. You'll just need to log in to your Porkbun account when prompted by WordPress.com, and their system will handle the rest automatically.
If you don't see that option, or if you'd just prefer to connect your domain manually instead, read on!
3
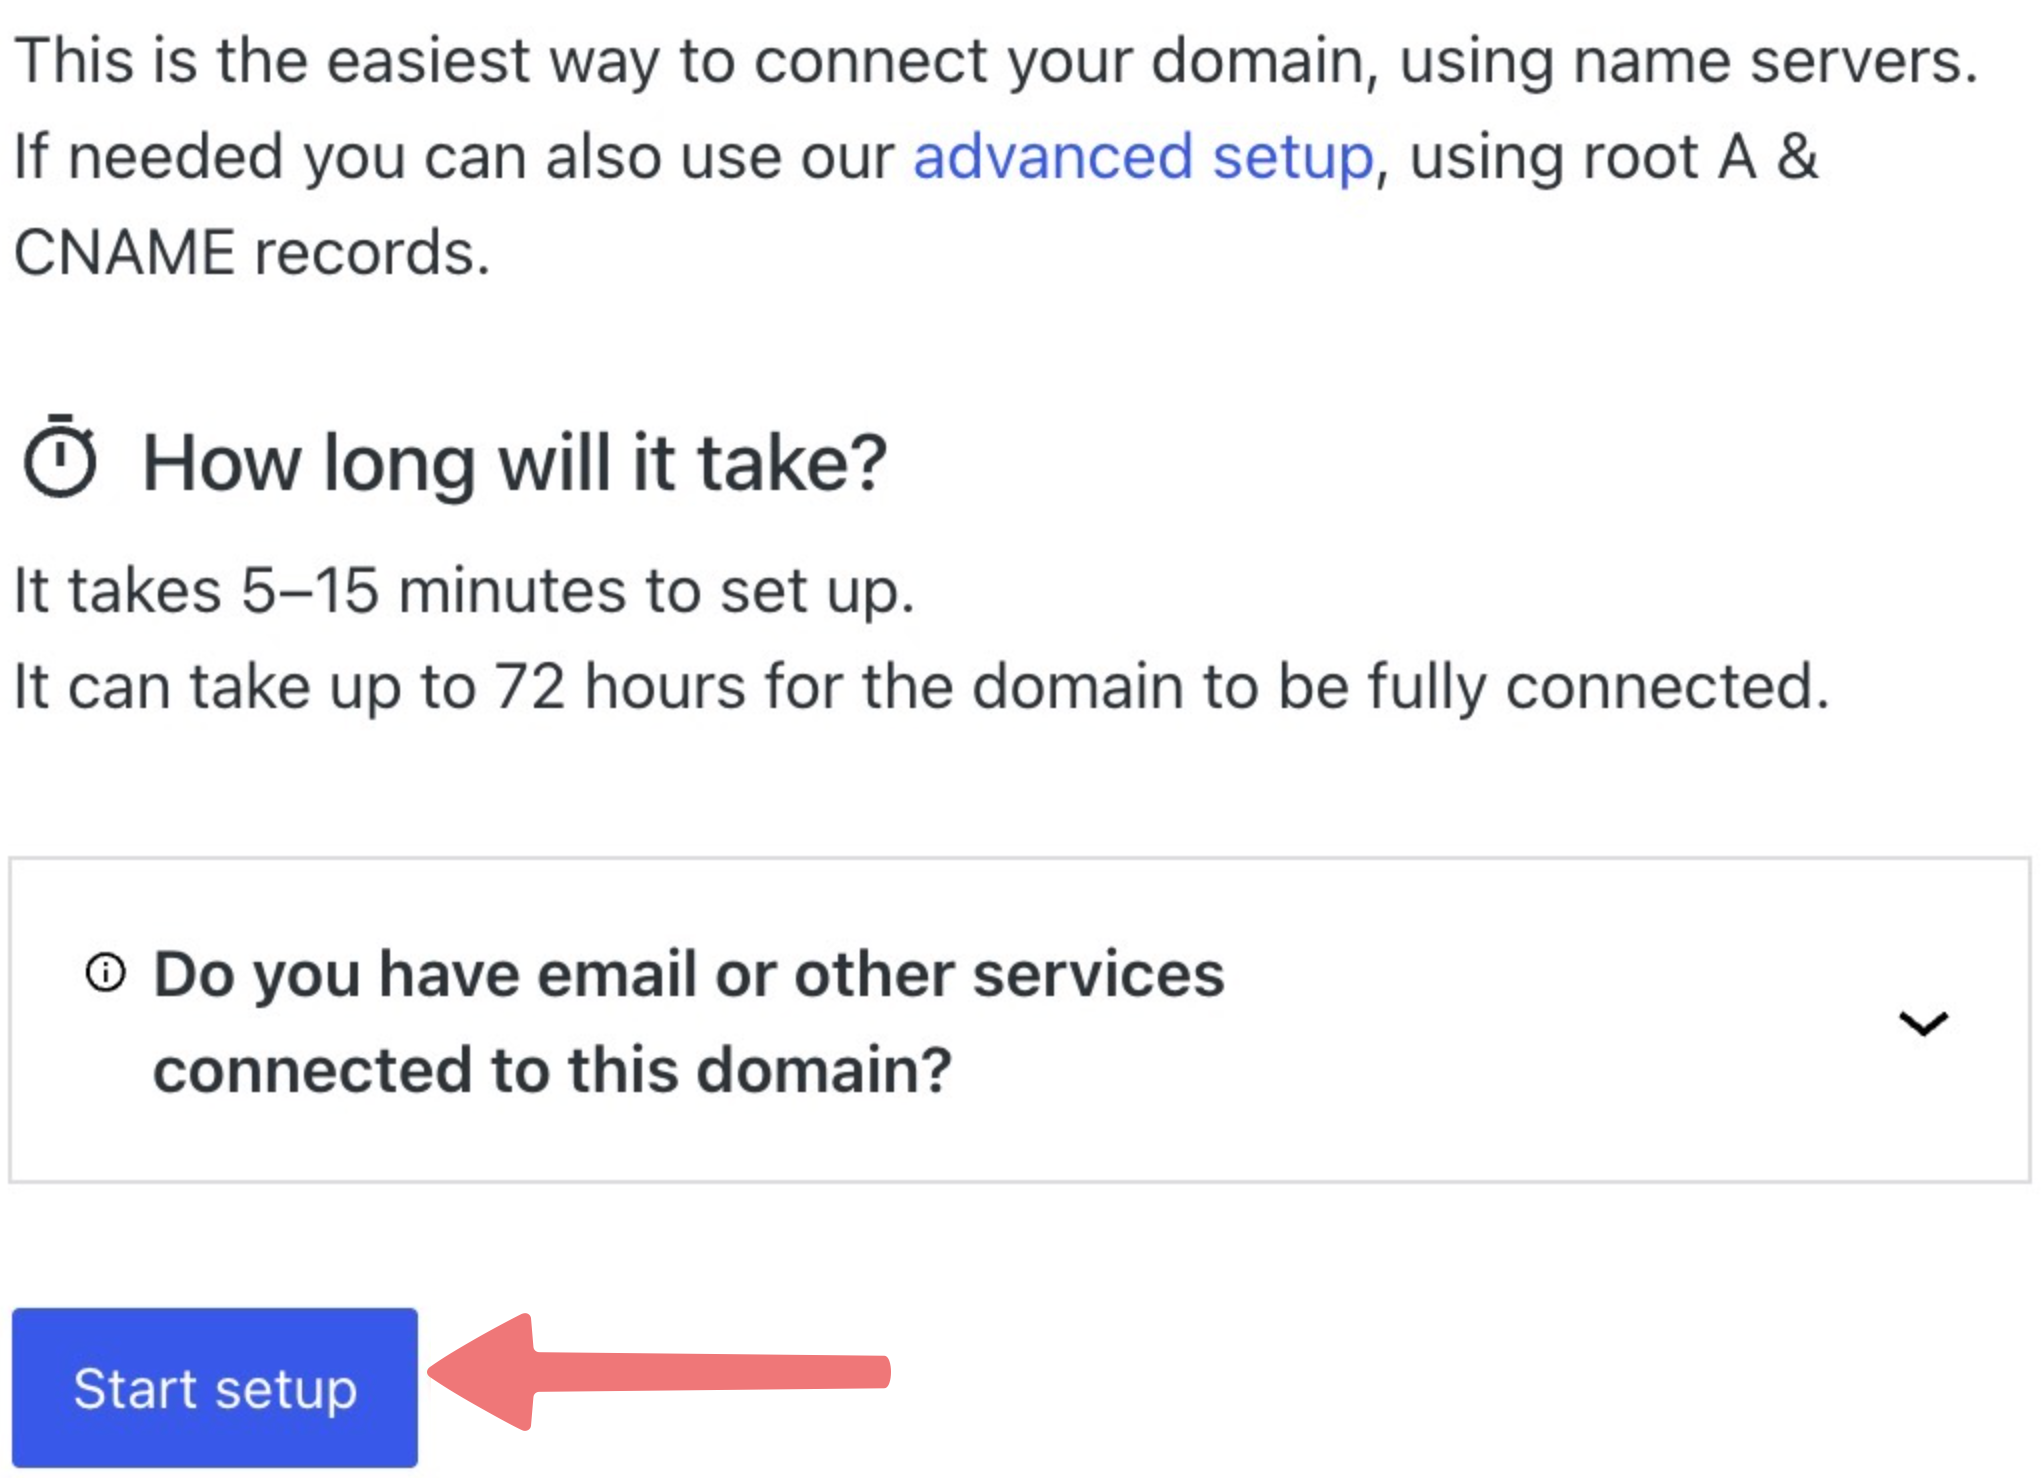
After adding your domain, you'll see a menu with some more information about the process. Click on the "Start setup" button to continue.
Note
If you would prefer to point your domain to WordPress.com using DNS records instead of their nameservers, click on the "advanced setup" link shown in the screenshot above. You can then follow this guide to create the DNS records to point your domain.
4
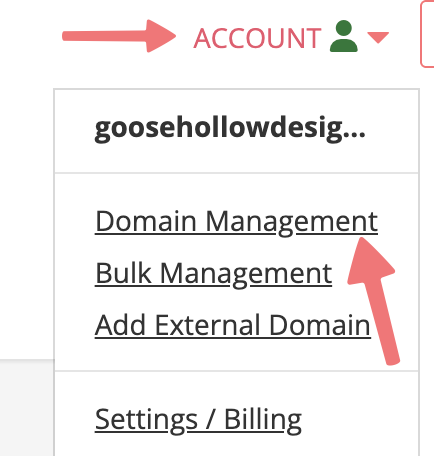
On the next screen, you'll be asked to log in to the DNS settings page at your domain registrar (that's us!). In a new tab or window, log in to your Porkbun account and navigate to the Domain Management page. If you're already logged in, click on ACCOUNT in the top-right corner and select Domain Management.
5
On the Domain Management page, locate the domain you're connecting to WordPress.com. Click on the "Details" button all the way to the right of the domain name. In the domain details menu that appears, look for the "Nameservers" option and click on the edit icon.

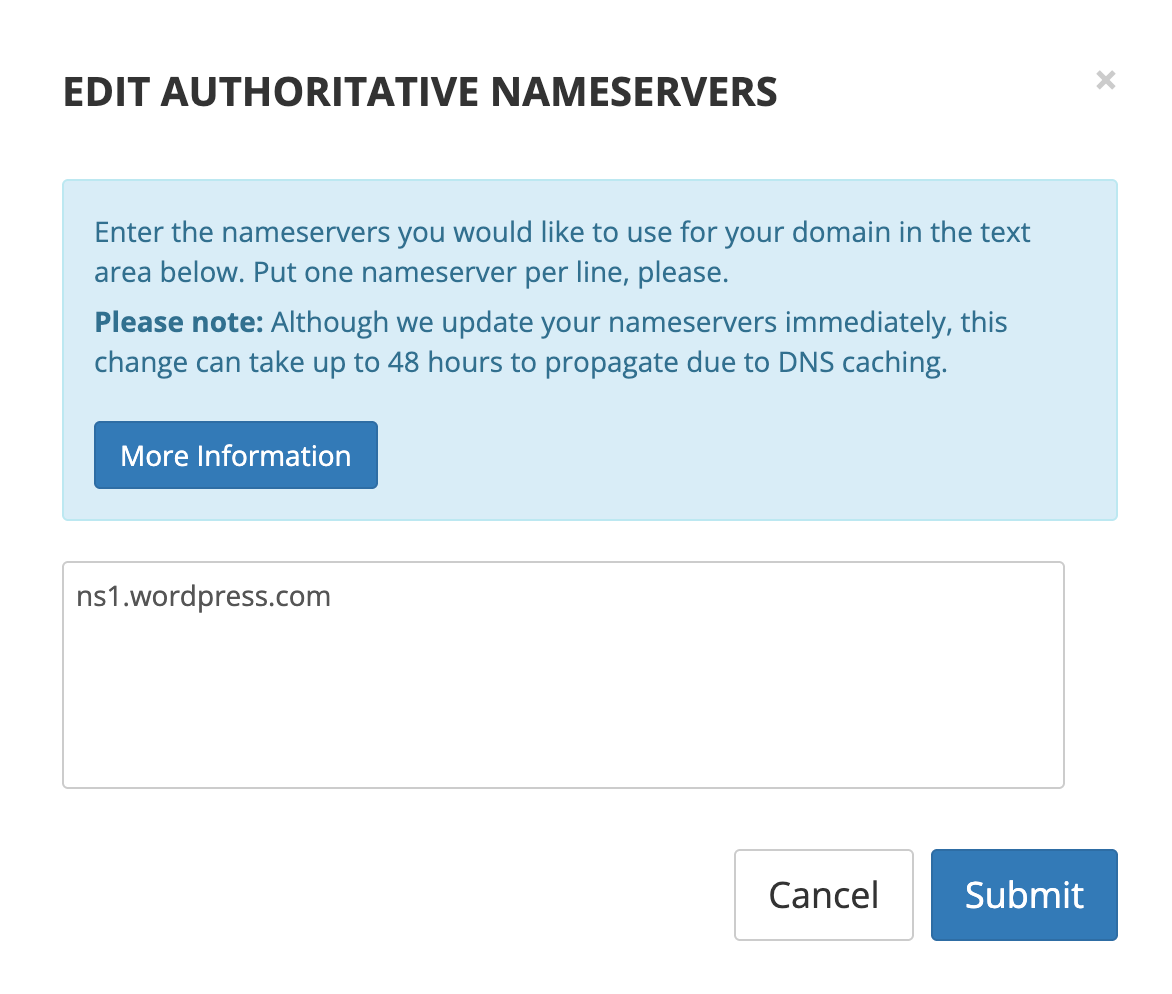
A menu will appear that allows you to edit your domain's nameservers. Leave this window open for now and don't make any changes yet.
6
Switch back to the tab/window with your WordPress.com account opened. Click on the "I found the domain settings page" button.
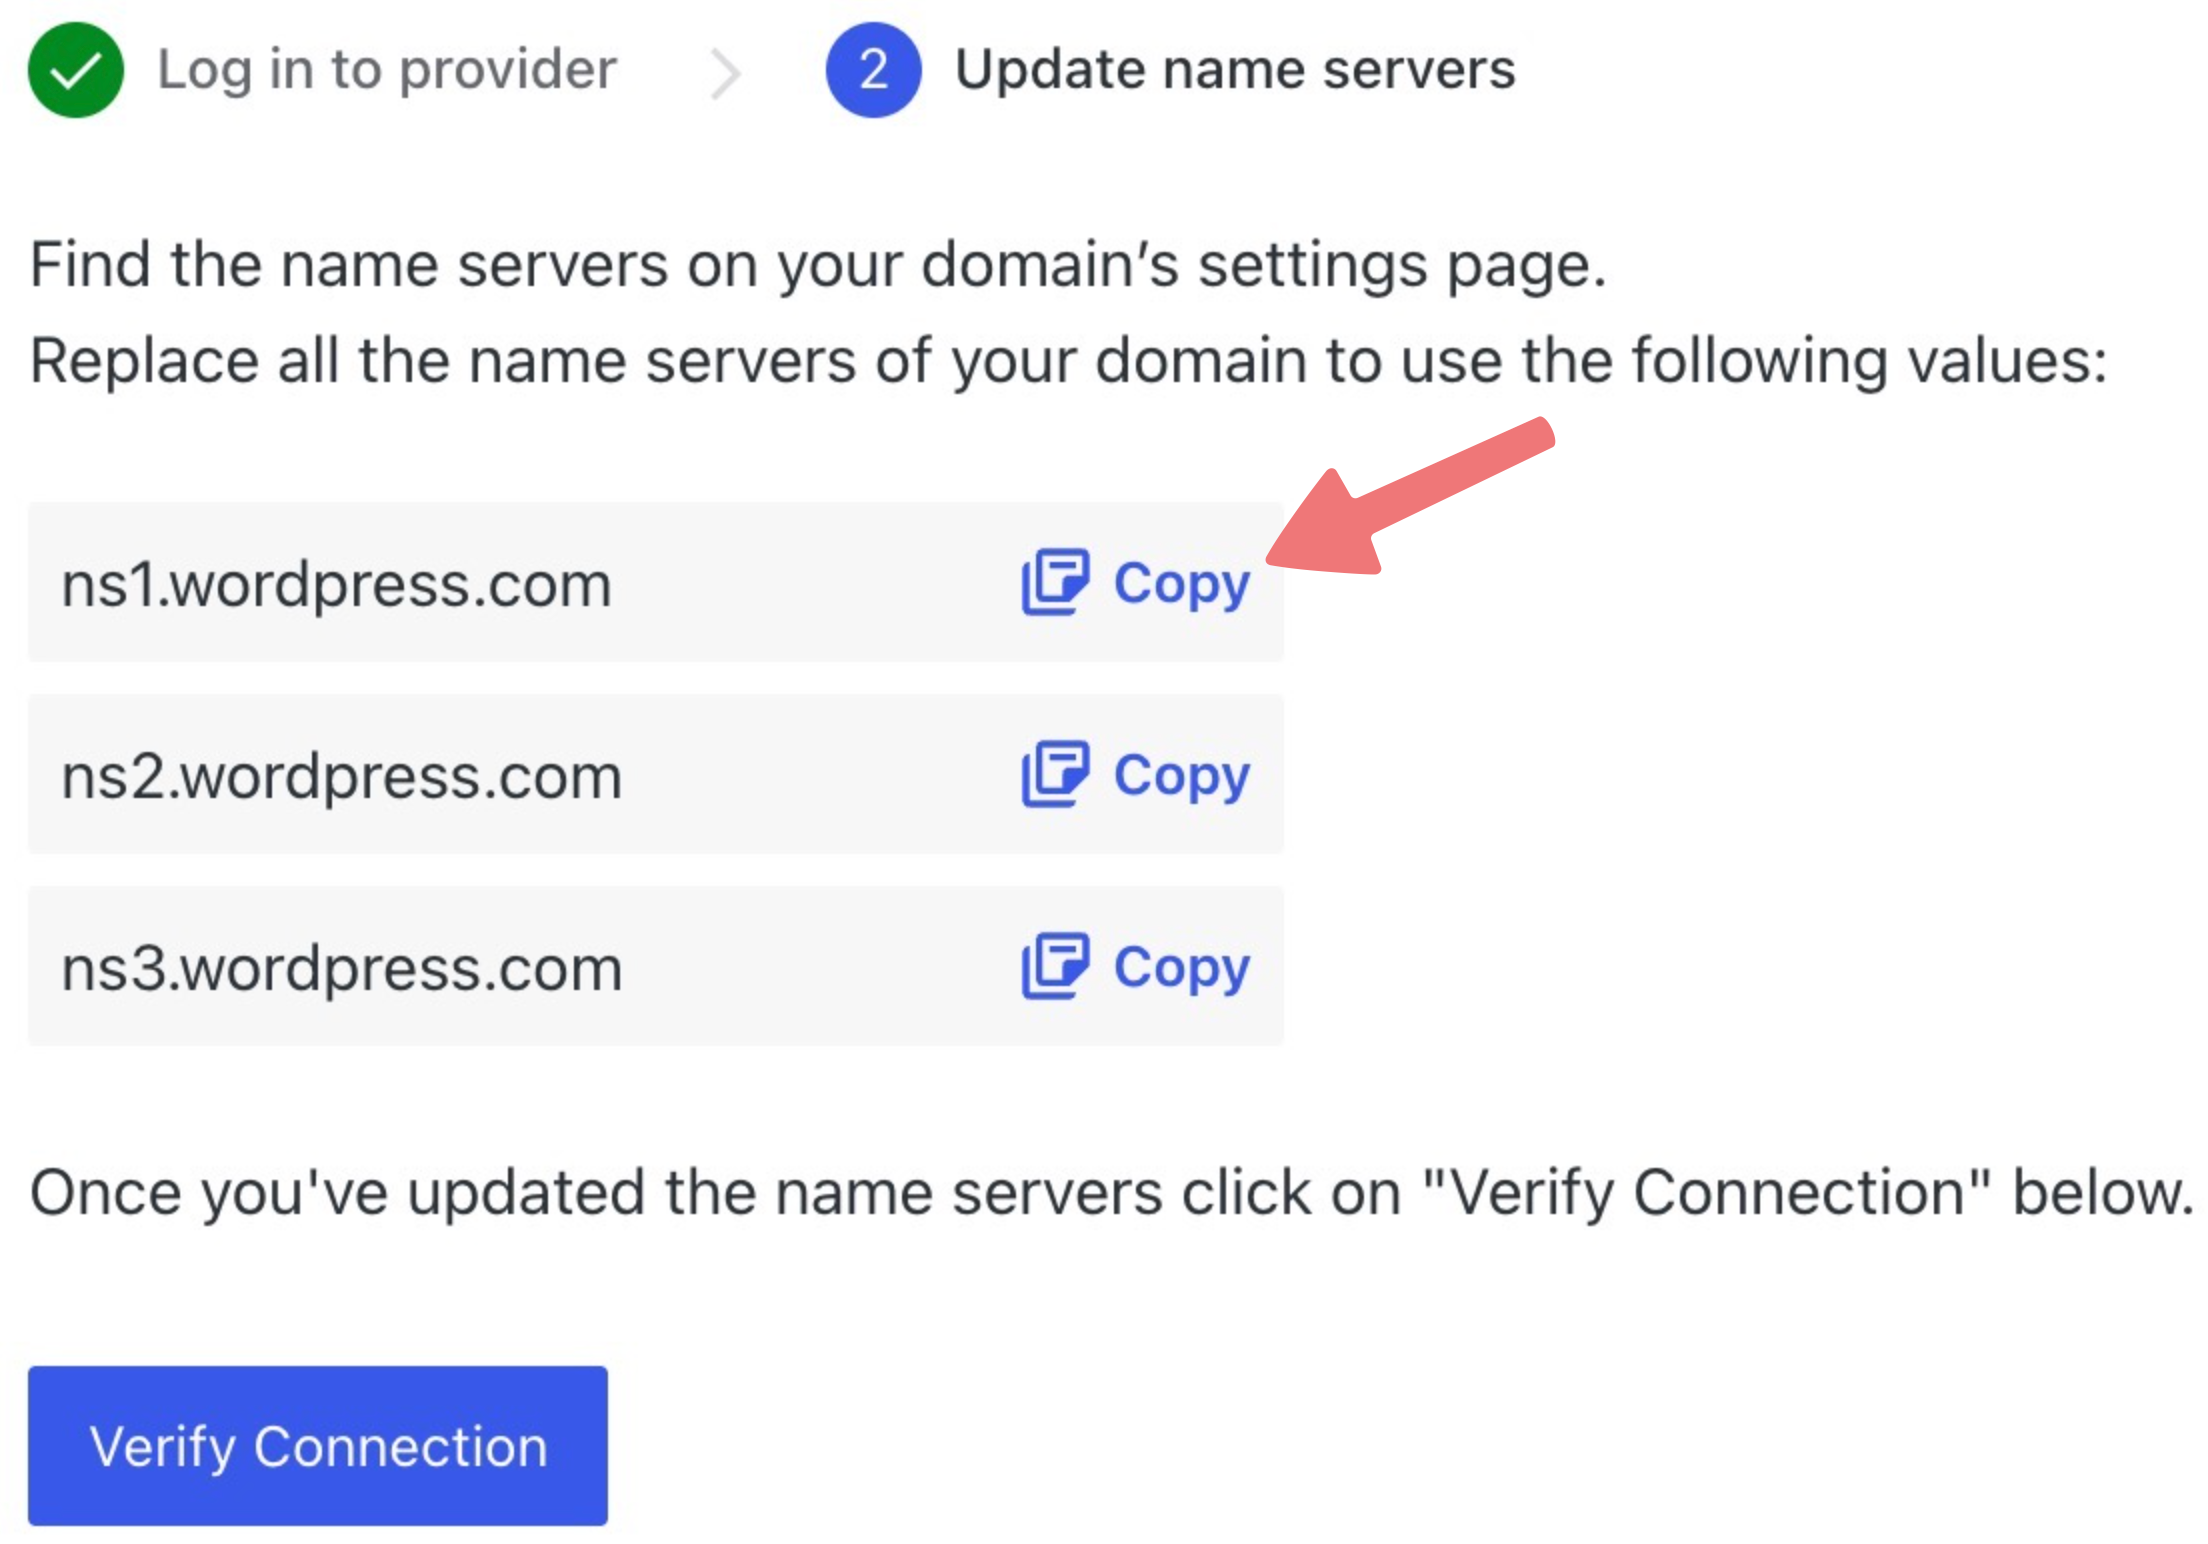
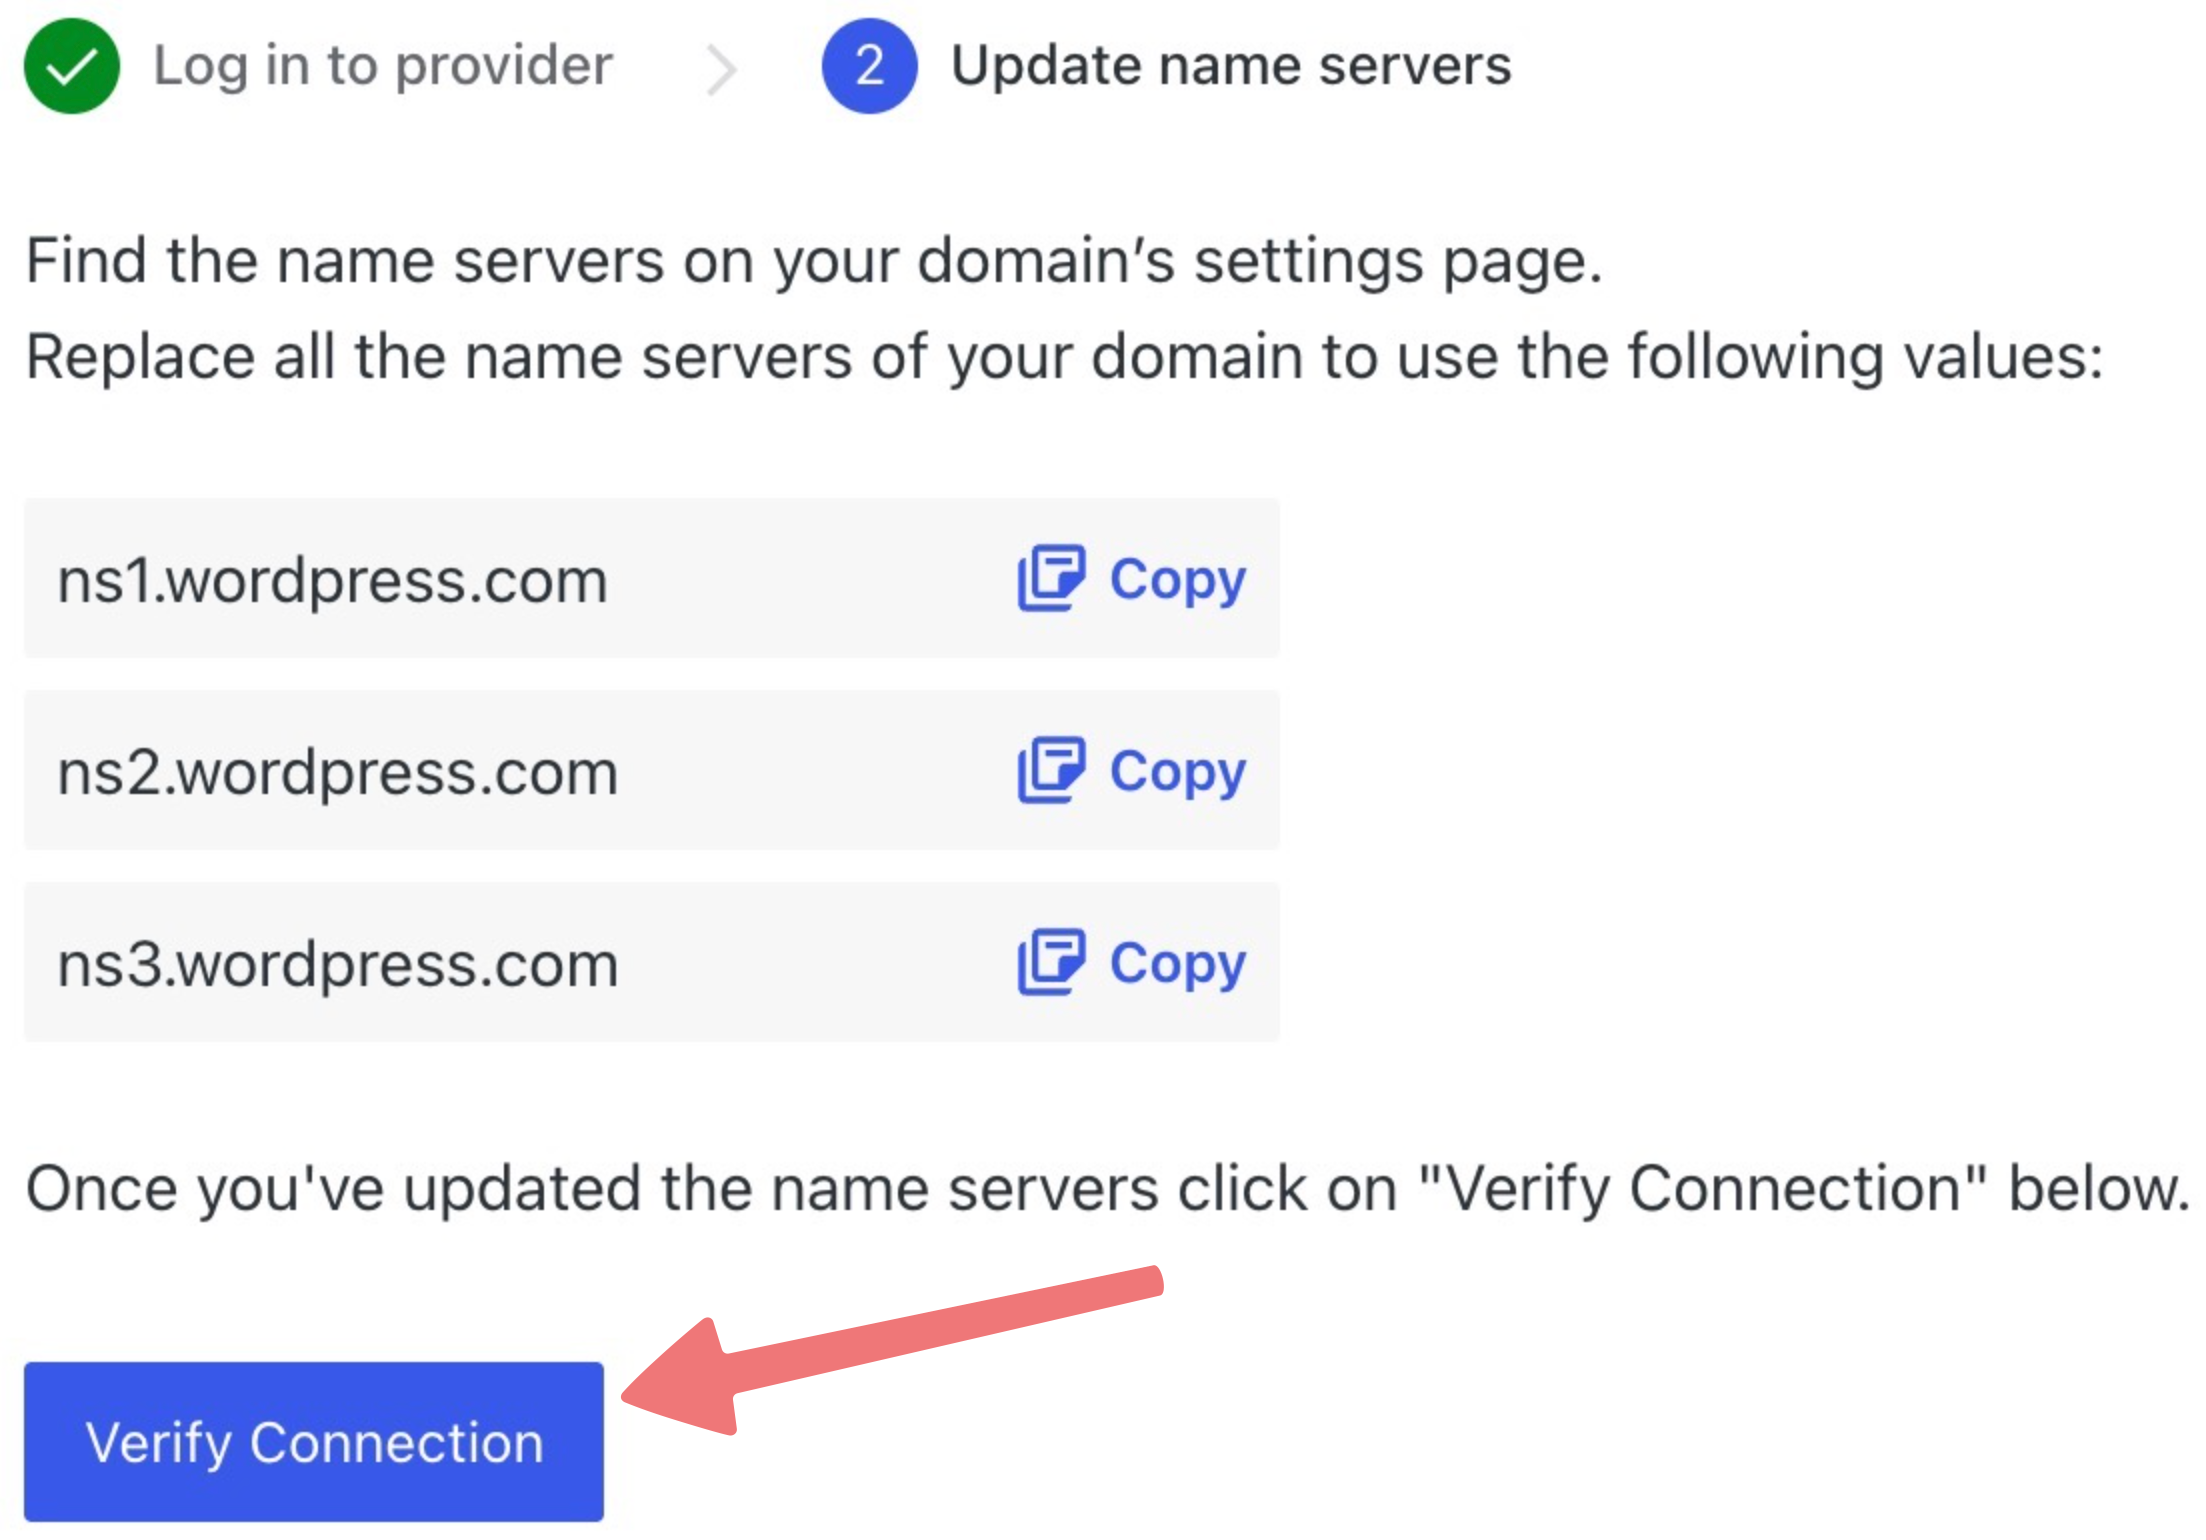
7
You'll be taken to another screen that shows a list of DNS nameservers used by WordPress.com. Click on the "Copy" link to the right of the first listed server.
8
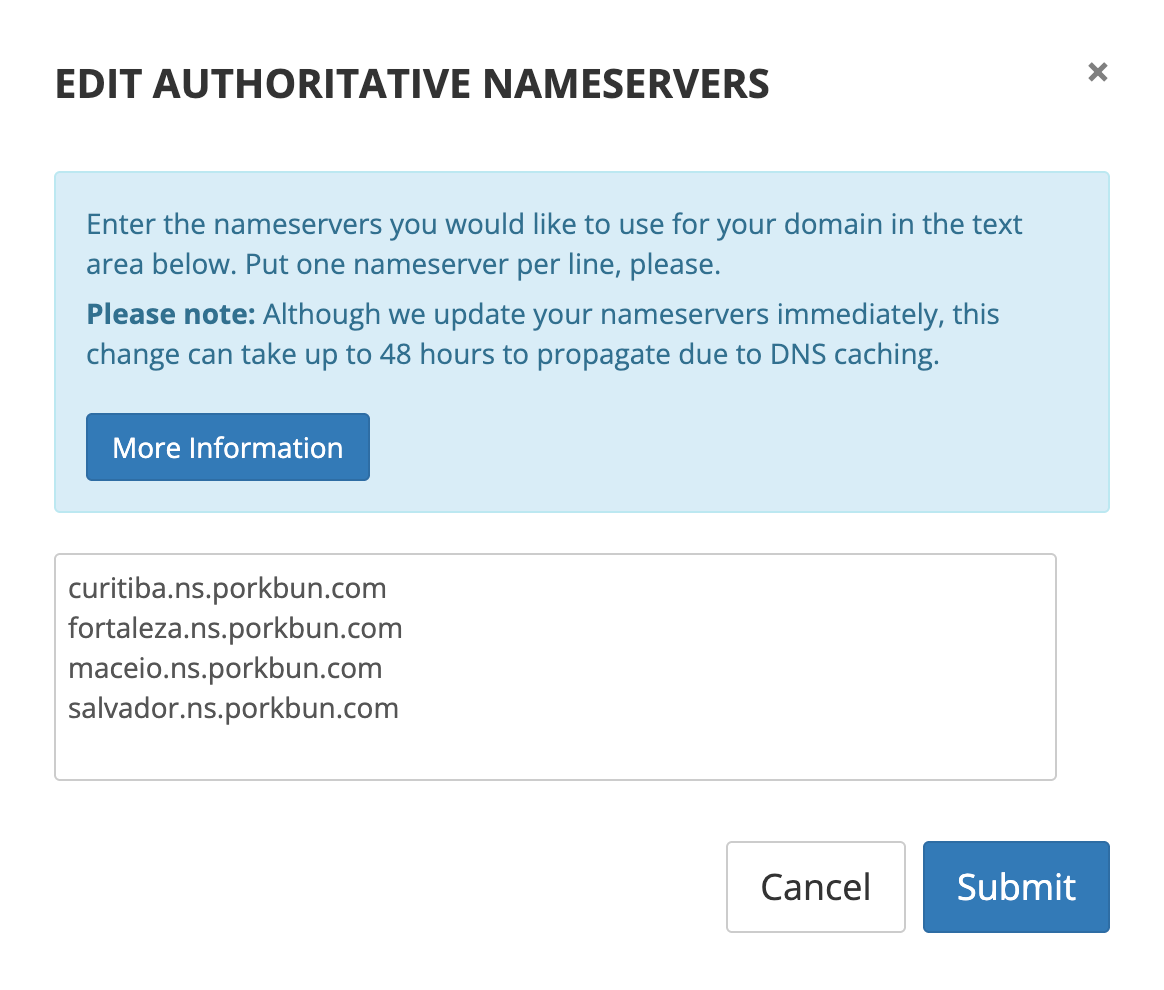
Switch back to your tab/window with the Porkbun account opened. You should still see the "Edit Authoritative Nameservers" menu from before. Erase all of the nameservers from the menu, then paste the new nameserver you just copied over from WordPress.com.
9
Switch back to the WordPress.com account and repeat the process for all of the nameservers provided to you. Enter each one on a new line. Once you've copied them all over, they should look something like this:
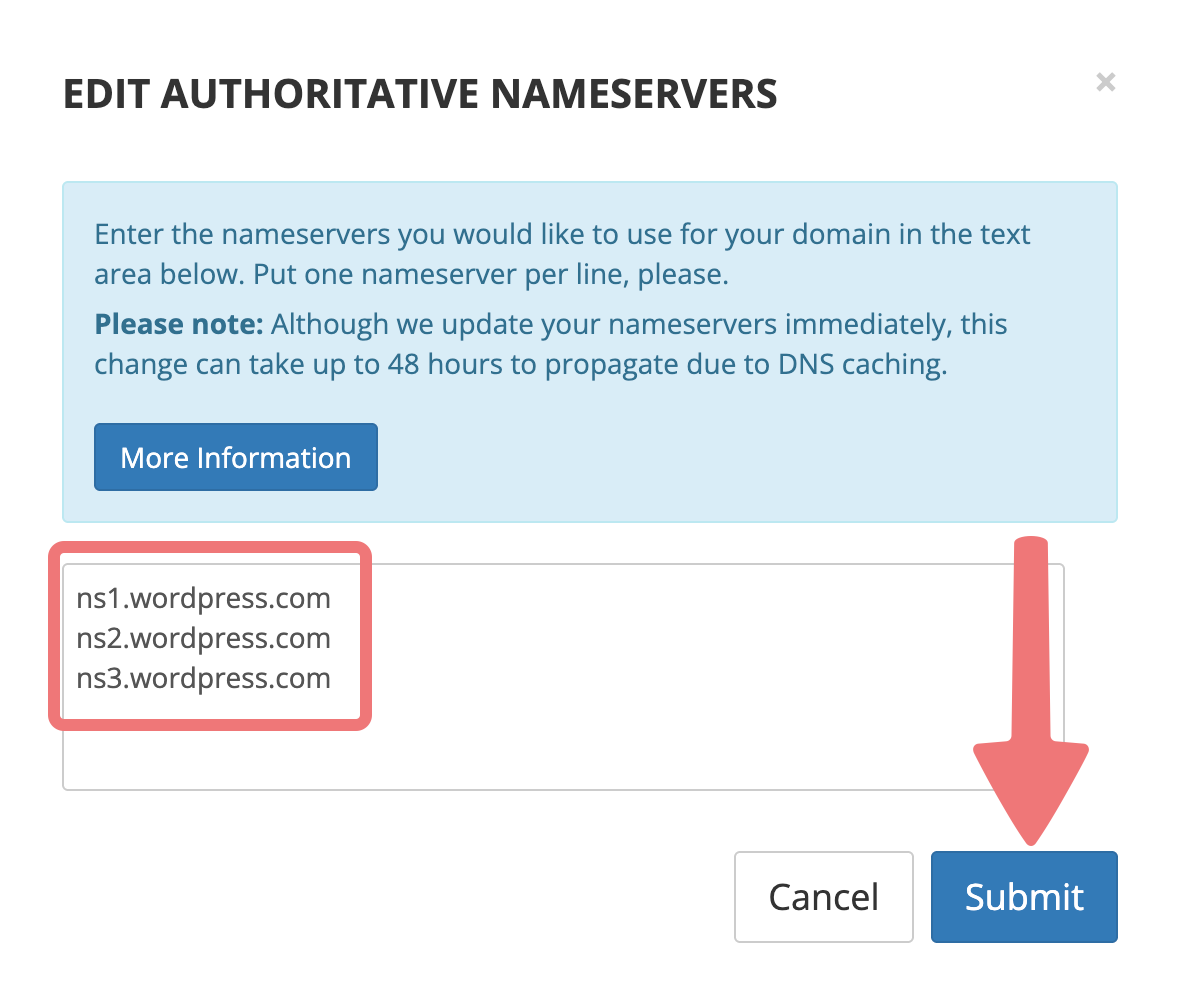
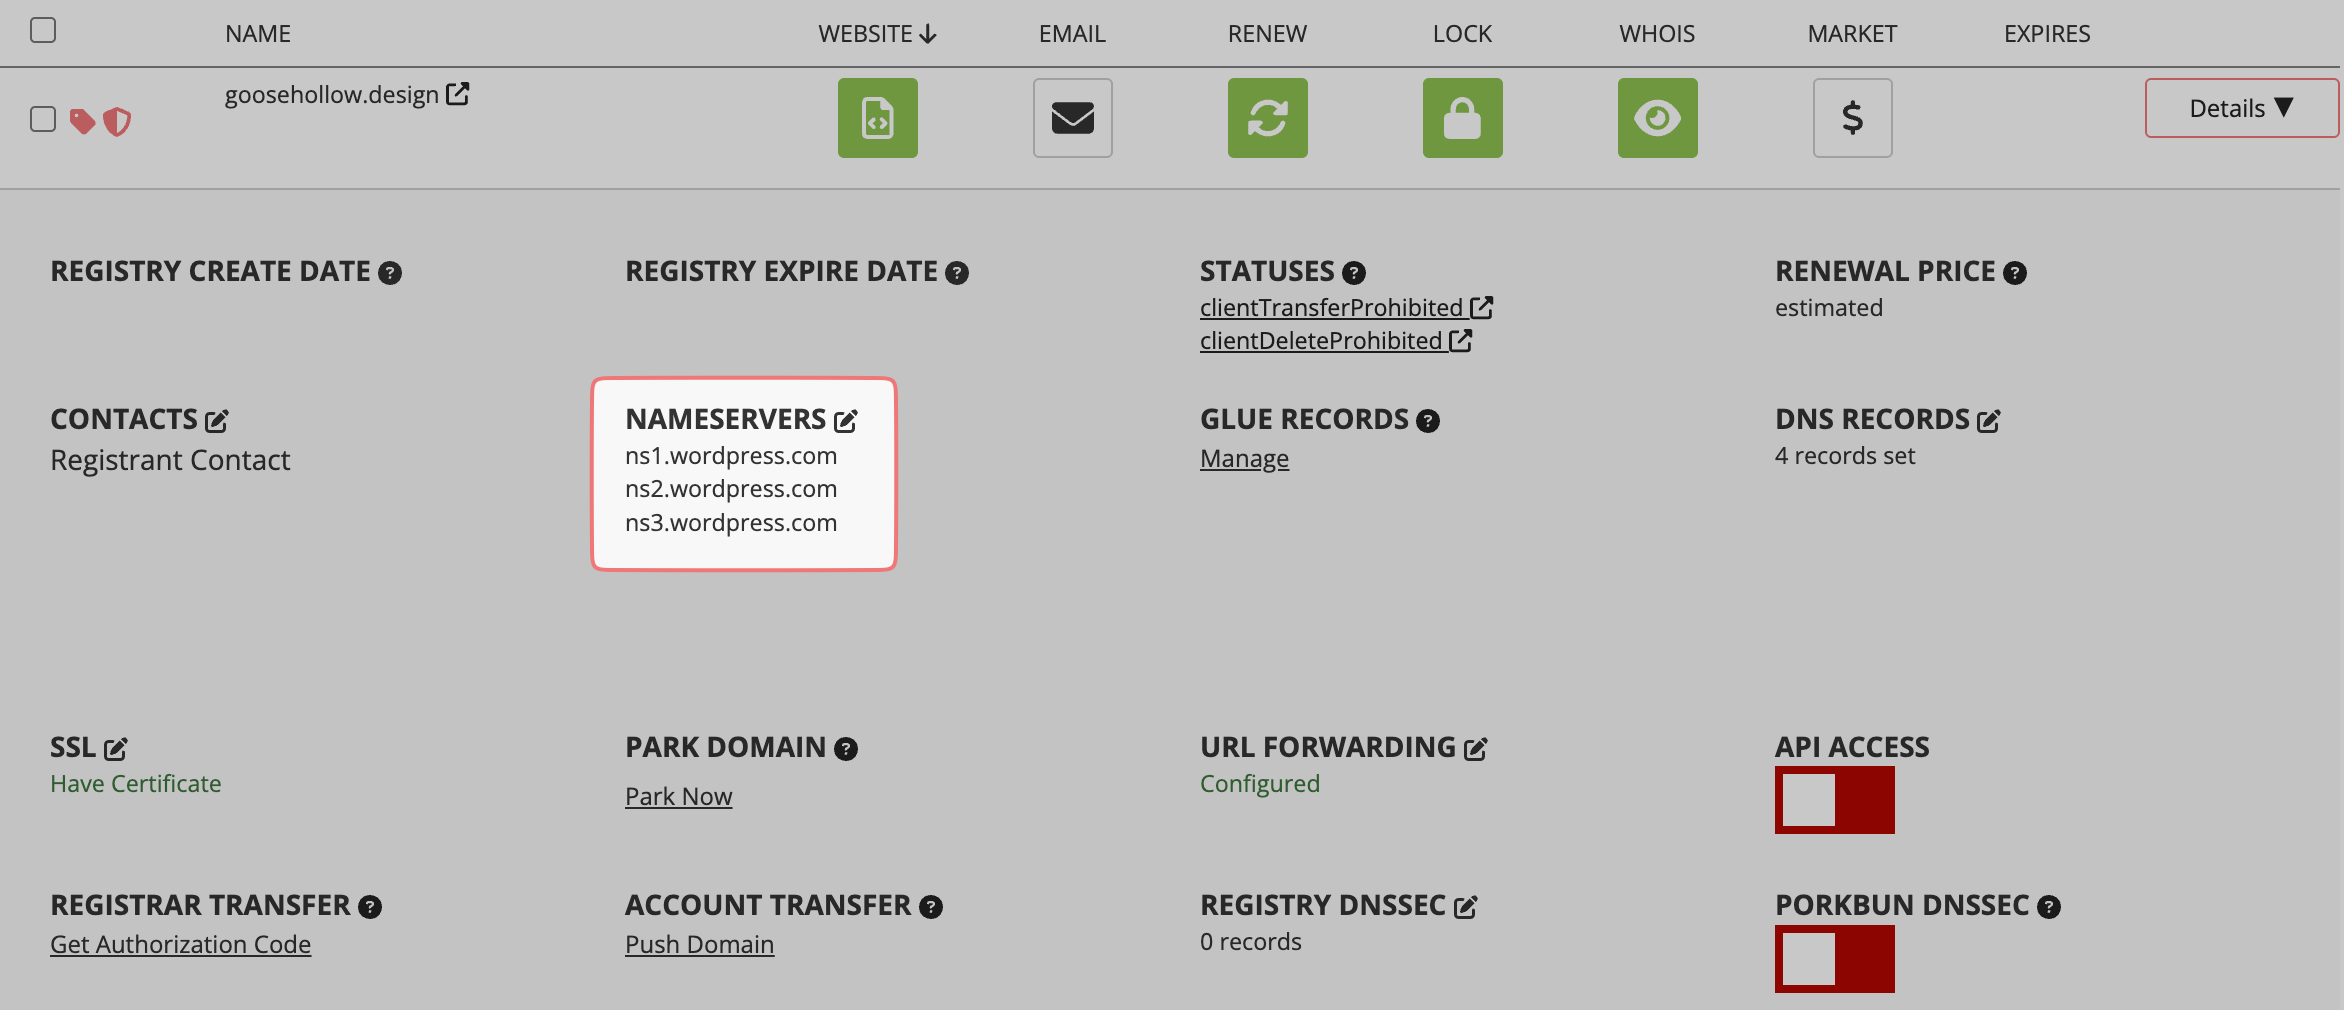
After copying over all of the nameservers, click on the "Submit" button on Porkbun. After a moment, the menu will close and you'll see the nameservers applied to your domain in the details menu.
Note
If you have any other services attached to your domain such as email hosting/forwarding from Porkbun, these will stop working unless you copy over the associated DNS records to your site on WordPress.com. This guide explains more.
10
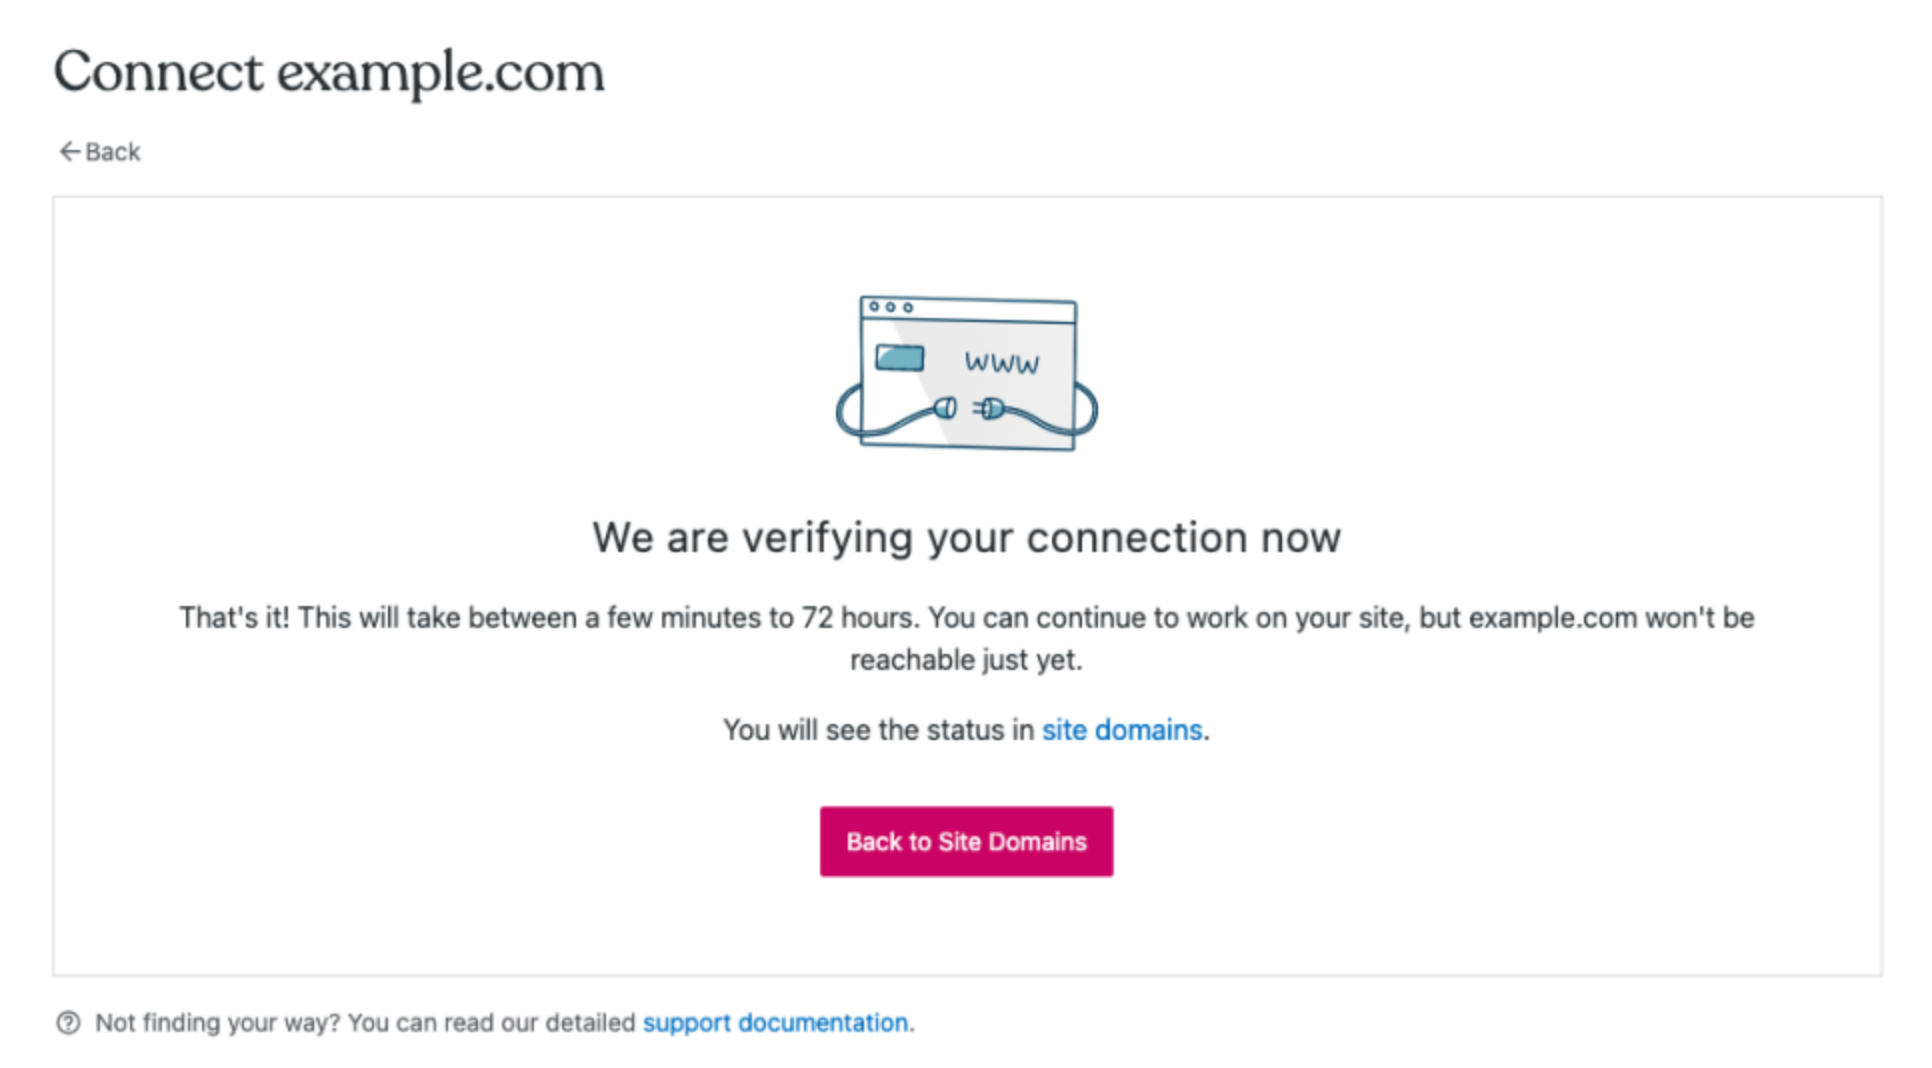
You're almost done. Switch back over to WordPress.com one more time and click on the "Verify connection" button.
Congratulations! You've connected your domain to the WordPress.com nameservers, and within 24-48 hours (typically much quicker) your website will be online.
Review steps 3 and 4 of the guide from WordPress.com to make sure your domain is connected successfully, and that you've set it as the "primary" domain for your website.
Please feel free to get in touch with our support team if you run into any issues connecting your domain to WordPress.com.


